


How To Use Toning Tools in Radiant Photo
Make your photos pop by using Radiant Photo's intelligent toning tools to adjust the exposure, contrast and color. Here's how.
If you’re a photographer, you must know the feeling of seeing your photos on a screen after a tiring shoot and wondering why they lack the vibrance you saw in real life.
Even though modern cameras offer great tech, they often fail to reproduce the scene as we see it.

Download the latest version of Radiant Photo to follow along with this simple tutorial.
Start a free 14-day trial today
That’s where toning becomes essential to bring back the magic in your photos.
With Radiant Photo toning tools, you can enhance your photos to match your vision.
Understanding Toning Tools in Radiant Photo
Before moving on to the process of toning, let’s first understand some basics.
What is toning in photography?
Toning is the process of adjusting exposure, contrast and color in a photo until it achieves the desired look.
On the other hand, a photo’s tonal range is the difference between its brightest and darkest area.
Our eyes have a great tonal range. We can see the bright daytime sky and the shade below a tree simultaneously without one appearing too dark or too bright.
However, in such a scenario, most cameras would either underexpose or overexpose the image.
With toning, we often aim to increase the tonal range of a photo, meaning we want it to retain as much light information as possible.
But sometimes, for creative reasons, you may want to limit the tonal range of a photo. For example, a close-up silhouette or a low/high-key photo will have limited light information.
- Read more: How do you use contrast in photography?
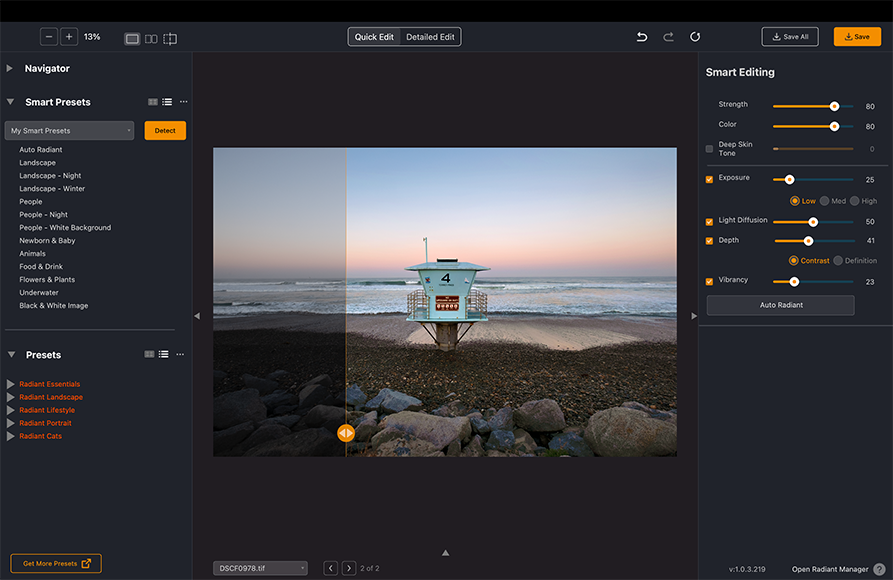
Toning tools available in Radiant Photo
i) Exposure: The light your camera captures reflecting off the subject when the photo was shot can be called exposure in this context.
Every photo has some light information embedded, which can be restored in the post-processing stage.
With this slider, you can control the amount of light exposure your photo displays.
Unlike other photo editing applications, Radiant Photo’s exposure function works uniquely.
It reads each pixel in your photo and makes adjustments to the pixel level. This means you get a perfect blending of shadows and highlights in your photo.
This feature allows two more adjustments to fine-tune your exposure:
a.) Auto Exposure Correction: When you load a photo into Radiant, it suggests an automatic exposure correction based on the photo’s content.
If you wish to use the auto-correction values, it gives you three options: low, medium, and high.
b.) Face Aware: With this option turned on, Radiant photo takes the person in your photo into account and fine-tunes the auto exposure correction specifically for portraits.
(Read more about how to optimize faces with Radiant Photo here.)
ii) Super Contrast: This feature adds contrast to your photos in a detailed manner.
Super contrast can also make your photos look sharp and punchy.
iii) Light Diffusion: This slider adds the effect of diffused light to your photos.
It also softens the skin tones and turns them slightly warm red.
In combination with the reduced contrast, it produces a pleasant effect on portraits.
For reference, imagine the harsh light of the midday sun (high contrast) with the diffused soft light of a large softbox (low contrast) in a studio setting.
iv) Depth: Photos are a 3D representation on a 2d medium. This sometimes means due to fog, haze or a particular time of the day, you may have less depth in your photos.
This slider addresses it with increasing contrast in every pixel in your photo.
It offers further control over the look via two options:
a) Definition: Best for photos with clear faces. It works by adding details in both shadows and highlights.
b) Contrast: This option increases the range between dark and light areas.
v) Skin & Depth Bias: This slider works best for portraits with exposure issues.
It corrects the depth perception in photos with three different options:
a) Normal: This option removes imperfections in the skin tone, makes the face pop slightly, and creates a separation from the background.
b) Brighter: This works similarly to the above option but adds an overall brightness to the image.
c) Auto: This smart option assesses if your photo needs the effect and determines a perfect adjustment value.
vi) White Point: This helps you set the white or the brightest point in your photo.
These are some of the bright areas in your photo where there are supposed to be no details.
vii) Black Point: It determines the darkest or the black part of your photo.
Contrary to the above, these are the darkest areas in a photo where there are no details at all.
We’ll look into these sliders in detail in the next section.
Step-by-Step Guide to Using Toning Tools in Radiant Photo
Toning in Radiant Photo is straightforward and allows you to improve your photos in a few simple steps.
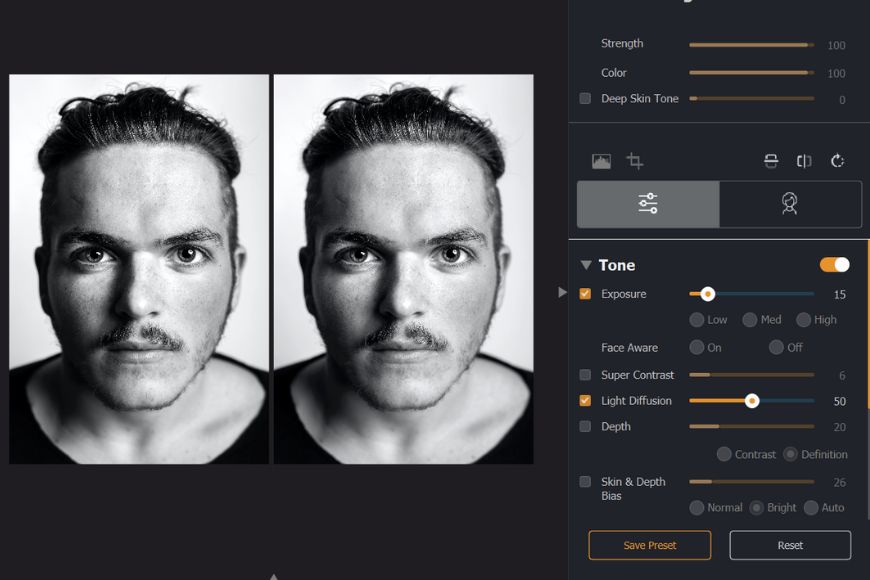
In the steps below, I’ll demonstrate how to use toning tools to enhance a portrait in Radiant Photo.
i) Importing your photo
Open your photo in Radiant by dragging the image or clicking on the canvas.
Alternatively, you can import your image by pressing Ctrl+O (Windows) or Cmd+O (Mac) or by going to File > Open in the menu.
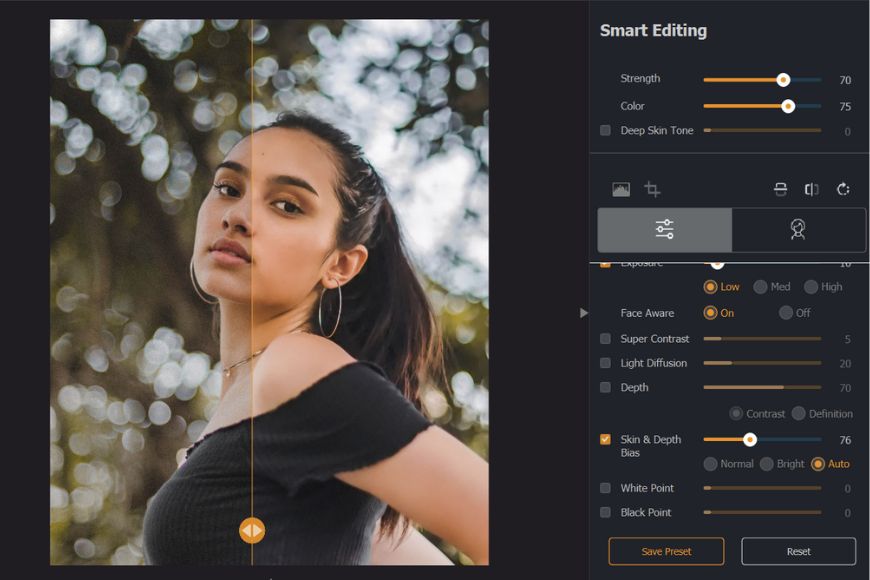
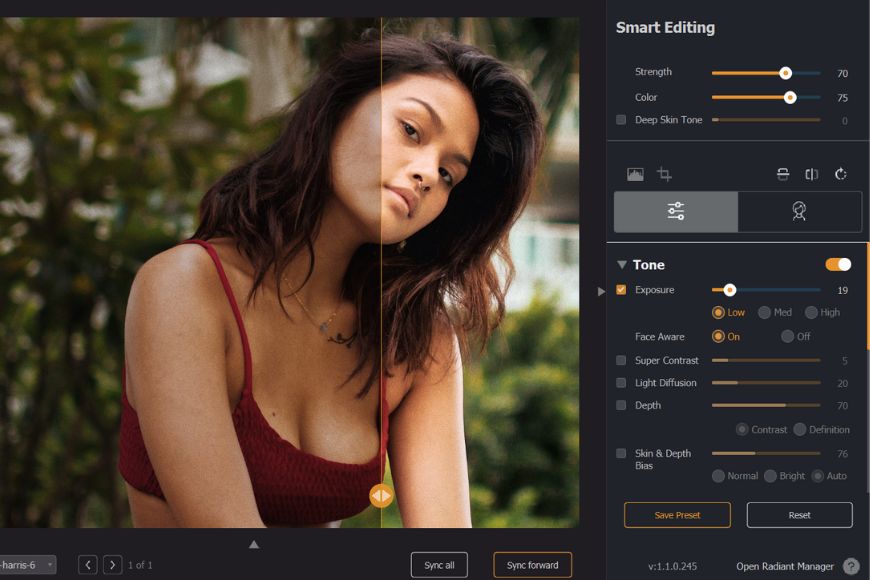
ii) Adding Exposure adjustments
You can see the example photo is very dark and grainy.
In this case, I’ve used the Low setting on the Exposure slider, which has effectively bumped up the exposure.
Additionally, I’ve set the Face Aware option to On so that Radiant Photo uses appropriate adjustments.
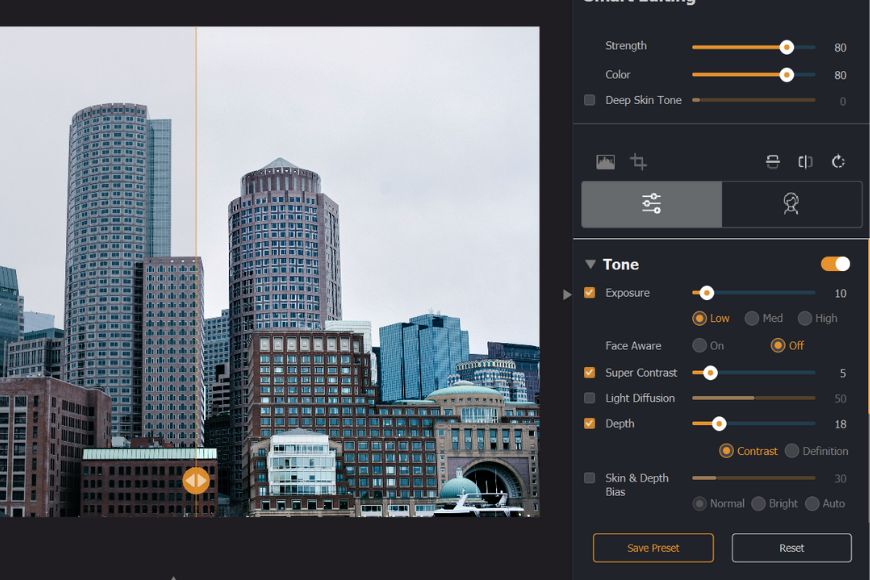
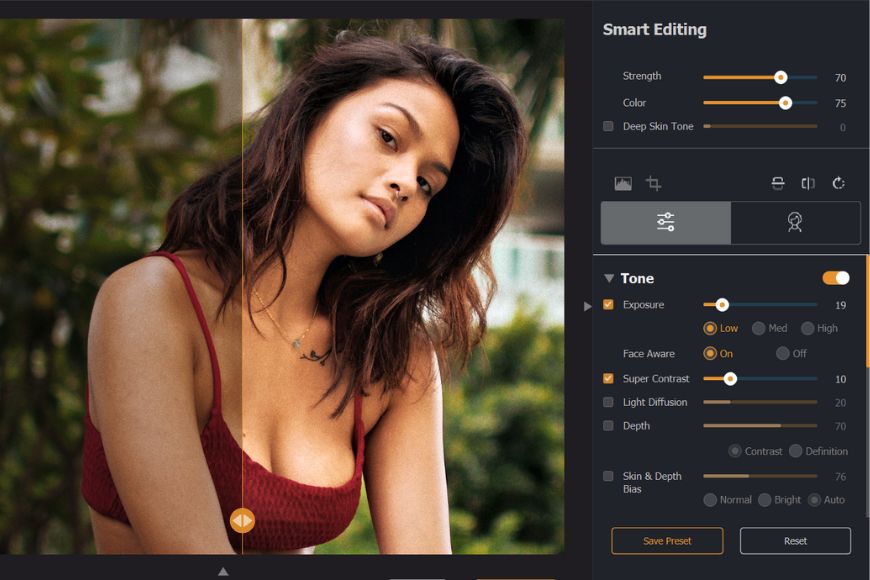
iii) Adding Super Contrast
The Super Contrast slider applies contrast at the pixel level, and for the current image, I’ve chosen a moderate adjustment value of 10.
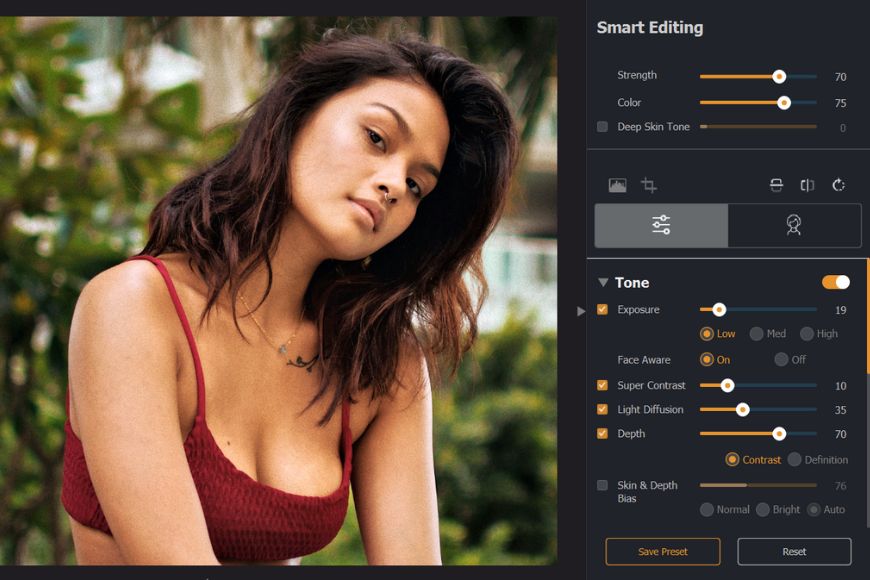
iv) Using Light Diffusion and Depth adjustments
The Light Diffusion slider softens the effects of harsh, contrasty light on the subject’s face.
I’ve set it to a value of 35 to even out the skin and brighten shadows on the face.
Additionally, moving the Depth slider to 70 made the subject pop out in the photo.
v) Applying Skin and Depth Bias adjustments
Increasing the value of Skin & Depth Bias to 35 with the Normal option selected created a perception of separation of the subject from the background.

vi) Setting White and Black Point
For this image, setting White Point at the 15 mark yielded a good tonal range.
However, I’ve left the Black Point unchecked as this photo didn’t need that adjustment.
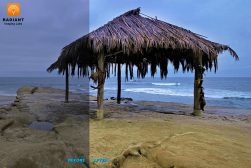
Before and After:

vii) Saving your photo
Save your photo by clicking on the Save button in the top right corner of the window or navigating to File > Save As in the menu.
Toning tips for Radiant Photo
Here are some of the things to keep in mind while working with toning tools in Radiant Photo:
i) When it comes to toning, moderation is the key to creating impactful results.
Use the sliders carefully without overdoing any effect.
ii) The Light Diffusion slider works best for portraits shot in harsh light or those where faces have uneven lighting.
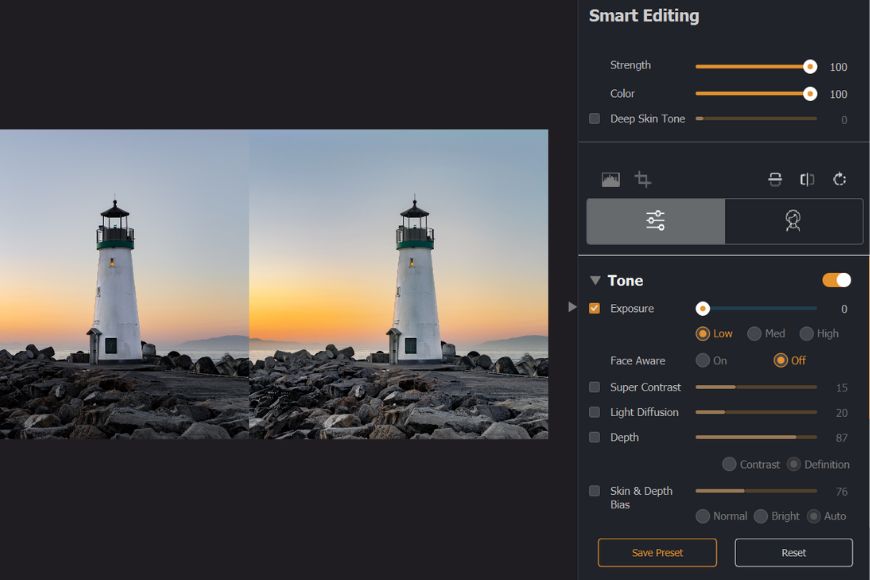
On the other hand, using the Depth slider on cityscapes can give them a new definition.
iii) For maximum impact, always start the toning process by adjusting the exposure and defining white and black points for your image.
Final Words
Radiant Photo is a state-of-the-art application that uses AI to make post-processing easy and fast for you.
It makes complex adjustments readily available for you in the form of toning tools that you can use to transform your photos in a few simple steps.
I hope you found this tutorial helpful. If you have any questions, leave them in the comments below.
You'll Also Like These:
 Radiant Photo Review: Fast & Fully Customisable AI Photo Editor
 How to Get Started with Radiant Photo (A Beginners Guide)
 How to enhance Landscape Photography with Radiant Photo

Yatharth Gupta is a seasoned travel and street photographer with eight years of experience. He is also a blogger and loves to explore new places.

WELCOME TO SHOTKIT
Enter your email to be sent
today's Welcome Gift:
19 Photography Tools
🔥 Popular NOW:


Shotkit may earn a commission on affiliate links. Learn more.