Guide to Using Contrast in Photography
What are the different types of contrast in photography, and how can you use them to create stunning images?? Learn it all in this guide!
By Greg Cromie
Contrast is one of the most critical aspects of photography – but it can also be one that’s misunderstood.
In this guide to using contrast, we’re going to take a deep-dive and discover what it really is.
Further to this, we’ll cover the many forms of contrast in photography composition. As we’ll soon find out, there’s a lot more to it than dark and light.
What’s more, controlling contrast in your post-processing workflow can make or break an image. Later, we’ll cover how to handle this correctly to make your pictures stand out.
Let’s get started.
What Is Contrast in Photography?
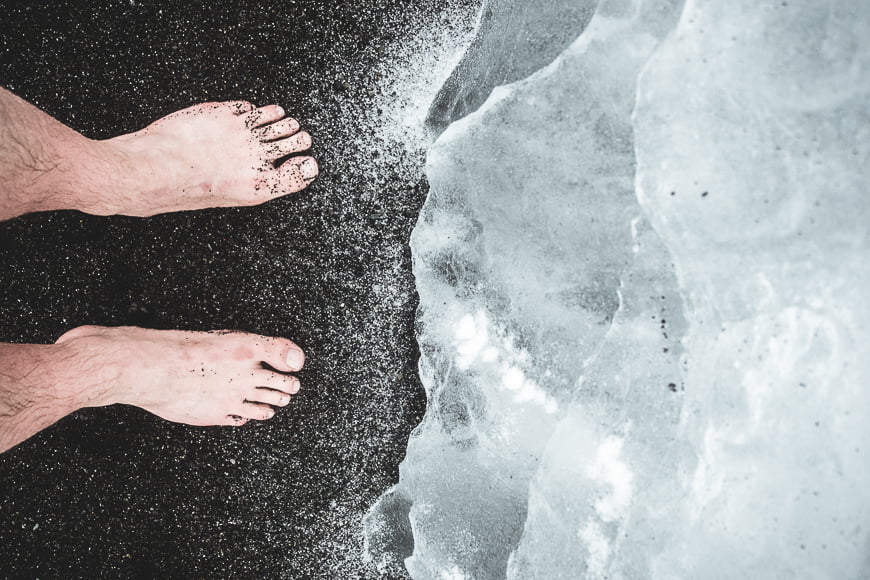
The term contrast relates to one thing being strikingly different from something else that’s in close association.
In photography, we use that definition to identify the difference between critical elements in a composition.
In the early days of photography, there wasn’t a lot of detail, nor even colour. Images were very grainy and low in detail. As a result, definition and the compositional story were told through contrast – the juxtaposition between light and dark elements.
Today, with the insane levels of detail and millions upon millions of available colours, it’s easy to forget about contrast as a vital part of the composition.
It’s also important to highlight that contrast is much more than the play between highlights and shadow. The difference between tone, colour and texture are all a part of controlling this in your photos.
You can also add new dimensions to your contrast game by adding conceptual elements to your image.
This way, you can elevate the story that your images tell without having to take any special steps.
What are the Types of Contrast in Photography?
As we’ve hinted at, there’s a lot more involved in applying contrast to your photography than the dance between light and dark.
In fact, by knowing and understanding each of the types of contrast in photography, you can master your compositions. What’s more, you can be selective with the styles of contrast you employ and know the best times to use them.
Finally, imagine being at a level where you know how to overlap multiple forms of contrast to push your image quality higher and narrate a compelling story… Surely that’s a good skill to have.
Let’s take a better look at the types available to you in your photography and also talk about when to use them.
Tonal Contrast
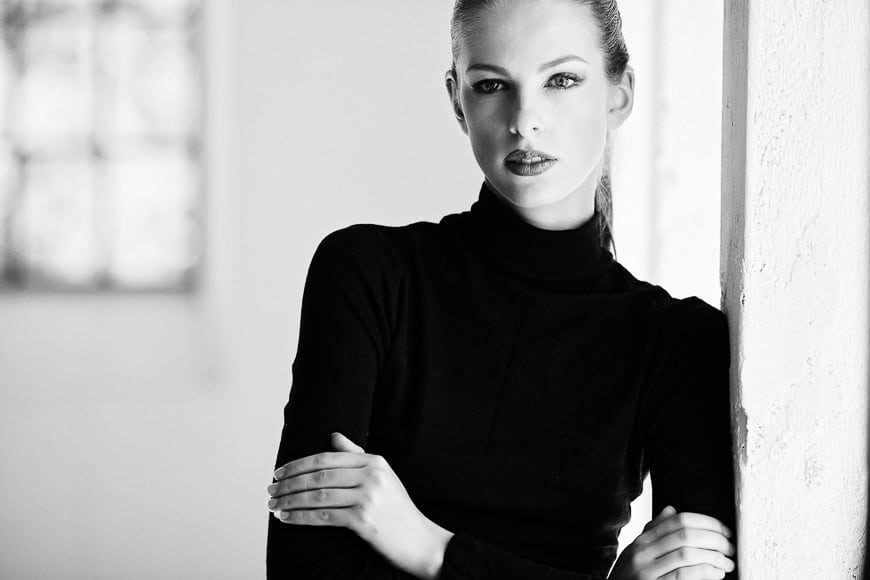
To kick things off, let’s take a look at the most obvious and commonly-used type: tonal contrast. It’s the very type that was used in the first photographs to help build an image.
Without the benefit of detail and colour, the play between light and dark tones was critical.
But just because photography and camera technology have advanced, it doesn’t mean that tonal contrast is no longer needed.
Most modern cameras rely on this style to power the autofocus algorithms of the camera processor. Your camera detects contrast as a means of determining the focus capture.
The tone goes a long way to defining the different elements in an image. For that matter, our eyes and the optic system does the same thing.
Black and white photography (see examples) depends on contrast to create image definition – the difference between the black areas and white areas builds the composition.
A great example is the stark tonal contrast between a full moon and a pitch-black night sky. The tonal values are extreme, with minimal mid-tone greys other than those captured on the surface of the moon.
The same applies when shooting monochrome photography, where only a single colour exists. You can have a range of tones within that one colour – dark blue and light blue elements, say – and that contrast is what creates the definition.
Tonal contrast doesn’t have to involve the extreme ends of the tonal range to be effective. In photography, even a slight difference between tonal values can be enough to define different aspects of a photo.
High Contrast
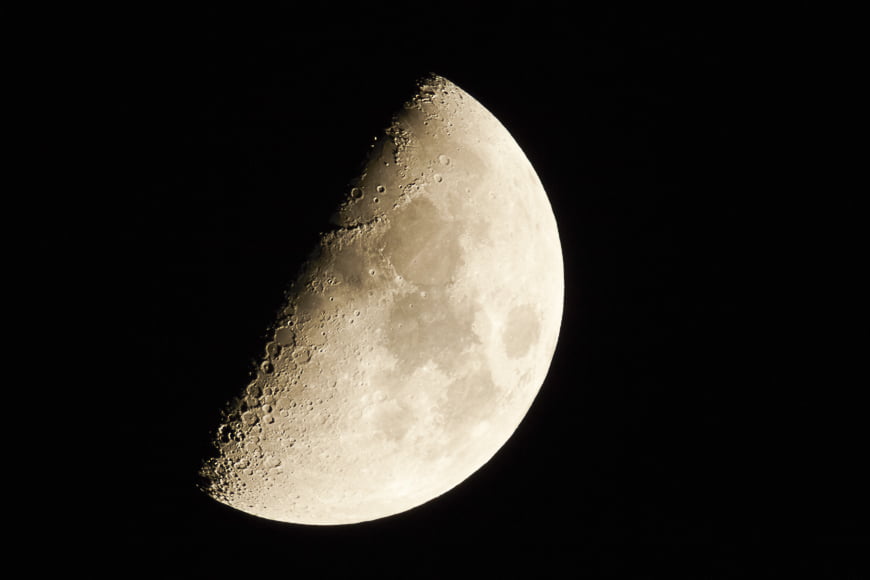
As you would expect, higher contrast images have a more significant difference between their brighter and darker elements.
Think of the difference between where the sun highlights one area of a scene while others are in dark shadows. That creates a high contrast setting.
Another popular example is when you want to catch a silhouette, so you place your subject between your camera and the setting sun.
Their body blocks the harshest of the sunlight, but as a result, the side facing the camera is dark. This makes the subject stand out in sharp contrast from the background.
The best use of high contrast photography is to make a strong point and add a level of intensity and even shock to your composition.
But high contrast images can also be the play between the intensity of competing colours or even the variance in surface textures. We’ll come to those in a little bit.
Low Contrast
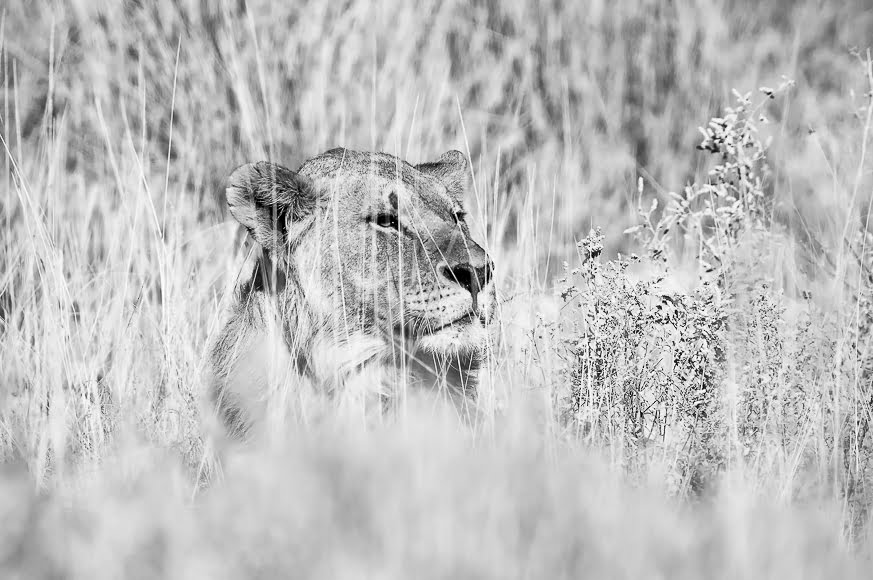
Low contrast images are far less intense with a subtle level of distinction.
Low contrast images will include more of the middle tones in the tonal range – in black and white photography this will be more greys as opposed to pure blacks and whites.
Where high contrast images are punchy and tend to jump out at you, low contrast images are softer and take a little longer for you to evaluate the definition in the composition.
Low contrast photography can also flatten or soften the saturation of intense colours. For example, the difference between the blue sky and the blue of the ocean could be very minimal and result in a low contrast image.
Low contrast photography is best when you’re trying to build a calm and gentle story, or when you want the image to be a subtle representation of the scene. For example, the calmness of the ocean or the quiet of a sleeping baby.
Color Contrast
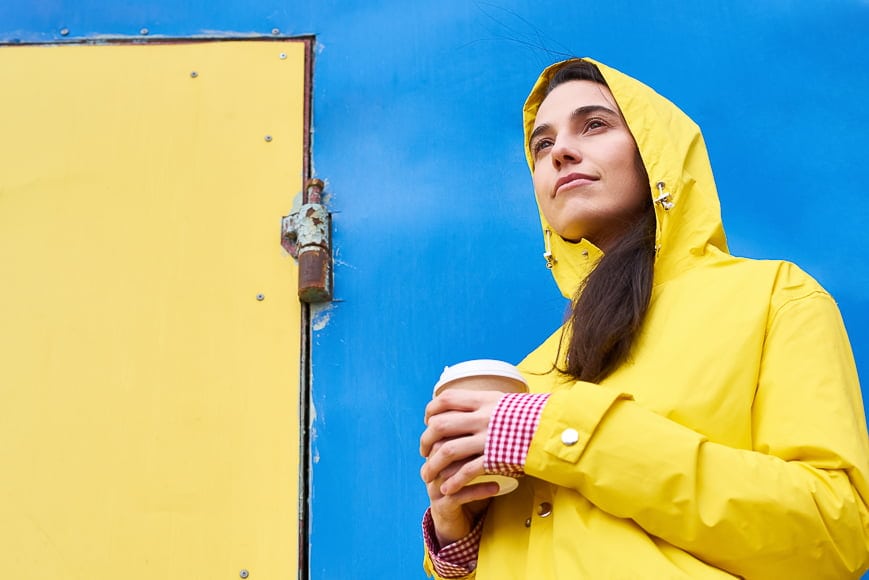
Before you step out the door with a camera to capture color contrast shots, we first need a trip back to primary school art class.
You may remember coloring in or even painting your very first color wheel. In its simplest form, a color wheel displays the primary colors on an inner circle and then secondary and tertiary colors on outer circles.
As the colors stack around the ring and sit opposite other colors, you start to see a stark difference between one color and another.
Red sits opposite to green, forming a strong opposition. Purple and yellow also tend to stand out against one another, as do blue and orange – these pairings make complementary colors.
In essence, this is color contrast – where one color creates a clear contrast against another depending on their placement.
Color contrast is a little more complicated, and we have other whole articles dedicated to color science in composition.
Using color contrast is a great way to build a story and lead a viewer’s eyes around a photo. It’s also a great way to make a subject pop out from the rest of the scene.
For example, if you’re doing a model shoot, you may find an impressive blue wall in your location. The choice of colors that your model displays are vital. In that scenario, imagine a model with vibrant orange hair: the contrast between the blue of the wall and the orange of the hair forms color contrast.
In that photo, the definition, clarity and intensity of the composition are far greater than if the backdrop was dull and grey.
Another way to employ color science with contrast is to utilise warm and cold colors to aid in your composition. Reds, yellows, purples and oranges represent warm colors while blues and greens represent cooler colors.
A simple way to employ this approach is when you’re shooting flowers and plantlife. Imagine a field of yellow sunflowers (warm) against the backdrop of the green field and blue sky (cold).
As we discovered with tonal contrast, color contrast can either be intense (high) or mellow (soft) – it all depends on your composition and desired outcome.
High-Key and Low-Key Contrast

In photography circles, you’ll often hear the terms high-key and low-key. Both of these terms refer to images that have elements of low-level contrast.
With low-level, there’s not an extreme level of contrast as experienced in high contrast photos. Instead, opposing tonal or colour values are more subtle, with less difference between the two.
You can create flat light by using low-key techniques – this is often desirable for portrait photographers.
For example, a high-key image will mostly feature bright tonal values at the lighter end of the scale. Darker tones aren’t needed to create contrast, as it’s already created by the variance between these brighter tones.
As for low-key images, the opposite applies – the contrast is created primarily through lower or darker tones and blacks without needing many brighter tones.
You would use high-key or low-key contrast when you want to suggest a mood within your image. An example of a high-key image would be a bright beach scene that’s almost washed out with light and with very little evidence of dark tones.
Conceptual Contrast
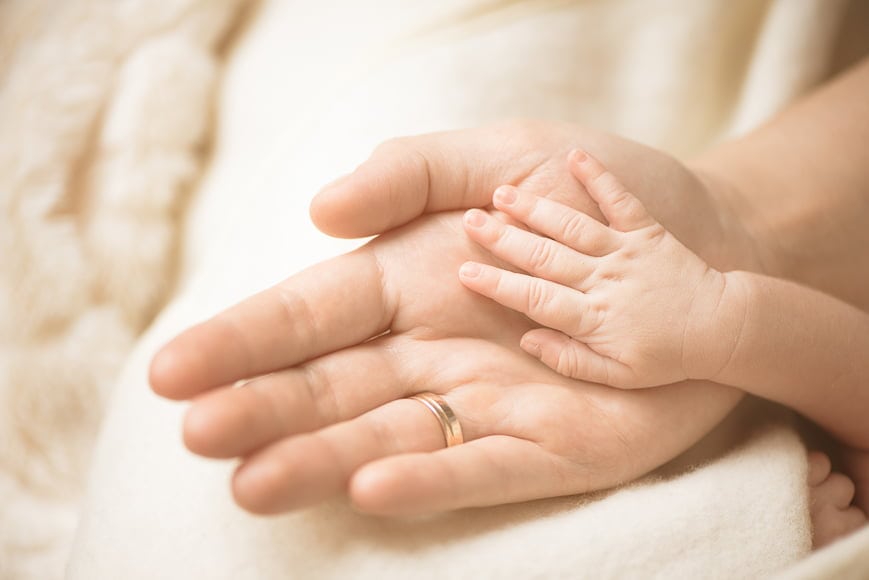
So far, we’ve covered how the tone and colour values of a scene can help deliver contrast. Conceptual contrast is a technique employed to convey a narrative in a composition.
Conceptual contrast gives the viewer a sense of scale, age or even emotion in an image.
An example of conceptual contrast is a photograph where a pair of old, weathered and wrinkled hands hold the hands of a newborn baby.
The difference in age between the two subjects represents the contrast in the scene, and the old skin versus the new soft skin tells a crucial part of the story.
Another example of conceptual contrast is an image where a beautiful tree has grown in the middle of an abandoned and tumbled down stone-building.
In this case, the contrast is delivered through the idea of new growth and life overtaking the forgotten world; or nature beating human endeavours.
I would recommend using conceptual contrast in photography when you want to tell a compelling story with opposing elements.
Contrast Through Textures

Textural contrast has a loose association with conceptual contrast in that it calls upon subjects with key differences.
These differences come in the form of texture, and can even be conveyed through the use of depth of field (see our guide to controlling depth of field).
Starting with textures, you could have a completely smooth body of water with a single craggy rock rising from its centre. Or, imagine the concept of a spikey creature such as an echidna or porcupine photographed with a satin backdrop.
The appearance of the varying textures creates a natural contrast. With our spikey creature example, the contrast is between the softness and silkiness of the satin versus the sharp spikes of the animal.
If you don’t have access to a satin backdrop, you could photograph your subject with the sharp textures in front of a standard background.
Then, by using a wide aperture and a shallow depth of field, turn that backdrop into a soft, creamy blur. The contrast between it and your sharp and textured subject will stand out even more.
For more on this technique, see our guide on how to show texture in a photo.
How to Adjust Contrast in Lightroom
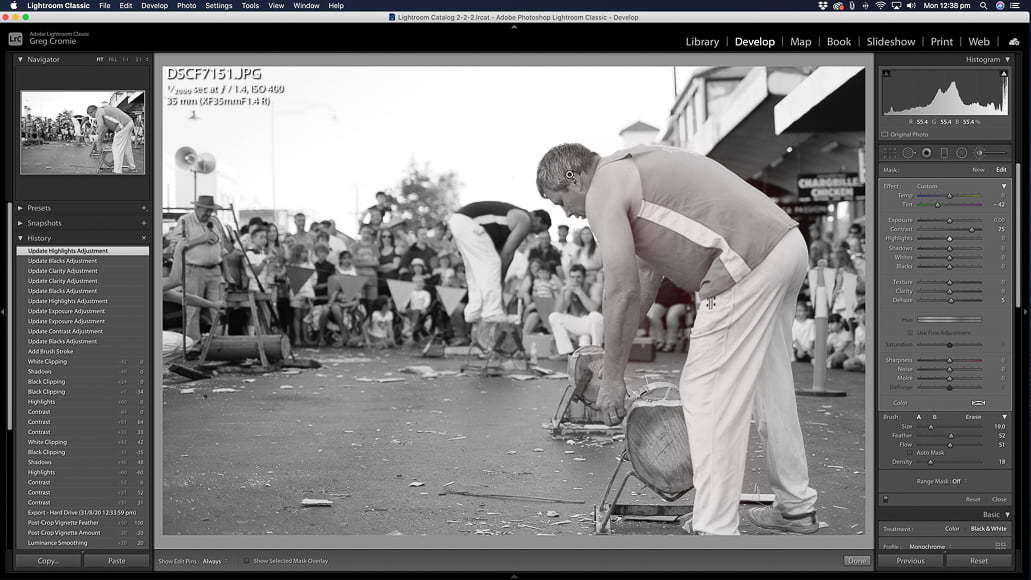
Capturing contrast in a composition is up to your camera – your job is to frame your compositions and fire away.
In post-processing, you can finely control and adjust contrast with editing software such as Adobe Lightroom.
Lightroom is a pro-grade photo editing and file management application with a lot of power and features to manage editing needs such as contrast.
To adjust the contrast of the whole photo, go to the Develop tab in Lightroom and jump into the Basic menu. You can either slide the Contrast slider to the right to add stronger variance or left to reduce it.
Alternatively, manually alter the Whites and Blacks sliders to control the range of tones more finely.
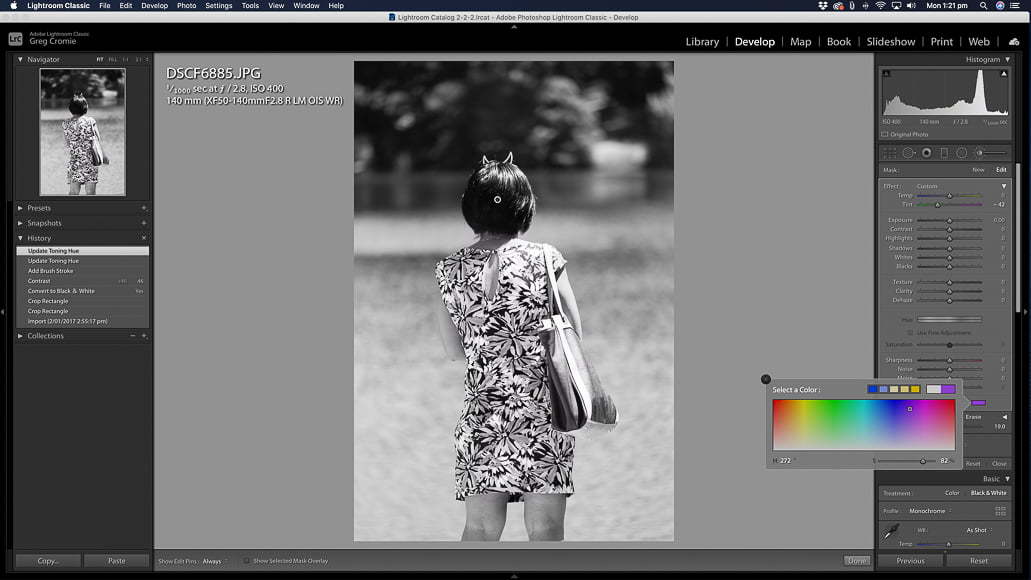
In Lightroom, you can also make selective changes to the contrast of a specific area of a photograph. To achieve this, use the Brush tool to paint an area that you wish to control the contrast within.
Once you’ve painted that area, you can then select to adjust the Contrast slider or once again the Blacks and Whites sliders.
A handy tip is to use the Show Selected Mark Overlay option to highlight the area you intend to make changes to.
Contrast Photography FAQs
What are high contrast images?
In high contrast images, there’s a significant difference between dark and light elements. Shadows are dark and highlights are bright; often colours are also punchy and bold and textures made to stand out.
Is high or low contrast better?
That completely depends on the effect you’re going for in your image. If you want to create a mood that’s calm, soft, nostalgic, or perhaps even a little gloomy, you would likely opt for low contrast. For photos that are more dramatic, mysterious, lively or punchy, you’d be inclined to go with high contrast.
How do I take high contrast photos?
There are a number of ways to achieve a high degree of contrast. One is through your choice of colours and textures. Another is to use strong lighting that creates crisp, dark shadows and a brightly lit subject. You can also try shooting in black and white mode to automatically create more contrast. Finally, you can increase contrast during post-processing using editing software.
Contrast Photography | Final Words
The use of contrast in photography dates back to the art form’s origins. As we’ve discovered here, the use of such simple techniques can elevate the quality and impact of your images.
The best thing about the use of contrast is that you already have all you need to master this essential photography skill.
If you have any questions about tonal contrast. color characteristics, or any other of the numerous photography fundamentals, leave a comment below and I’ll do my best to help.

Check out these 8 essential tools to help you succeed as a professional photographer.
Includes limited-time discounts.


