


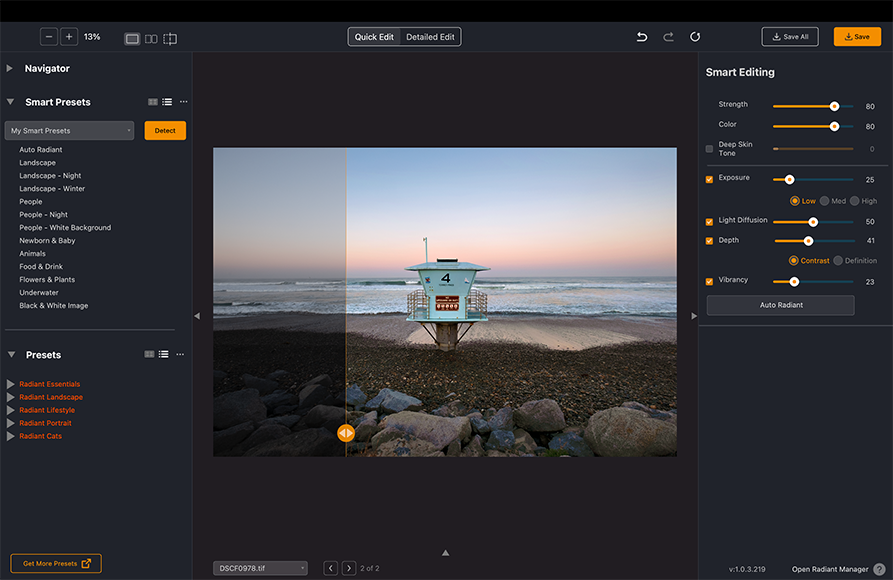
How to Optimize Faces with Radiant Photo
Radiant Photo makes portrait retouching quick and easy. Here's a step-by-step guide on making the most of its AI-powered tools to optimize faces in photos.
Portrait retouching used to be a difficult and time-consuming task for me – until I stumbled upon a nifty photo editing app called Radiant Photo.
With Radiant Photo and its AI photo editing capabilities, I can now optimize faces in just a few minutes.
In this tutorial, I’ll show you how to quickly enhance faces with Radiant Photo and take your portrait editing to the next level.

Download the latest version of Radiant Photo to follow along with this simple tutorial.
Start a free 14-day trial today
How to Optimize a Photo of a Face with Radiant Photo
You can access Radiant Photo in two ways: as a plugin via Photoshop or Lightroom, or as a standalone program.
The plugin route might be helpful if your workflow has multiple steps.
However, for this tutorial, I’ll use the Radiant Photo standalone program.
You can follow along by downloading the example photo here.
1. Preparing Your Photo
Before starting with face optimization, we need to make some primary adjustments.
(i) Import your photo
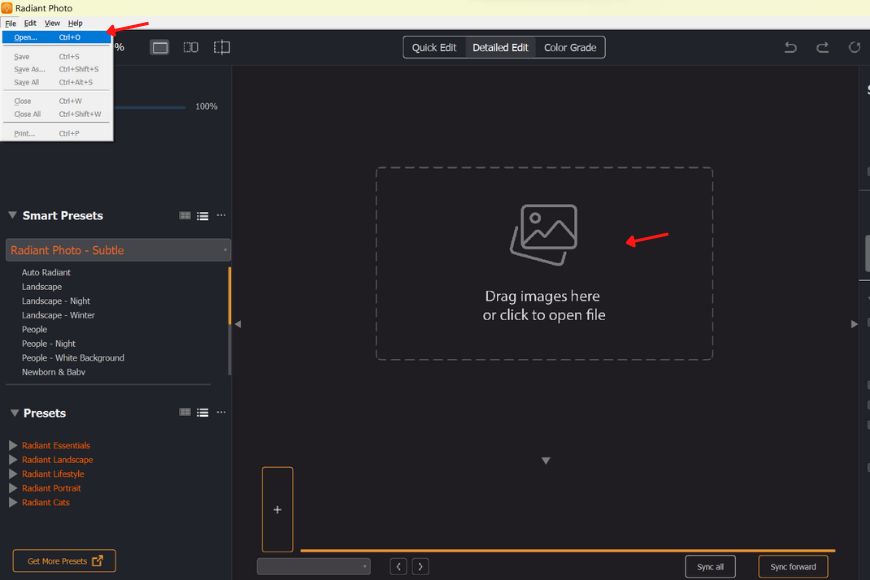
Open the Radiant Photo app from your desktop or menu shortcut and click File>Open. Alternatively, you can press Ctrl+O on Windows or Cmd+O on Mac.
Select the photo from your desired location and click Open.
You can also drag your photo directly onto the canvas.
(ii) Crop your photo or zoom in on the face
You can crop with different aspect ratios or do a free resize.
You can also zoom and pan the photo with the navigator on the top left.
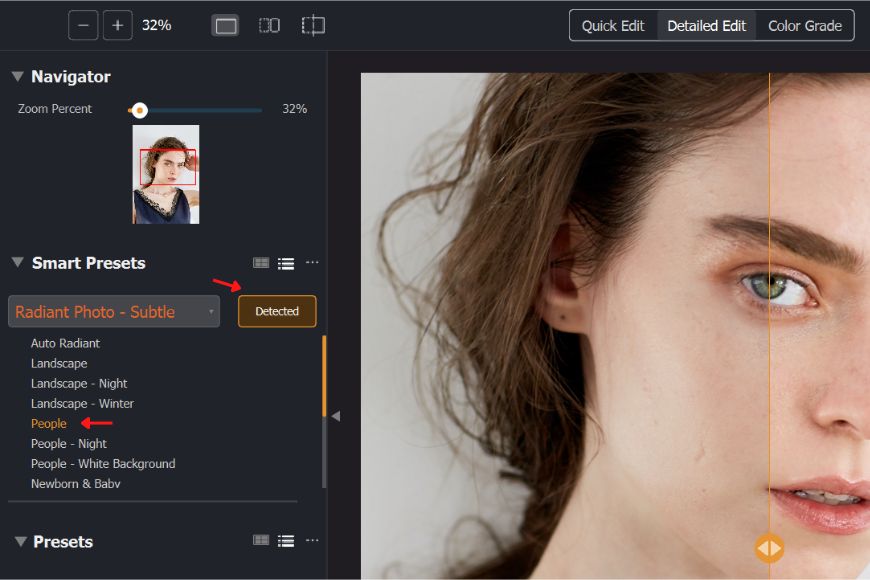
As we want to optimize the face in the image, I’ve zoomed in so that all facial details are visible in the working area.
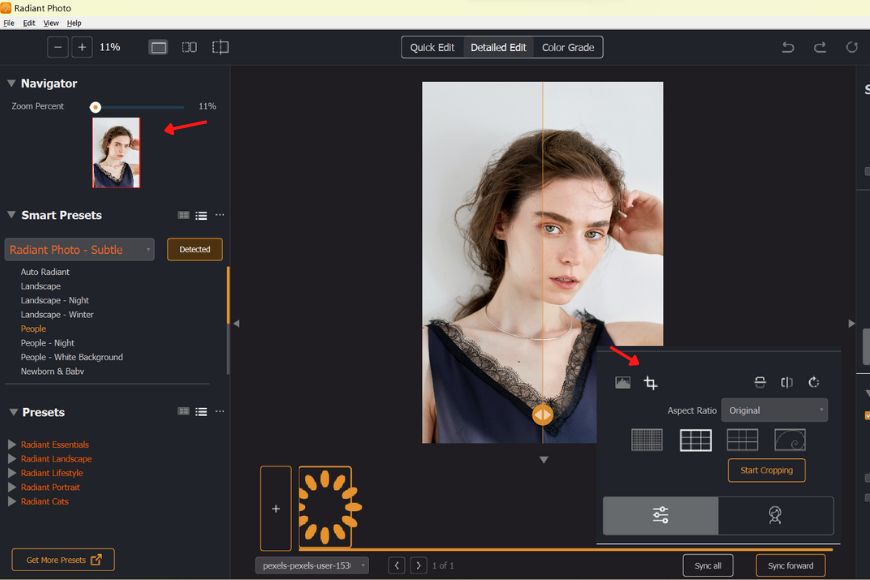
You might already notice some improvements in your photo because Radiant Photo automatically detects a face and makes adjustments.
Most of the time, you won’t feel the need to tweak any settings, as the auto-generated picture is good enough.
In this case, however, we’ll manually optimize the portrait and go through all the features that can elevate your photo editing.
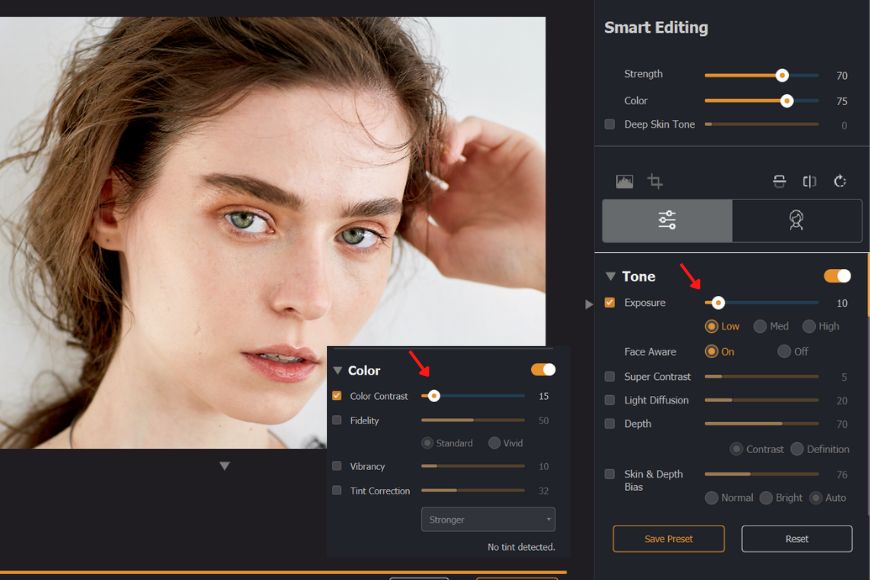
(iii) Make basic exposure adjustments
I found the photo a bit dark, so I bumped up the exposure by 10 points on the Low setting. Also, I raised the color contrast by 15 points to make it a bit punchy.
In the next section, we’ll see how to use the retouch menu.
2. Exploring the Retouch Tools
Radiant Photo’s ability to detect and retouch a face automatically makes it unique.
In this section, I’ll show you how you can fine-tune the effect or make tweaks to the portrait as per your liking.
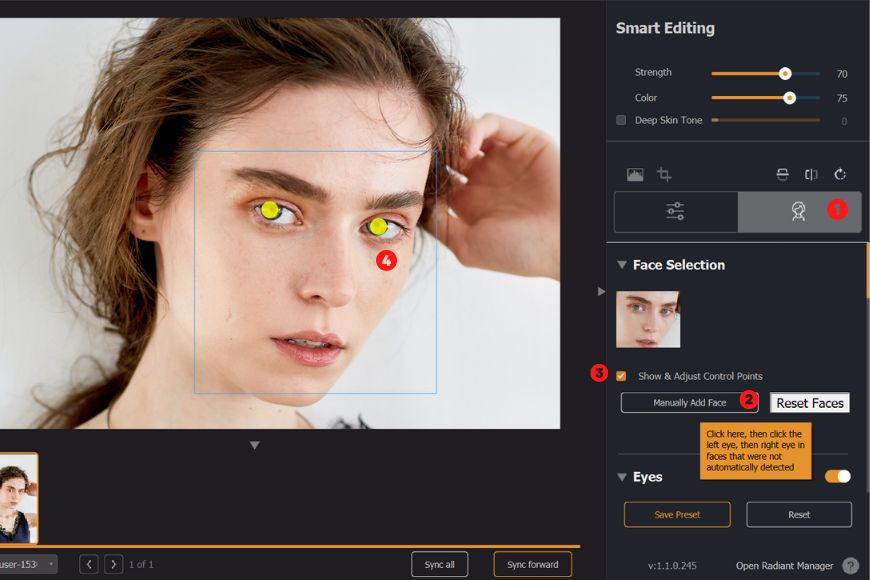
(i) Manually add a face
Step 1 – Select the retouch menu
Step 2 – Click on Manually Add Face
Step 3 – Check Show & Adjust Control Points
Step 4 – Click on the eyeballs so that the yellow dots are on both the eyes
Make sure to uncheck Show & Adjust Control Points once the selection is made.
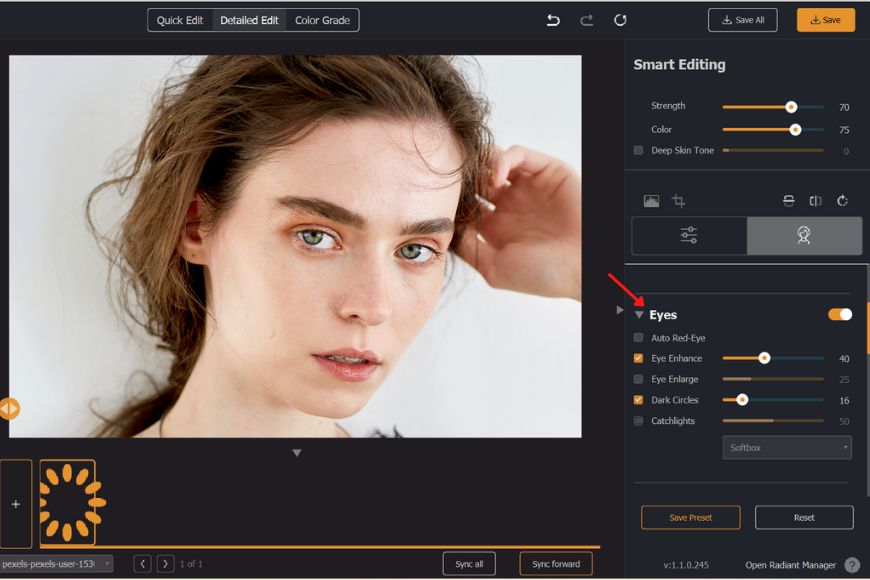
(ii) Editing the Eyes
Auto Red-Eye: As the name suggests, this slider corrects red-eye. It automatically detects if there’s red-eye in the photo and reduces it without reducing brightness or catchlights. For this photo, I left it unchecked.
Eye Enhance: This slider makes more than one adjustment to the eyes. It not only sharpens the eyeballs and the lashes but also brightens and clears the eyes. I’ve set it to a value of 40 for this photo.
Eye Enlarge: With this tool, you can enlarge the eyes. It’s helpful at times when you capture an otherwise excellent shot, but the eyes are not fully open, or when your subject has tiny eyes.
However, you should use this slider in moderation as it can quickly make your beautiful portrait look like a meme template (just set it to +100 once and see for yourself).
The current photo doesn’t require eye enlargement, so I left it disabled.
Dark Circles: Toning dark circles in photoshop requires masking and blending adjustments. However, with Radiant Photo, it’s as simple as moving this slider to the desired value. For this photo, I’ve increased it to 16.
Catchlights: Catchlights are the bright highlights in the eyes that make a photo compelling and grab the viewer’s attention.
With Radiant Photo, you can recreate four types of catchlights based on the light source or the light modifier: umbrella, ring light, softbox, beauty dish, and outdoors. Catchlights are already there in the current photo, so I’ve skipped it.
(iii) Editing the Face
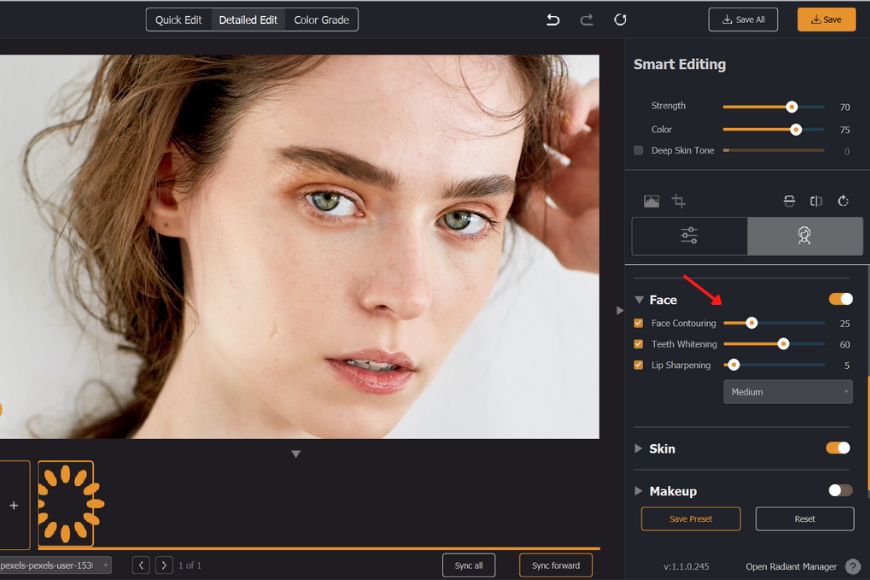
Face Contouring: This option enables you to contour the face or make it narrower and longer without distortion.
It’s useful when you shoot with the wrong focal length for your subject’s face or at an unusual angle. Or when you need control over facial aesthetics. To demonstrate its impact, I’ve raised it to 25.
Teeth Whitening: Custom white balance and color casts can sometimes make the teeth look discolored in photos. With this tool, you can easily restore the original color of the teeth or whiten them. For this photo, I’ve raised the teeth whitening slider to 60.
Lip Sharpening: This adjustment focuses only on the lips. It offers three modes of sharpening: fine, medium, and coarse.
Fine mode targets fine details, medium mode sharpens more visible details, and coarse works on the larger details of the lips.
With the Lip Sharpening tool, the idea is to make subtle enhancements. So, you should use it in moderation as well. Here, I’ve used a value of 5 for mild sharpening.
You can toggle between before and after looks by clicking on the photo and releasing or moving the yellow slider to the left or right.
By this time, you no doubt already notice many improvements to the face. However, there are a few more adjustments that you can use to optimize further.
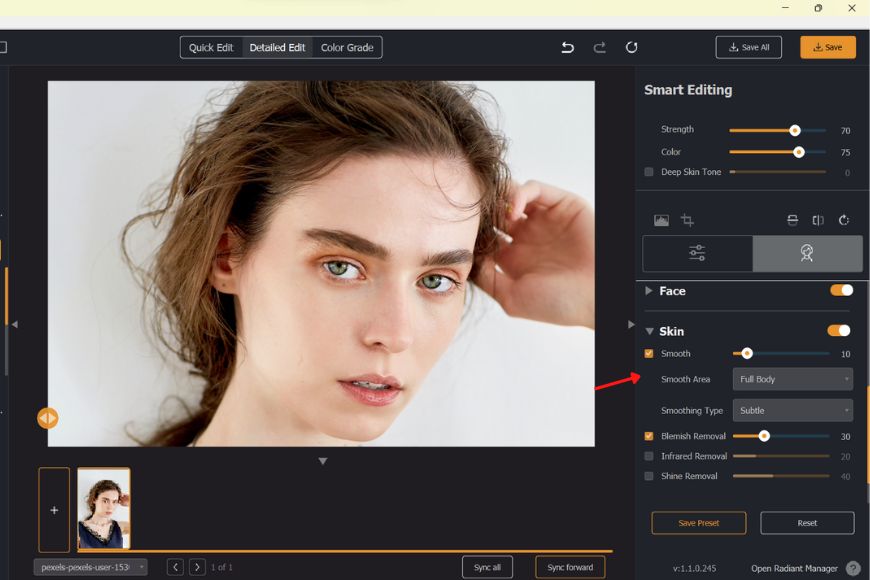
(iv) Editing the Skin
Smooth: With this adjustment, you can smoothen uneven skin and wrinkles.
This intelligent filter focuses on the skin and automatically excludes other details like hair and eyes.
There are three controls for smoothness: subtle, default, and super-smooth.
- Subtle produces minimal smoothing in the skin that looks realistic.
- Default makes a more substantial smoothing effect on the skin while retaining texture.
- Super Smooth makes skin smoothest, which mushes most facial details.
This adjustment produces the best results when used in moderation. I’ve set the control to Subtle and value to 10 for light smoothing.
Blemish Removal: This scans the face for imperfections like acne and blemishes and automatically corrects them without blurring. In our case, I saw a few acne and blemishes on the subject’s face and used a value of 30 to correct them.
You can notice its effect clearly around the nose and the forehead area.
Infrared Removal: This is a unique feature of Radiant Photo that removes the redness in the skin due to the infrared light captured by the camera.
It removes the red tint and restores the original skin color without affecting the red values in the rest of the photo.
Shine Removal: It helps correct bright highlights on the skin which occur due to oily skin or a powerful flash.
However, if overdone, this setting can create weird patches on the skin. I’ve left it unchanged for this tutorial.
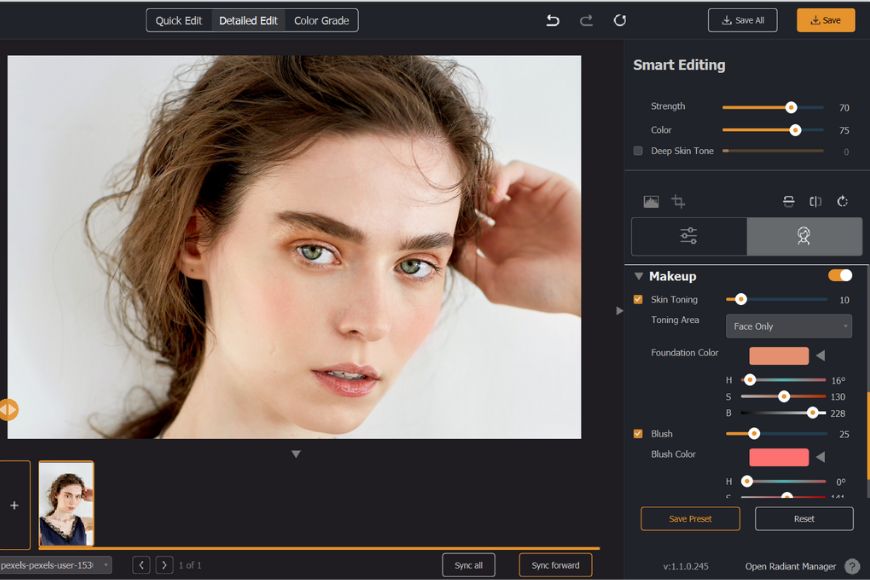
(v) Editing the Makeup
Skin Toning: You can correct or change the subject’s skin tone with this slider. There are five predefined tones: white, pale, tan, and foundation.
Also, you can create your own tone using the Hue, Saturation, and Brightness controls. This tool allows you to choose where the toning is applied – Full Body or Face Only.
It produced a pleasant effect with a value of 10, the color set to Foundation, and Toning area set to Face Only.
Blush: With this slider, you can add blush to the cheeks of the subject. There are many color options, as well as Hue, Saturation, and Brightness controls for a custom color. I’ve used a pinkish tint with a value of 25.
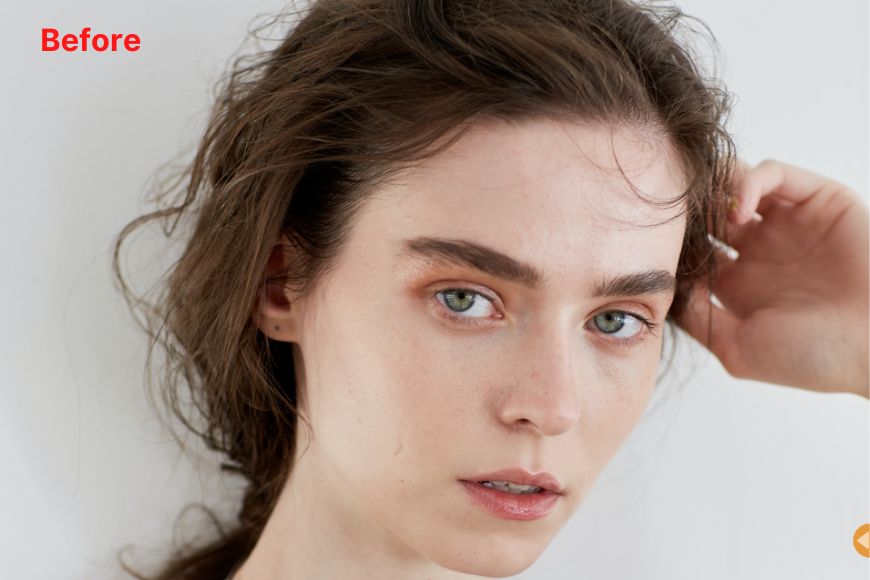
Radiant Photo Edits: Before and After
Here’s a before and after comparison.

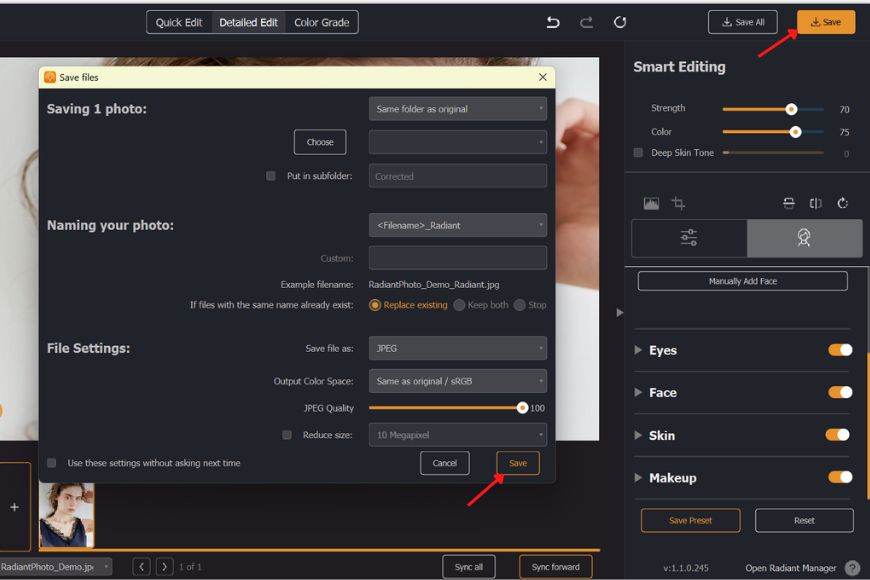
3. Save Your Photo
To save your photo, click the Save button in the top right corner.
In the next step, Radiant Photo allows you to choose the location, rename your file, and select the desired quality setting.
After choosing your options, click the Save button again on the bottom right to export the edited photo.
Final Thoughts
Radiant Photo can transform your photo editing workflow. What used to take hours of manual work in Photoshop is a task that can now be done in just a few minutes.
The results are outstanding and can rival those of even the most experienced Photoshop users.
With Radiant Photo, optimizing faces is quick and easy and it creates professional-level photos every time.
(You should also check out our guide on how to create black-and-white photos with Radiant.)
You'll Also Like These:
 Radiant Photo Review: Fast & Fully Customisable AI Photo Editor
 How to Create Fine Art Black & White Photos with Radiant Photo
 How to enhance Landscape Photography with Radiant Photo

Yatharth Gupta is a seasoned travel and street photographer with eight years of experience. He is also a blogger and loves to explore new places.

WELCOME TO SHOTKIT
Enter your email to be sent
today's Welcome Gift:
19 Photography Tools
🔥 Popular NOW:


Shotkit may earn a commission on affiliate links. Learn more.