


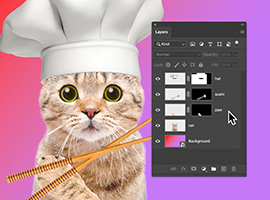
How to Make a Custom Shape in Photoshop
Learn how to create custom shapes that can be easily added to your images or designs to create a specific effect or to save time.
By Judyth Satyn
Photoshop’s Custom Shape Tool has a small library filled with shapes, but how do you make your own custom shape?
Custom Shapes can be a cool way to add some creative flair to your designs.

Download a free copy of Adobe Photoshop to follow along with this simple tutorial.
If you want to add a new custom shape to the Custom Shape Tool collection, check out this Photoshop Tutorial to learn how.
How to Make a Custom Shape in Photoshop in 5 Steps
Step 1 – Import Image of Shape
If the custom shape you want to create is very basic, you can most likely draw it free-hand.
But if you want to create a complex shape, it will be easier to trace around an image for its outline.
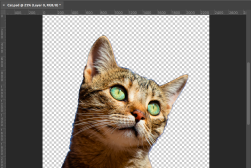
So, let’s start by opening the image you’re going to use as the custom shape’s outline.
Navigate to File > Open and locate the image file on your computer.
It’s a good idea to make a grid to help guide you when you create a custom shape.
Step 2 – Open Pen Tool
Once the image is open in your canvas window, you can create the outline of the custom shape.
The Pen Tool has a customized setting specifically for making custom shapes.
Open the Pen Tool using the Toolbar to the left of your canvas window or by using the keyboard shortcut P.
(If you can’t find it, see our guide on locating a missing toolbar.)
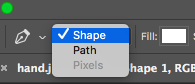
When activated, the Pen Tool Options bar will open above your canvas window.
![]()
Select Shape in the drop-down menu to the left of the Options bar.
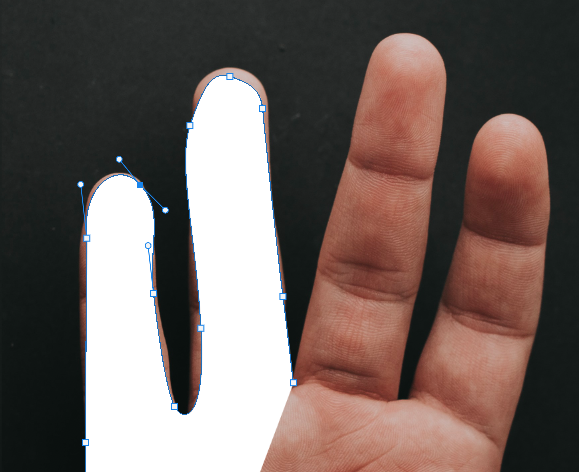
Step 3 – Outline the Custom Shape
The Pen Tool is a Path Selection Tool perfect for drawing shapes.
Using the Pen Tool you can now create the outline of your custom shape.
Click on your image with the Pen Tool to create the first anchor point of the custom shape selection.
Follow the outline of the shape adding anchor points as you go.
If the anchor point is mistakenly positioned you can adjust and move the anchor point.
Press Command (for Macs) or Ctl (for Windows) and hover the Tool Pointer over the anchor point you wish to move.
When the Tool’s Pointer changes from a Pen Icon to an Arrow Icon, press with your cursor and move the anchor to its new position.
Use the Zoom Tool if you want to zoom in for a better view.
To convert the contour of the Pen Path, press Option (for Macs) or Alt (for Windows) and hover your cursor over an anchor point.
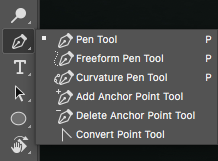
Alternatively, select the Convert Point Anchor Tool – it’s the last tool in the tool’s menu bar.
Using the Convert Point Tool, alter the curve of the Pen Path by using the cursor to drag the anchor point or the anchor point’s bars.
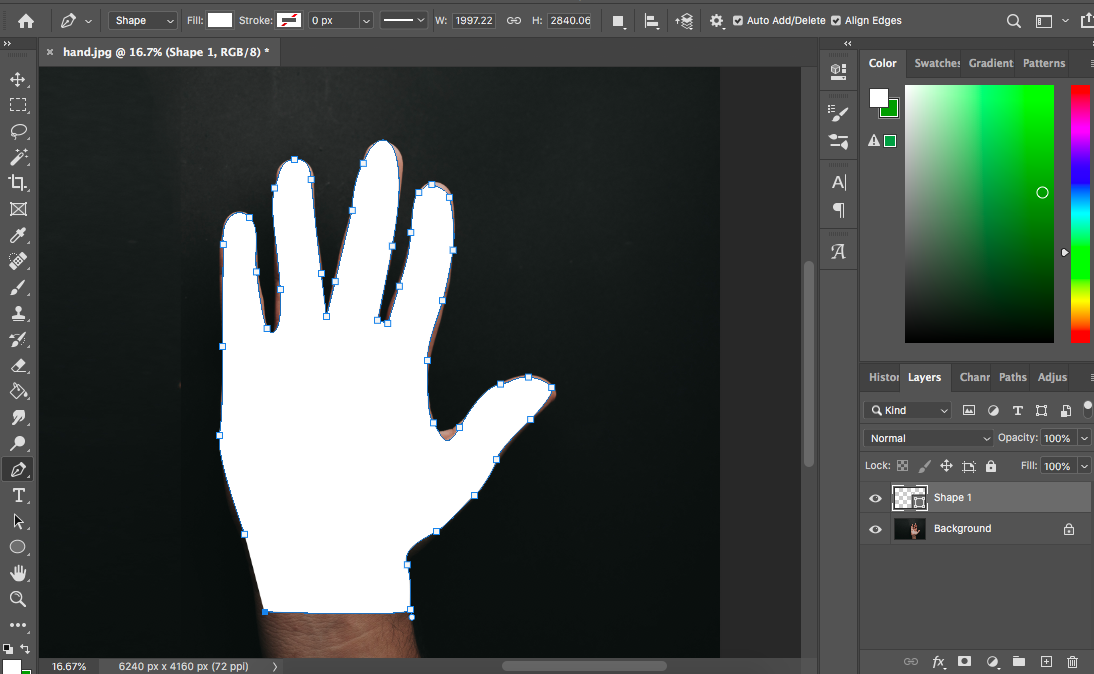
A white fill area will appear to define the new custom shape as you create each anchor point.
To close the path, hover over the first anchor point with your cursor.
A Circle will appear beside the Tool Pointer indicating the path will be closed when the canvas window is clicked.
Click on the canvas window to close the path.
Step 4 – Convert to Custom Shape
You now have a shape created which you can view as a separate layer in the layers panel.
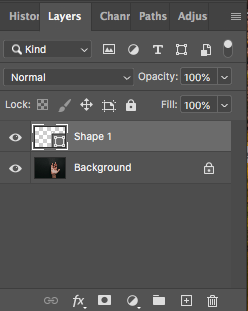
You can copy the layer to make duplicates of the shape.
Step 5 – Save and Use Shape
Now you can save your new custom shape in the Custom Shape Tool library for future use.
In the drop-down menu under Edit, select Define Custom Shape.

Click on Define Custom Shape and a Pop-up window will appear with the option to name your shape.
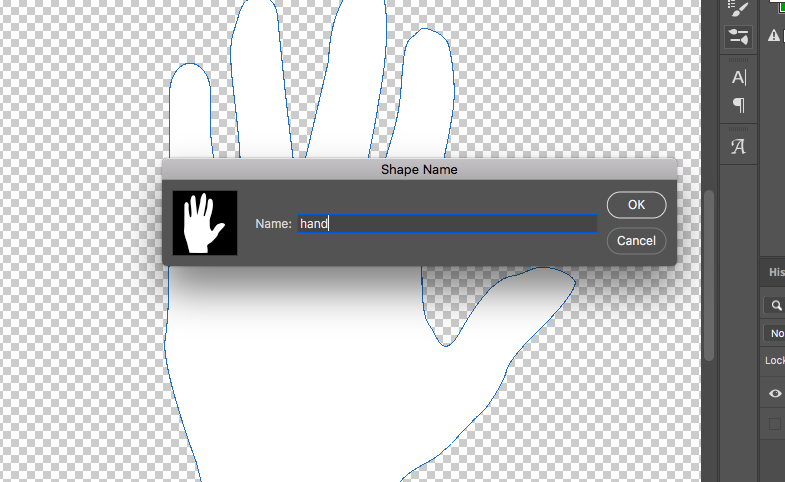
Name your custom shape in the pop-up window and click OK.
Your custom shape will now be saved in the Photoshop Custom Shape Tool collection.
To view your shape, select the Custom Shape Tool from the Toolbar.
The Custom Shape Tool is the last one in the Custom Shape Tool drop-down menu.

When the Custom Shape Tool is active, the Custom Shape Tool Options bar will open above your canvas window.
In the Custom Shape Tool Options bar click on the drop-down menu beside Shape.
Here you will find all the Custom Shape Tool collections of shapes.
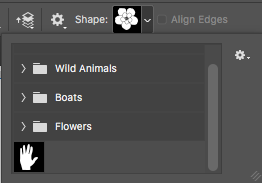
Your Custom Shape will now be stored with the collection of Custom Shapes in Photoshop, ready for use.
How to Manipulate Shapes in Photoshop
Manipulating custom shapes in Photoshop is easier than it sounds.
To manipulate a shape, start by activating the shape layer in the Layers Panel.
Navigate to the top menu bar and in the dropdown menu under Edit select Transform > Warp.
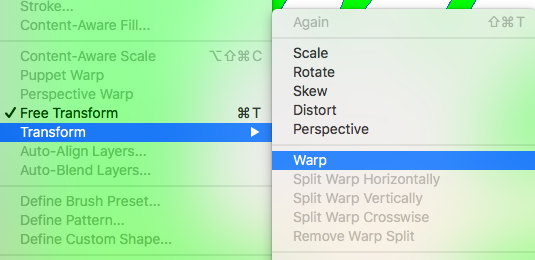
When Warp is clicked, a bounding box will appear around the custom shape.
You can now use your cursor to drag and manipulate the custom shape.
Click on an area of the custom shape and drag the shape in any direction.
You can manipulate your shape to increase or decrease it in size.
If you liked this Photoshop Tutorial on how to use the custom shape tool, you’ll also enjoy learning how to create a pattern in Photoshop.
You'll Also Like These:
 Best Custom Photo Blankets in 2023 (+ Wash & Care Guide)
 How to Use Line, Shape and Form in Photography Composition
 How to Smooth Skin in Photoshop
 How to Use the Liquify Tool in Photoshop
 How to Remove Background in Photoshop (4 Foolproof Ways)
 How to Create a Rainbow Gradient in Photoshop (& Save as a Preset)

Judyth is an experienced studio photographer and glass artist. When she isn’t Photoshopping comedians into the bellies of sharks, you can find her cooking delicious treats for her guests.

WELCOME TO SHOTKIT
Enter your email to be sent
today's Welcome Gift:
19 Photography Tools
🔥 Popular NOW:


Shotkit may earn a commission on affiliate links. Learn more.