


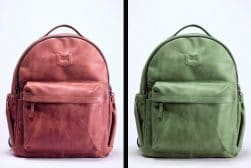
How To Change Background Color In Photoshop Automatically
What to change the background color in a photo? This guide makes it easy, with tutorials for both Photoshop and Photoshop Express.
By Ana Mireles
How to change the background color in Photoshop is one of the most common editing questions in digital photography. There are many reasons to do so for both amateurs and professional photographers.
If you’re a professional photo retoucher, you’re going to change the background often to meet the needs of your clients.
But even if you’re not a photographer you might find yourself trying to change the background color in Photoshop. For example, if you run an e-commerce website and you prefer to change the color palette to fit a specific brand identity.

Download the latest version of Adobe Photoshop to follow along with this simple tutorial.
Start a free 7-day trial today
Or you may want to change the background color of your favorite profile photo on social media because you didn’t have the right colour background for your headshot at the time.
Whatever the reason is, this article will help you change the background color in Photoshop even if you’re a beginner, and there’s no need to use any 3rd party tool of plugin either.
[Related: How to whiten teeth in Photoshop | How to make a transparent background in Photoshop]
Automatic Background Change
This solution is great for any beginner or amateur because it’s easy to do, and completely free. No downloads, no membership fees, no previous knowledge required.
This is done online with Photoshop Express.
Step 1: Log in
If you have an Adobe account, you have to log in. If you don’t have one then you’ll have to register. Don’t worry though, it’s free; you’re not buying any membership with this.
It’s worth noting that this account will be useful if you want to use any of the Adobe products for your phone or desktop. So I recommend having it regardless.
Step 2: Upload your image
On the landing page of the website, you get the option to upload your image, use one of the example images, or continue with your previous work.
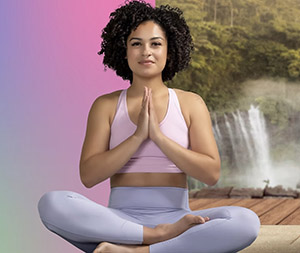
So just click on the Upload button and choose the image you want to change the background color of. I’ll use the example image just to show you how it works.
Step 3: Remove background
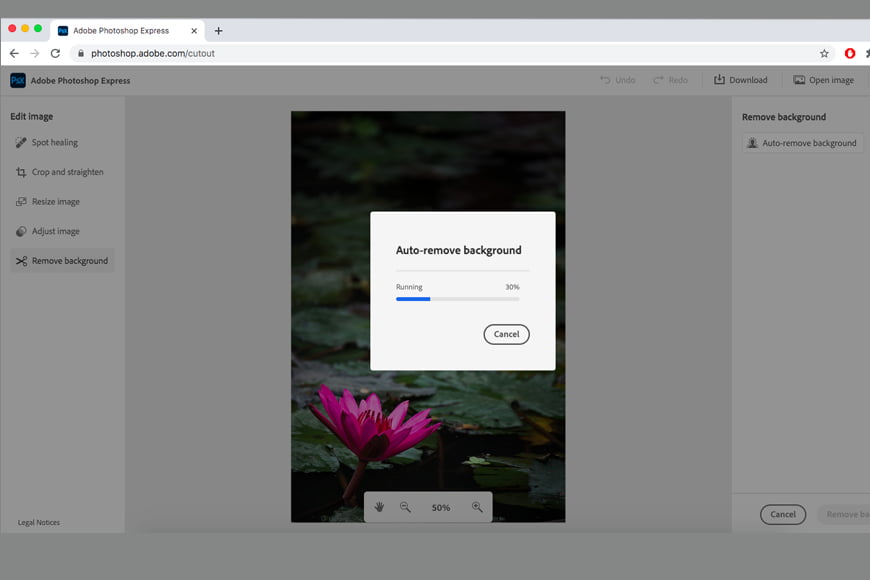
On the left side of the screen, you’ll find the menu. Click on Remove Background and then click on Auto-Remove Background on the right-hand side.
Here are some other ways to remove the background in Photoshop.
Step 4: Change background-color
On the right side of the screen, Photoshop will offer to blur your background or replace it. On the Replace Background portion, you’ll find a menu to choose your new background color.
Step 5: Download your image
When you’re satisfied with the new background color, you can save the image by clicking on the Download button. It will ask you to choose the size and then you just need to download it.
Very easy right? Well now let’s give you more control by doing things manually.
Manual Background Change
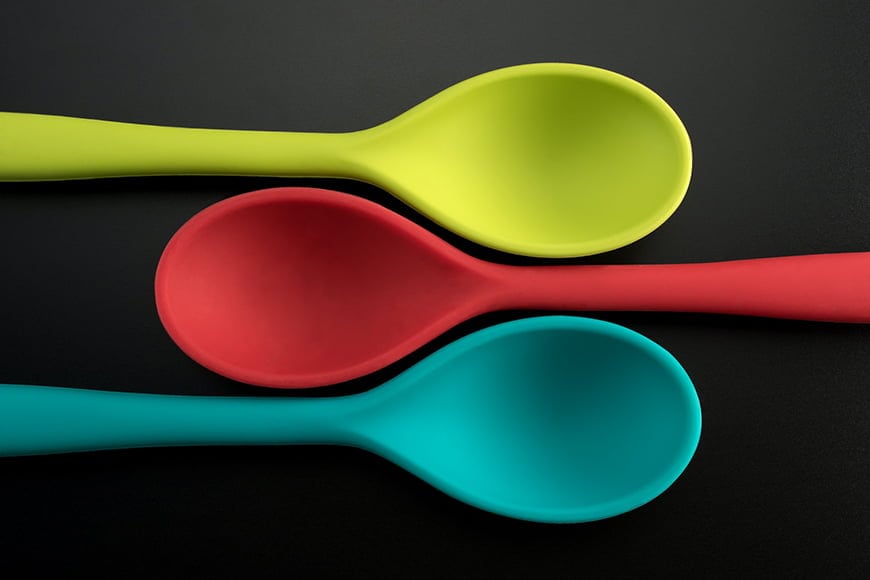
Credit: Hue12 Photography
If you have Photoshop on your computer, then you can change the background color with full control of the process and the result. You can also record the steps and create an Action.
The most important thing for a realistic background change is to have a good selection of the subject. If you do this manually then you’ll have many tools available, allowing you to be as accurate as possible.
(To perfect your selections, check out our guide on how to use the Refine Edge Tool in Photoshop.)
Also, you’ll have endless color possibilities, gradients, patterns, or a different image to use as backgrounds. Let’s get started.
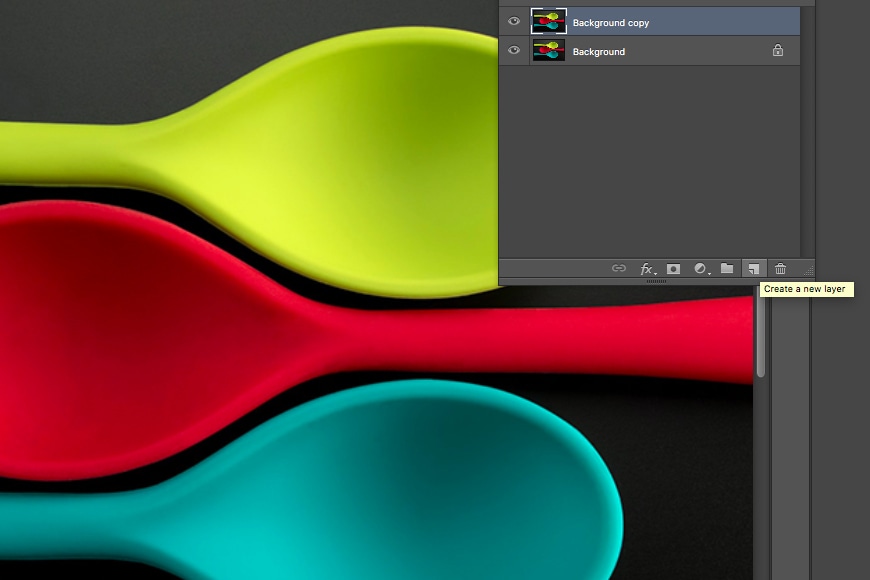
Step 1: Duplicate layer
Imagine that your image is printed on paper. If you want to change the background you need to separate it and put the new one underneath the subject.
This is the same concept. You need a second layer for your subject, so you can put a new one beneath it.
You can duplicate a layer by going to the Layer menu and then selecting Duplicate Layer.
Alternatively, you can drag your original background layer into the Create A New Layer button at the bottom of the panel.
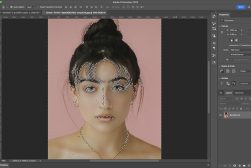
Step 2: Select background
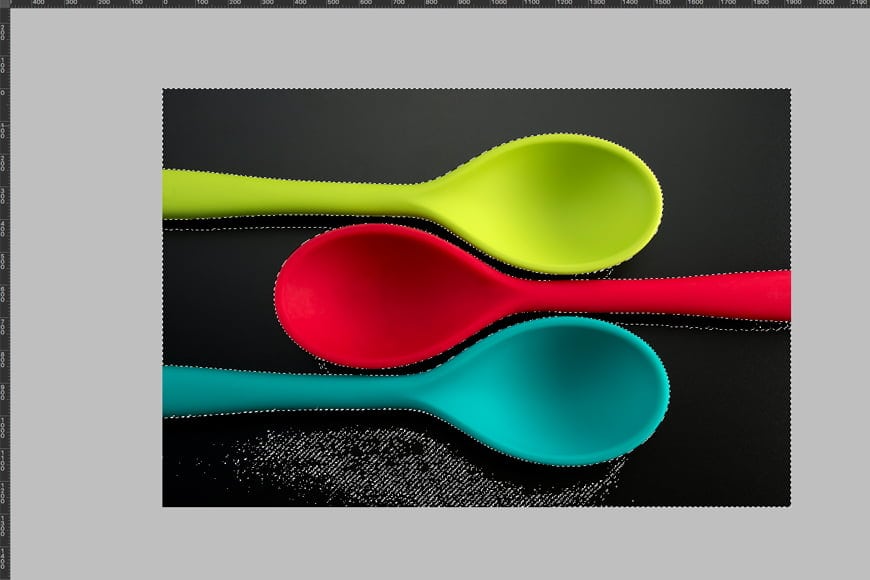
There are many different selection tools in Photoshop. There’s no right or wrong when choosing which one to use; each one has a different advantage. Often you’ll need to use a combination of tools to get the complete subject.
If your current background is a solid color and your subject is contrasting to it, you can use the Magic Wand tool.
While you’re on the layer you just created, click once the background and the Magic Wand will select it for you.
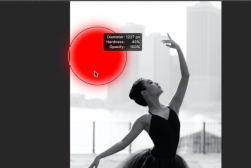
If there were any unselected areas like the ones on the bottom part of this image, make another click on that part to add them. You can also make the Tolerance lower or higher to include more variants of the same color in the selection.
Step 3: Invert selection
Now that you’ve selected your background you need to invert the selection so that your subject is the one selected.
You just have to go to the menu Selection and then select Inverse. Another way is to use the keyboard shortcut by pressing the keys Cmd+Shift+I.
(See also: How to Invert Colors on a Picture)
Step 4: Refine selection
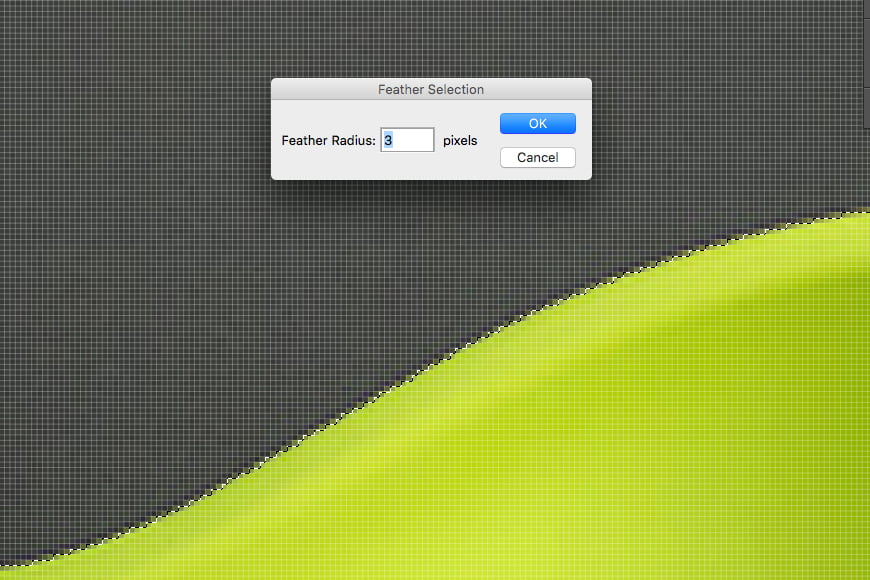
Often with these types of selection tools, it’s easy to have problems around the edges. Sometimes you need to expand the selection a little or feather it so that you get a more accurate result.
Zoom in to see if your selection is correct or if you left out some pixels. Even if it looks right, I always like to add at least a minimum feathering to get a more realistic transition.
You can do this by going to the Selection menu and opening up the Modify option. Then select Feather. This will open a window where you can type how many pixels. The amount you need will change from image to image.
Another way to get a more accurate selection and pick up all the small or difficult details is to use the Refine Edge tool. Check out this tutorial for an easy step-by-step guide to doing that.
Step 5: Add a layer mask
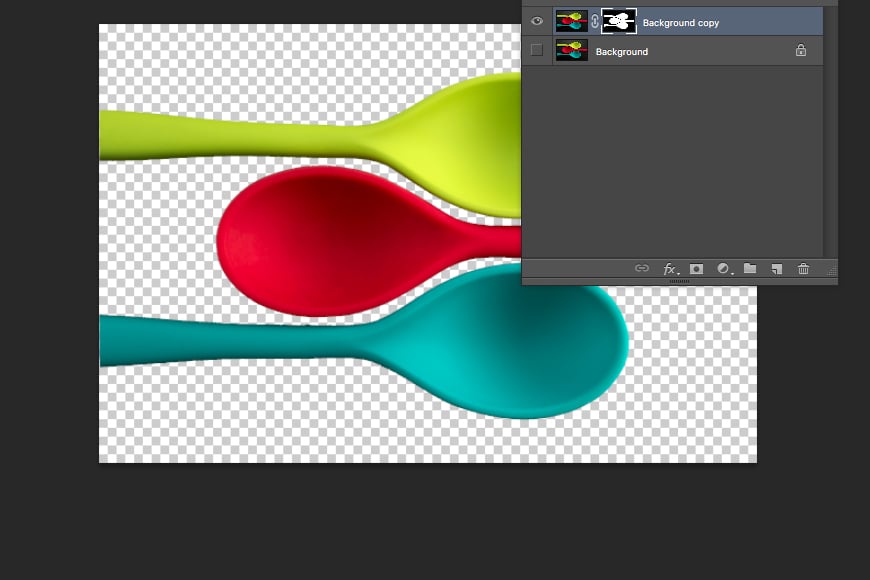
Now that your subject is selected, you can easily mask out the background. This is a non-destructive way of editing, because if you erase the background then there’s no room to correct any mistakes.
So, click on the Add Layer Mask button from the bottom of the panel. This will show up as an icon on your layer showing in black the parts that were covered and in white the visible ones.
Now your background is still there, you just can’t see it. This is useful in case you made a mistake during the selection process. You can just paint black or white on the mask to add or remove parts from the visible area.
Step 6: Add a new fill layer
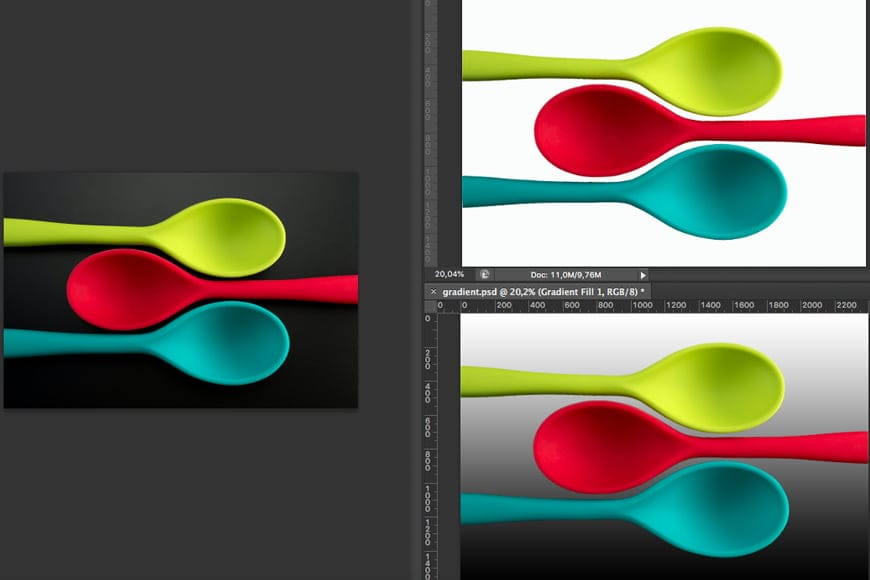
Now select the original layer and click on the Create New Fill or Adjustment Layer button that you’ll find on the bottom.
From the menu choose Solid Color to open up the color picker. From there you can choose whichever color you want.
If you change your mind later on, you just have to double-click on the color thumbnail and choose a different one.
Also, if you prefer to have a gradient to add some depth to your background instead of a solid color, you can choose a Gradient fill layer.
If you need to change the colors of the objects in the layer, check out our guide: how to change the color of an object in Photoshop.
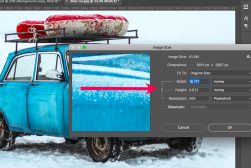
Step 7: Save
Ok, now some considerations when saving your work. If you want to keep the layers so that you can come back and change any time you want, you need to save as .psd file.
This is the native file format from Photoshop and it will save the layers and keep your file editable. Keep in mind that this will make the file size larger, and also you won’t be able to open it with other programs.
If you’re sure you won’t need to work on it again, you can spare some storage space and save it as a .jpeg.
First, you need to flatten your image so that all the layers become one original background layer – just as it was when you opened it, but now with a different color.
This will make your file accessible from any software as well, so it’s the ideal way to save your image if you want to share it.
Finally, if you didn’t change the background color and just removed the original leaving only the subject, then you need to save as .png.
This format allows the image to be saved with transparency, whereas .jpeg would fill the empty pixels with white. (You can also use an app to change a picture background.)
Final Words
If you’ve been looking for instructions on how to change the background color in Photoshop, hopefully, this guide has helped.
As you’ve seen above, it’s not all that complicated. It just takes a little bit of familiarity with the Photoshop functions and perhaps a little bit of practice to gain confidence.
From there, the sky’s the limit on choosing a new background color or texture for your photo.
Download the latest version of Adobe Photoshop to follow along with this simple tutorial.
Start a free 7-day trial today
You'll Also Like These:
 7 Best Apps to Change a Picture Background (Add Background to Photos)
 How To Change The Color Of An Object In Photoshop
 How to Change Skin Tone Color in Photoshop
 Topaz Photo AI Review | Get the Most out of Your Images, Automatically
 How to Change your Brush Size in Photoshop (with Shortcuts)
 How to Change DPI in Photoshop (Plus More Tips)

Ana Mireles is a Mexican researcher that specializes in photography and communications for the arts and culture sector.


WELCOME TO SHOTKIT
Enter your email to be sent
today's Welcome Gift:
19 Photography Tools
🔥 Popular NOW:


Shotkit may earn a commission on affiliate links. Learn more.