How To Invert A Selection In Photoshop (Plus Keyboard Shortcuts)
Learn how to invert your selection area in Photoshop to change the unselected area into the selected area.
By Judyth Satyn
When editing in Photoshop, it can sometimes be easier to select the opposite area to which you need to select and then invert this selection area – sound odd?!
Imagine you wish to isolate a subject, like an orange, from its beige backdrop so that you can replace the bland beige with a beautiful contrasting bright blue.
You could spend extra time selecting the entire background area behind the orange or you could simply select the orange and ‘invert selection’.
With Photoshop you can invert an active selection area, changing the unselected area into the selected area.
This Abode Photoshop tutorial will teach you how to invert selection areas to save you wasting time in the future.


Download the latest version of Adobe Photoshop to follow along with this simple tutorial.
Start a free 7-day trial today
Related: How to invert colors in Photoshop
How to Invert Selection Areas
Open the image or select the layer you wish to work on in the layer panel.
If the layer is locked, you can unlock it by clicking the Lock Icon in the Layers Panel.
From the available selection tools, pick the one best suited to your job.
If your subject contrasts its backdrop with no blurred or merging colors, it will be easy to isolate, and a quick selection tool will do the trick.
You can use Select Subject or another Quick Selection Tool for a quick-click method.
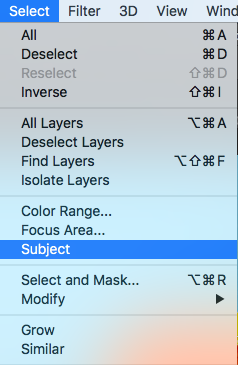
Navigate to the Menu Bar and choose Select > Subject.

Your subject will now be selected and surrounded by marching ants.
If, however, the subject has colors that merge with its backdrop, the Quick Selection Tools will not be able to discern the subject from its background.
You will find areas of background included in the selection area, if this happens you can instead use one of the manual Selection Tools.
The Magic Wand, Marquee Tool, or Lasso Tool are the selection tools that give you more control when you want to fine-tune a selection area.
Navigate to the Tool Bar to the left of your image window, and choose a Selection Tool.
Or use a keyboard shortcut, M for Marquee Tool, L for Lasso Tool, and W for Magic Wand.
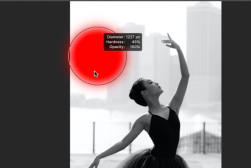
Carefully select your object using the Marquee Tool or Lasso Tool.
When you have precisely the selection area you want, surrounded by marching ants, it is time to invert.
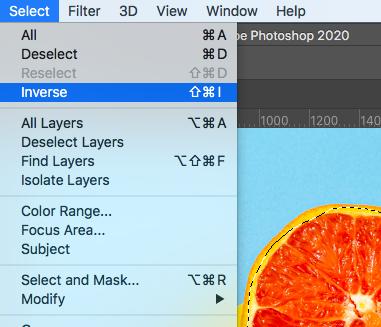
To invert the active selection navigate to the Menu Bar and choose Select > Inverse.

Or use the Keyboard shortcut to invert your existing selection by pressing Command, Shift, and I (for Mac) or Ctrl, Shift, and I (for Windows).
When you see the marching ants around the border of your image and marching ants surrounding your object, you will know you have inverted the selection area.

Now the opposite selection area (the backdrop to your object) will be selected.
Congratulations, you have successfully inverted your selection area.
To Undo the Selection Area
If you’ve made the wrong selection and want to create a new selection area, you can use a keyboard shortcut to revert.
Simply press Command plus Z (for Mac) or Ctrl plus Z (for Windows) to undo your current selection area and start again.
Alternatively, click on the canvas to the side of the current selection area and the selection area will be removed.
To undo selection areas, you can also follow the steps in this Photoshop Tutorial How to Deselect in Photoshop or How to Undo in Photoshop.
How do I Invert a Selection Mask?
There are lots of snappy easy-to-use shortcuts in Photoshop that save you time, so why not use them?
One such shortcut is a simple way to create Layer Masks and Invert Selection at the same time.

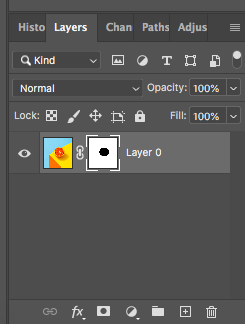
When you have completed the perfect selection path around your subject, hold down Option (for Mac) or Alt (for Windows) and press the Layer Button at the bottom of the Layers Panel.
Your selection path will instantaneously be inverted, and the layer masking created.
To learn more useful tips on layer masking in Photoshop check out this tutorial – How to use a layer mask in Photoshop.


