


How To Use the New Mask Tool in Lightroom
Lightroom's new AI-powered masking tools can save you lots of time. Follow this easy step-by-step guide on how to use each tool in the masking panel.
By Ana Mireles
Have you tried the new Mask tool in Lightroom?
I’ve been using it to make selective edits, and it’s been saving me lots of time.
In this article, I’ll tell you all you need to know to use the new masking tool in Lightroom.
I’ll also answer some FAQs about this impressive Lightroom update. So, let’s get started!

Download the latest version of Adobe Lightroom to follow along with this masking tutorial.
Start a free 7-day trial today
What is the new Mask tool in Lightroom?
Masks allow you to make adjustments and apply them to a specific area of your photograph.
For example, you can blur only the background or darken just the sky.
These are just some basic examples, but masks are very powerful tools that let you do advanced photo editing.
Lightroom has given users the possibility to create masks for some time now. Since it’s such a helpful tool, they’ve kept improving this feature.
In the latest update available from October 2022, Lightroom added AI-powered masks. They’ve also changed the entire selective adjustments area.
These are the new AI Masks you can find in the Masking Panel.
Background
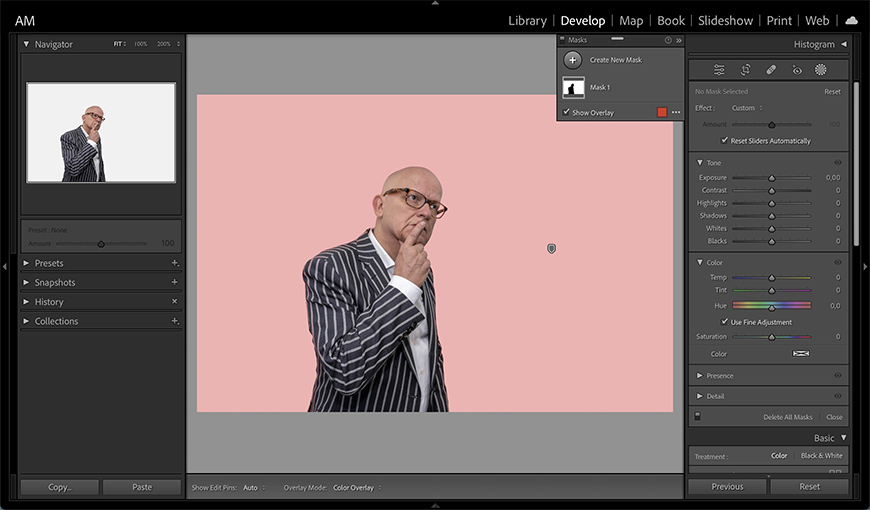
Photo: Mike van Schoonderwalt
This option is perfect when you have a background that’s a solid color.
For example, when your photo shoot was done in the studio or you shot against a clear blue sky.
You can use it with busier backgrounds too. It works especially well if there’s a clear separation between subject and background (e.g., when you have a narrow depth of field).
However, the results may be less precise.
It doesn’t matter if the subject is a person or an object. Using this option, you can mask the background with a single click.
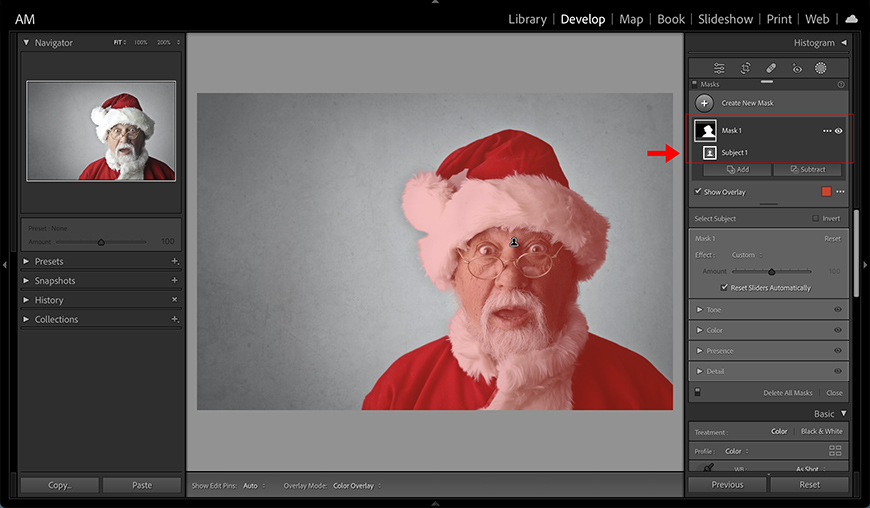
Subject
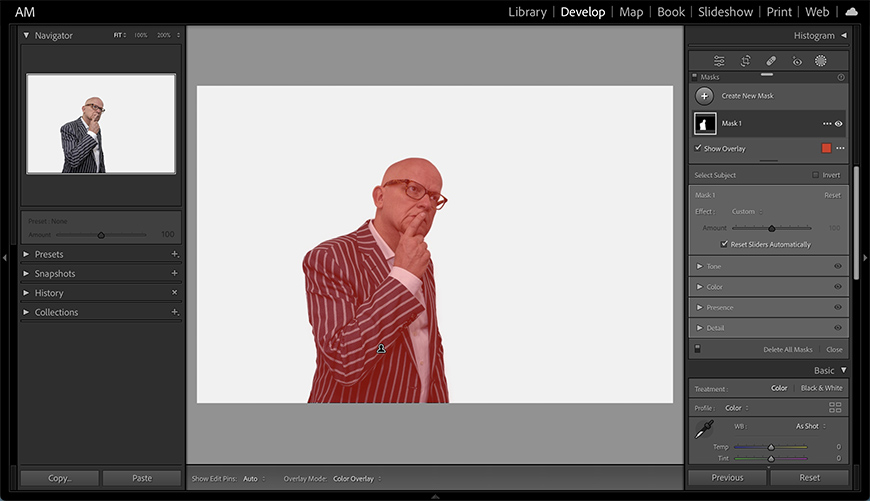
Photo: Mike van Schoonderwalt
This situation is the opposite of the previous one. When you click on the subject, the AI-powered algorithm will identify your subject and mask it.
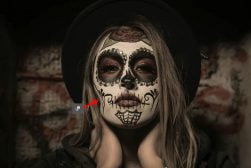
Objects
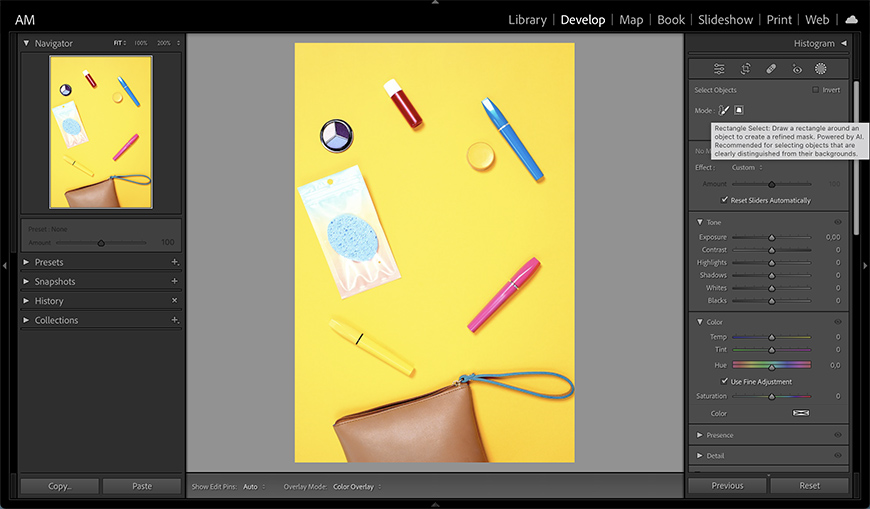
Photo: Shiny Diamond
If your subject includes many objects and you want to mask only one, this is the best choice. You can use a brush or a rectangle to tell Lightroom which one to mask.
The selection doesn’t have to be very precise. Just make sure you include the entire object.
How do I use the new Masking tools in Lightroom?
Here’s a quick step-by-step guide on how to use the new Mask tool in Lightroom.
1. Open the Mask panel
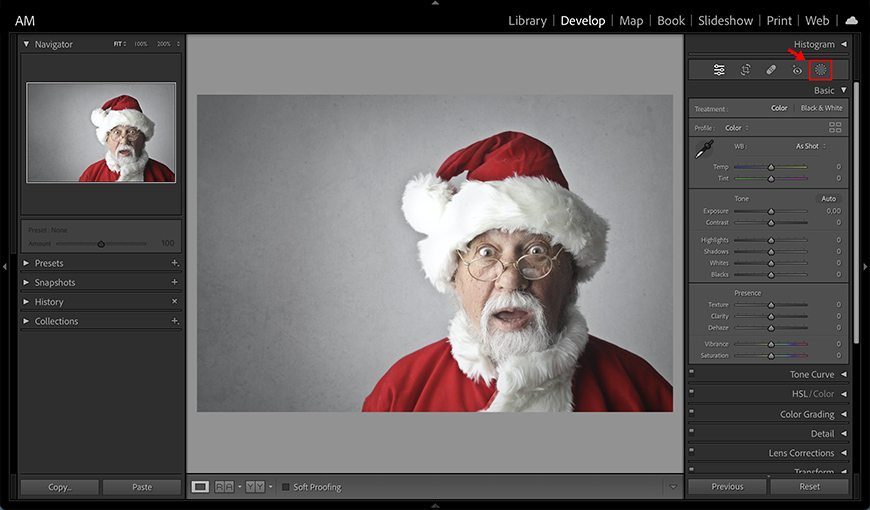
Photo: Andrea Piacquadio
Right under the Histogram, you’ll find the icons for different tools. The first one from the right is the masking tool. It’s represented by a dotted-line circle.
Click on it to open the Masking panel.
2. Choose the type of mask you want to create
There are different types of masks available in Lightroom’s masking panel.
The AI-powered masking tools allow you to mask people, objects, the background, or the sky with one click.
The linear and radial masks let you create fading masks using the click-and-drag technique.
The brush tool lets you draw the mask manually. You can adjust the brush’s size, density, flow, and hardness.
Finally, the range features help you to create a mask by determining a color, luminance or depth range.
3. Refine the mask
You can layer as many adjustments as you want to refine a mask.
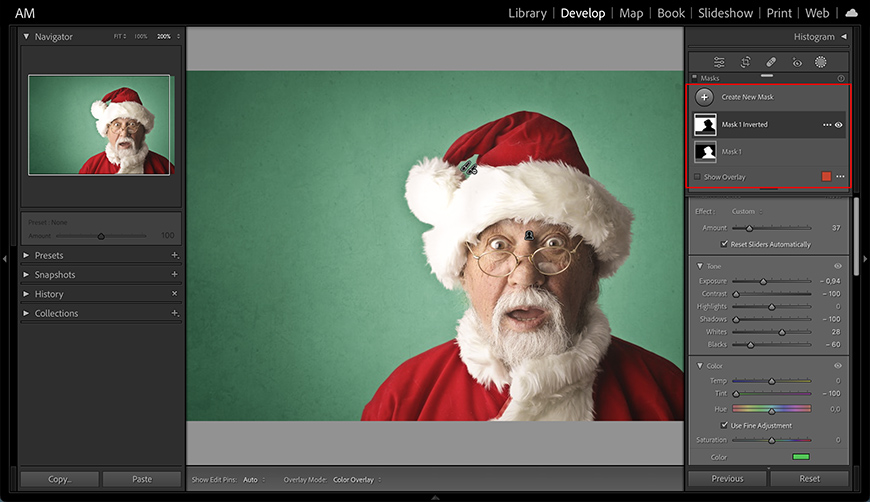
On the masking panel, you’ll see the mask you just created marked as Mask 1. You can rename it if you want.
Underneath it, you’ll see the first masking tool. In my example, it’s Subject.
Below that, you have the buttons Add and Subtract. You can use them to fine-tune the mask.
Use the Add button if a part of the subject wasn’t included in the mask. Alternatively, use the Subtract button to remove any part of the background that shouldn’t be on the mask.
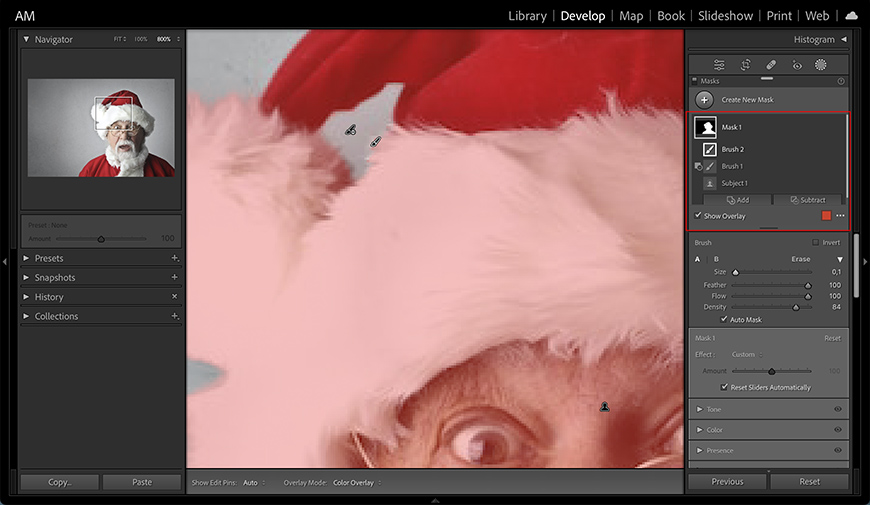
I’ll do the latter because the masking tool highlighted some background between Santa’s hat gap. You can use any of the masking tools to Add or Subtract. In my case, the most adequate is the Brush.
Unfortunately, I didn’t do a very precise job and unmasked part of the fur that belonged to Santa’s hat.
Not to worry – I can click the Add button, and use the brush to paint it back and include it in the mask.
You can do this as many times as you like, and everything will be included and controlled within the same mask. This will keep your workspace tidy.
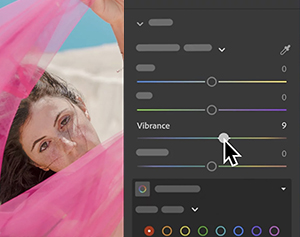
4. Regulate the Amount
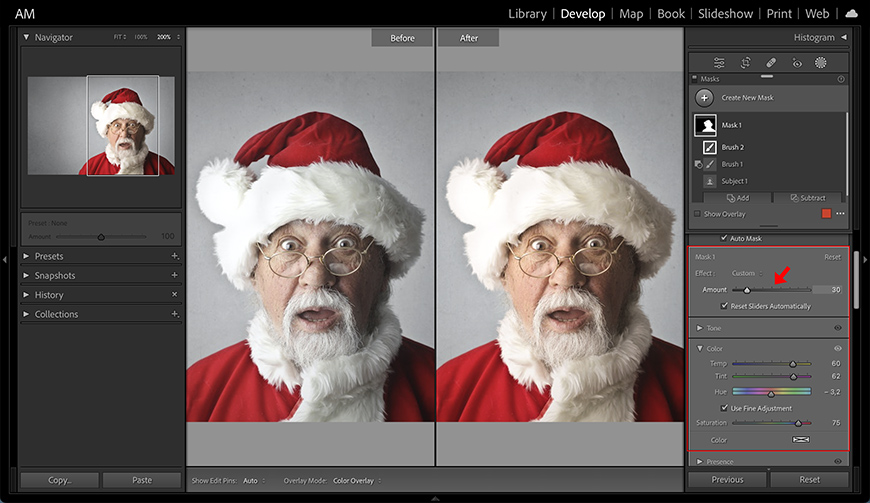
Once you have a mask, you can do selective editing to make local adjustments.
In this case, I want to make the subject warmer.
So, I can go to the Color panel and adjust the Temperature, Tint, Hue, and Saturation.
Once I do this, I might find the changes too intense.
So, instead of moving all the sliders again, I can simply regulate the intensity of the effect by moving the Amount slider.
5. Add a second Mask (optional)
If you want to work on a different part of the subject, you can add a second mask.
To do this, simply click on the Add a New Mask button on the Mask panel.
It’s also possible to Duplicate and Invert the mask you have now. This is useful, for example, if you want to work on the background after you’re done with your subject.
On the new mask, you can use the same tools and steps explained before for doing the first mask.
Lightroom Masking Features: FAQs
Here are some of the most popular questions about the new masking tools in Lightroom.
Where is the brush tool in the latest version of Lightroom?
Before October 2022, the Brush tool was an independent tool. Now, you’ll find it inside the Mask module. Simply click on the Mask icon (where the Brush one used to be). Now, select Brush.
Does AI power all mask tools?
AI powers the new masking tools in Lightroom. This includes the Sky, Background, Subject, and Objects features. The rest of the Mask tools remain as before.
What is the difference between Add/Subtract and Add New Mask?
The Add and Subtract buttons allow you to refine an existing mask. The New Mask button, on the other hand, creates a different one. This way, all the work you do while masking is well organized and separated, so you can go back and adjust it whenever you want.
What does the Amount slider do?
The Amount slider in the Mask tool allows you to increase or decrease the visibility of the edits you do in the selected area.
Further reading:
- Complete guide to image masking
- How to add a layer mask in Photoshop
- Adobe Help article on the masking tool
You'll Also Like These:
 Lightroom Classic vs Lightroom CC – Compare & Understand their Differences
 How to Use the Clipping Mask in Photoshop (Complete Guide)
 How do you mask in Luminar Neo?
 Learn How to Layer Mask in Photoshop in 4 Simple Steps
 How to Use the Refine Edge Tool in Photoshop
 How to Use the Liquify Tool in Photoshop

Ana Mireles is a Mexican researcher that specializes in photography and communications for the arts and culture sector.

WELCOME TO SHOTKIT
Enter your email to be sent
today's Welcome Gift:
19 Photography Tools
🔥 Popular NOW:


Shotkit may earn a commission on affiliate links. Learn more.