


How to Remove Background in Photoshop Elements
Photoshop Elements lets you remove the background from your pictures easily and quickly, leaving your subject ready to be placed over a new image. Here's how.
By Jeff Collier
A practical approach to removing the background in your images is using Photoshop Elements.
The background eraser is ideal for erasing pixels on a layer for transparency, but other alternatives are available for different image structures.


Download the latest version of Adobe Photoshop Elements to follow along with this simple tutorial.
Start a free 30-day trial today
In this article, I’ll explain more about the background eraser and how to use Photoshop Elements to remove the background in your images.
If you want to learn more about this exciting software, check out our Photoshop Elements review.
For now, let’s dive into the tutorial.
What Is the Background Eraser in Photoshop Elements?
The background eraser available in Photoshop Elements is a tool that lets the user modify an image’s background to transparency.
It guarantees to remove the background without compromising the foreground object edges. You can adjust the boundaries, sharpness, and transparency range in the tool’s settings for satisfactory results.
The background eraser works by sampling the “hot spot,” which is the color configuration in the brush’s center, then erases the color.
You can also execute color extraction to optimize the edges of any foreground objects and ensure no color halos appear in the final image.
It would be wise to note that the background eraser tool will override the layer’s “lock transparency” settings to provide you with complete control.
Photoshop Elements is easy to use, so let’s take a closer look at the process.
How to Remove the Background in Photoshop Elements?
Removing an image’s background is among the most common applications of Photoshop Elements.
It allows you to focus more on the picture’s subject without worrying about how the backgrounds blend or how the plain white expanses compromise quality.
There are different approaches to removing background in Photoshop Elements, and it all= depends on the background’s complexity.
Here are three practical techniques you can use to remove background in Photoshop Elements;
Deleting Simple Backgrounds
This approach is the simplest and works best for images with a solid background color. Here are the steps to follow when dealing with such a layer;
- Open a Solid Background Image
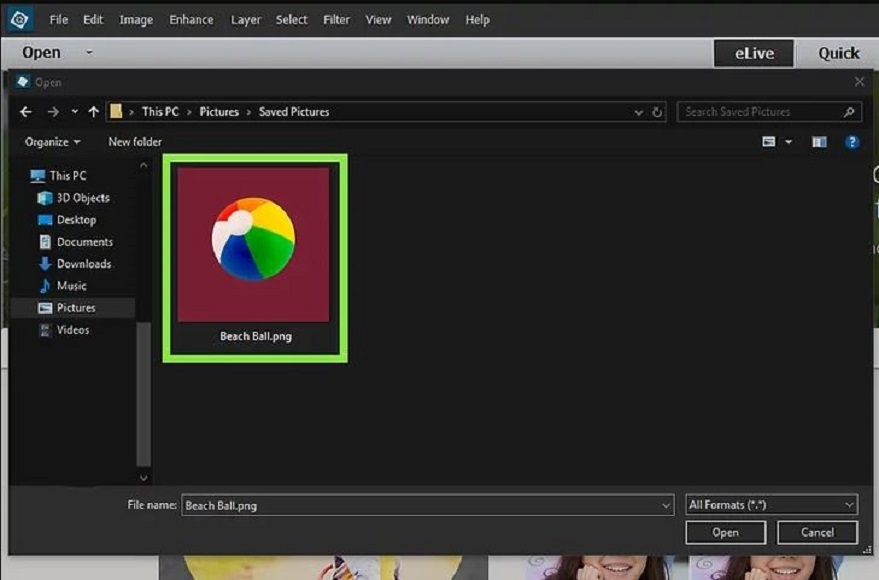
On the Photoshop Elements home page, click File, then select Open. Select the image you want to remove its background and click Open on the Pop-up widow.
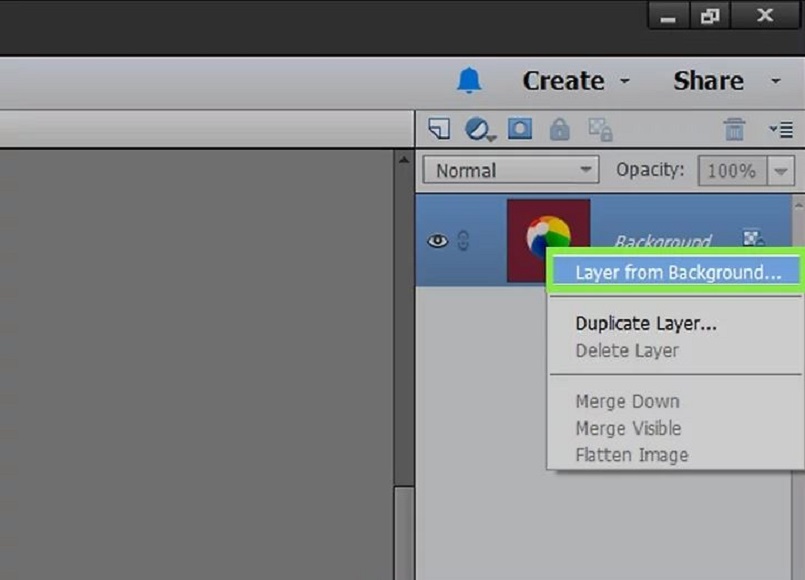
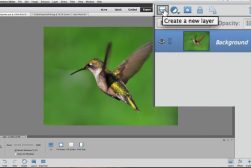
- Create a Background Layer Copy
You’ll observe a Layers panel on the right side of the Photoshop Elements panel.
Mostly, images that aren’t edited only have one layer called “Background.” You must convert it to a standard layer for successful editing and transformation.
To create another layer, right-click the background layer on the Layers window.
Select Layer From Background and press OK without tweaking any configuration options.
- Select the Magic Eraser Tool
This approach uses the Magic Eraser tool to clear the background in your image.
On Photoshop Element’s left toolbar, click the Eraser and choose the Magic Eraser on the screen’s bottom.
- Adjust the Tool’s Settings

Immediately you select the Magic Eraser tool, you’ll observe some settings in the top left corner.
For successful background removal, ensure you configure the settings in the following way;
- The tolerance should be between twenty and thirty. Working with a low tolerance prevents the tool from erasing other parts of the original image.
- Check the Contiguous and Anti-alias boxes.
- Set Opacity to 100%.
- Select the Background
The Magic Eraser tool transforms your background into a transparent layer by removing all the colors clicked on in the image.
Sometimes, the tool might erase something you had no intention of erasing. Pressing Ctrl + Z or Command + Z will undo your last action on the Photoshop Elements platform.
The History panel on the right also helps undo several steps effortlessly.
- Erase the Leftover Background
Images with a solid background are easiest to manipulate. You can effortlessly remove a solid-color background with just one click using Photoshop Elements.
If the background features a mix of colors, you’ll have to select the different regions to delete manually.
You can use the regular eraser tool to achieve a transparent background in images with background parts in the subject’s edges.
Click the circle icon in the upper left corner to open the brush and view the options available.
Choose a solid circle brush and adjust its hardness depending on the image’s structure and background complexity. Set the Hardness level to around 10% if you plan on feathering the edges around the subject.
To adjust the brush’s size, press (or.)
- Save the Image
The final step in this background removal process is saving your work. Ensure you achieve an object with a transparent background before using the following steps to save the image;
- Click File and select Save as
- Enter the file’s name
- Choose an ideal format from the drop-down menu; either PNG, PSD, or GIF
- Click Save
Related: Learn the difference between Photoshop Elements and Lightroom.
Deleting Complex Backgrounds
Complex image backgrounds include those that feature more than one color in their structures.
You’ll need to be familiar with the Background Eraser tool to effectively and successfully delete complex backgrounds in your images.
Here is the process;
- Open Photoshop Elements
The first step is opening the Photoshop Elements software on your computer by clicking its icon.
- Open the Image to Transform
The background eraser tool in Photoshop Elements works best with images that feature a more complex background.
To open the image, click File and choose Open.
Select the image you want to manipulate from the pop-up window and click Open.
- Select the Background Eraser tool
On the left toolbar, you’ll observe an icon resembling an Eraser. Click on it and select the Background Eraser tool at the bottom of the screen.
- Configure your Brushes

The background eraser tool also selects background sections before making them transparent.
You’ll configure your brushes in the top-left panel in Photoshop Elements.
Start by clicking the circle icon to display the brush menu.
It would be wise to consider a solid color brush and set its hardness to 100% to ensure its edges remove as much as its center.
It would be best to consider your image’s expectations before setting the brush’s diameter.
- Set the Limits to Contiguous
Setting the limits to Contiguous means the software will only delete the images selected in the circle.
It will prevent deleting colors inside the photo’s subject and erase the background only, even when the colors are touching.
Use the Dis contiguous option to clear any background coloring inside your image’s subject for quality results.
- Set Low Tolerance
It is crucial you set a low tolerance to limit erasure to areas similar to the sampled color. Setting a high tolerance will have the system erase a broader range of colors.
The ideal tolerance configuration should be between 20 and 30.
- Position the Pointer Close to the Subject’s Edge
The next step involves positioning the pointer near the subject’s edge.
You’ll observe a small circle with some crosshairs. The crosshairs indicate the “hotspot” and will delete the color clicked inside the brush’s circle.
The circle and crosshairs also effectively execute color extraction on the foreground object’s edges to ensure no color halos are in the final image.
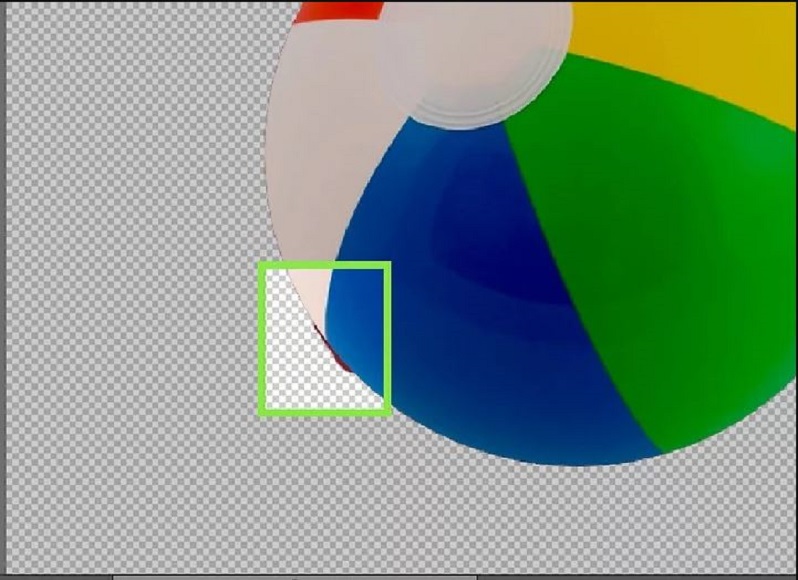
- Click Around the Subject’s Edges
You can use single clicks around the picture’s subject to erase other background regions in the image.
You’ll observe the checkboard pattern appear in the regions you click and drag to indicate transparency.
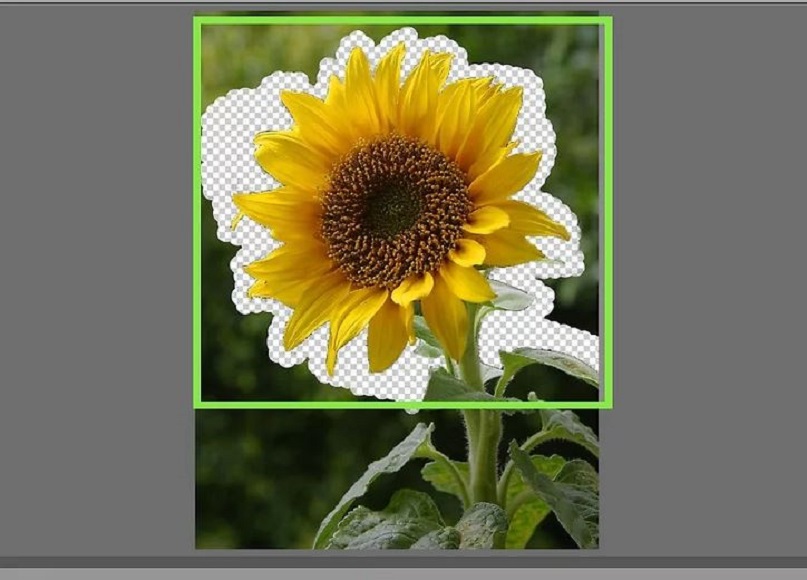
- Increase the Brush Size and Erase the Remaining Background Elements
After working on the background regions bordering the subject photo, you’ll need to increase the eraser brush size and cover the remaining sections.
You can use the regular or background eraser to clear these regions.
Increasing the brush size will allow you to make broader strokes and cover a more significant section with every click and drag.
To adjust the brush size, you can press (or) while you edit. Pressing the Ctrl + Z or Command + Z will allow you to undo any mistakes in the process.
- Save your Image
You must remember to save your work after achieving a transparent background on your image.
Ensure you save it in a transparent-friendly format for easier access.
Deleting Image Background Using the Polygonal Lasso Tool
You can also use the Polygonal Lasso to remove the background in your images.
This method makes it possible for the user to separate the subject and background without deleting any layer, and here is how;
- Open Photoshop Elements and Select the Image
Start by opening the Photoshop Elements software on your device.
Then click Open under File to select the images you want to transform.
- Select the Polygonal Lasso Tool

You’ll see an icon resembling an angular-shaped lasso on the left toolbar.
Click on this icon to access the Lasso tool, and choose the Polygonal Lasso Tool at the bottom.
- Align the Grey Line to the Subject
You’ll have to select your subject using grey lines on the platform before proceeding with the process.
Try to align the grey lines to your subject’s boundaries using your mouse cursor.
- Use the Polygonal Tool to Trace the Subject’s Shape
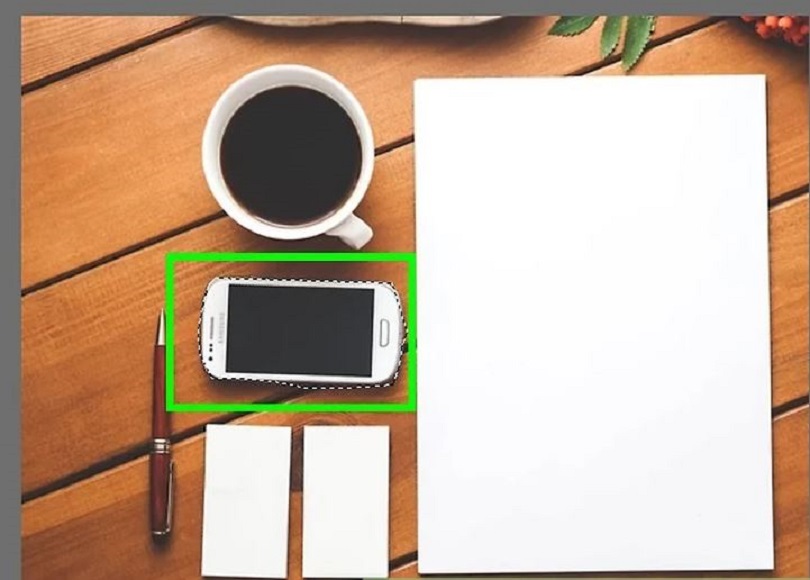
Move the mouse cursor along your subject’s edges and click to achieve a practical outline.
It would be wise to note that you might need more clicks for curved areas to get the perfect shape, while straight lines require fewer clicks.
Take time to ensure these outlines are accurate as possible for optimum results with background removal.
You can also consider using the Magnetic Lasso Tool. This tool is within the Lasso Tool menu and has an icon with a magnet.
The Magnetic Lasso Tool attempts to detect your subject’s edges as you trace its shape.
Although it may not be as accurate as the Polygonal Lasso tool, it saves you time significantly.
- Optimize your Subject Outline
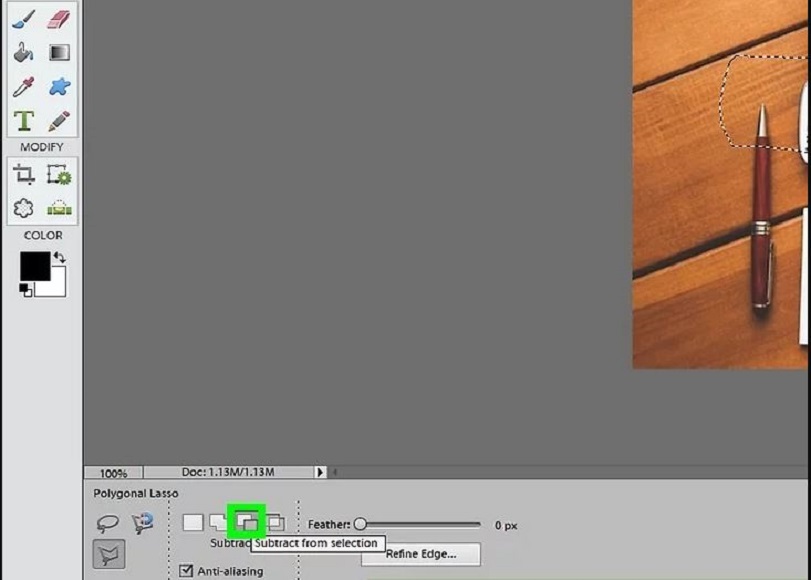
After creating a selection, you must perfect the subject selection by adding or subtracting some regions.
This step is crucial as it helps you identify sections that shouldn’t be part of your selections.
Select the Polygonal Lasso tool to add subject areas and click the icon resembling two joined squares at the screen’s bottom. Use this tool to trace where you’d like to add a selection.
To subtract, you’ll have to click on the icon resembling a square cut from another square.
- Copy and Paste the Selection
The next step involves pasting your selection into a new layer or another image.
Click Edit in the top bar menu and choose copy. Then select Edit and choose Paste.
- Turn the Background Layer Off
You’ll observe an eyeball icon beside each layer on the layer panel.
Click the icon next to the background layer to disable and remove the layer.
- Save your Image
Always save your work in a compatible format every time you finish editing.
I hope you enjoyed the article. You may also be interested in learning how to remove the background using Photoshop.
You'll Also Like These:
 How to Remove Background in Photoshop (4 Foolproof Ways)
 How to Remove Background of an Image Using GIMP (4 Easy Ways)
 7 Best Apps to Change a Picture Background (Add Background to Photos)
 How to Add a Vignette Effect in Photoshop Elements

Jeff Collier is an experienced film photographer who enjoys experimenting with modern digital photography equipment, software and apps. He’s also an ex-world champion triathlete and avid cyclist, clocking hundreds of km each week in the beautiful Tweed Valley of northern NSW, Australia.

WELCOME TO SHOTKIT
Enter your email to be sent
today's Welcome Gift:
19 Photography Tools
🔥 Popular NOW:


Shotkit may earn a commission on affiliate links. Learn more.