


How To Blur Background in Photoshop Elements
Learn how to blur the background in an image using Photoshop Elements with this easy, step-by-step guide.
By Jeff Collier
Blurring the background is one way to use Photoshop Elements to edit your images for a more professional look.


Download the latest version of Adobe Photoshop Elements to follow along with this simple tutorial.
Start a free 30-day trial today
Photoshop Elements is a practical platform that simplifies the editing process. It allows quick background edits with a few clicks of your mouse.
It’s such a great photo editing software for beginners due to its simplicity and affordable pricing.
In this article, I’ll guide you through how to use Photoshop Elements to blur the background of an image.
What Tools Can You Use in Photoshop Elements to Blur Background?
Adobe’s Photoshop Elements is the perfect software for creating, editing, and designing pictures. The software eliminates all the complexities and the steep learning curve.
It has advanced features like AI integration, making even the most complex image manipulations seem less challenging.
Here are some tools I frequently interact with to achieve the desired background effect in my images.
The Blur Tool
Photoshop Elements has a blur tool to reduce the sharpness in different sections of your image.
It’s located in the left toolbar and has a teardrop-shaped icon, which many confuse for a rain effect button.
This tool is among the most straightforward approaches to consider when blurring backgrounds.
After clicking on the raindrop icon, you’ll use the brush tool to make a selection on the image. You’ll need to adjust the blur effect’s strength before blurring.
- Related: How to blur background in Lightroom
The Lasso Tool
The lasso tool is handy in several image manipulation techniques, including blurring the image.
Photoshop Elements provides you with different versions of the tool for specific functionalities.
There’s the regular lasso or the polygonal lasso for straight-edged backgrounds. You can opt for automatic selection by using the magnetic lasso tool.
You can consider the quick mask tool when blurring your background for quick and more precise selection. It would help to note that it’s entirely freehand.
You’ll need to hold down your mouse after clicking on the lasso tool to see the options available and select one.
Using your mouse, draw around the background sections to blur and elect the blur filter on your screen’s top toolbar.
- Related: How to use Photoshop Elements
How to Blur Background in Photoshop Elements?
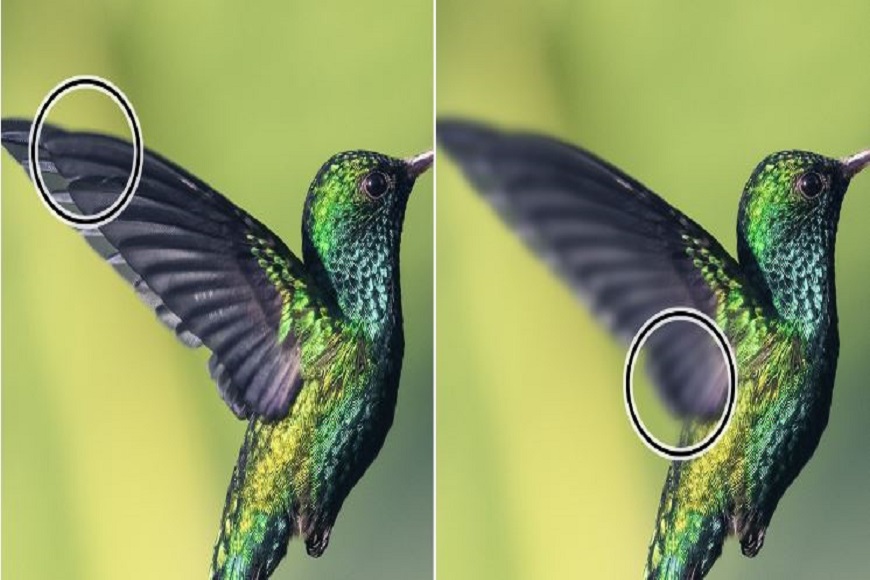
Blurring an image’s background gives it more depth while improving its final appeal.
I’ll show you how to blur an image’s background by manipulating layers in Photoshop Elements. Here is how to do it:
1. Select your Subject
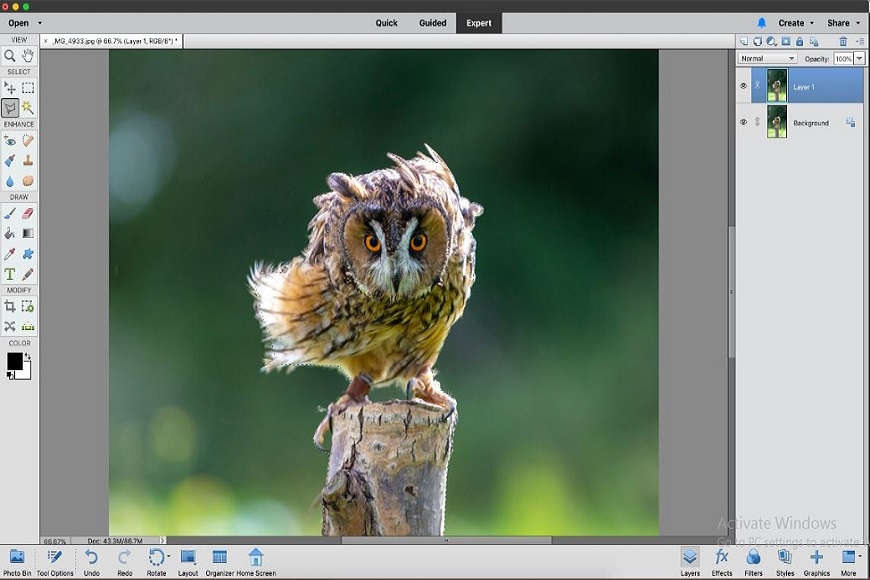
The first thing is opening the image you want to work on in Photoshop Element’s editor window.
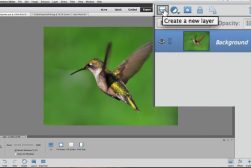
Open the image and press Ctrl/Cmd + J to duplicate the layer.
Click the Lasso tool on the left toolbar, and remember to set Feather to 0px in the Tool Options.
Make a rough selection around your subject using your mouse.
- Related: Lightroom vs Photoshop Elements
2. Refine the Selection

The first selection achieved is a rough layout – you’ll need to refine the subject boundaries before proceeding.
Click Refine Edge in the tool options and set View Mode to Overlay.
Using the Refine Radius tool, paint over the regions missed to include them in your selection.
Adjust the Feather to 1px and set New Layer with Layer Mask as Output To.
3. Add in the Missing Gaps
Go to your new layer, zoom in, and observe for any gaps in the subject, like an unselected space between their legs or fingers.
Select the gaps identified using the Polygonal Lasso Tool and hide them by painting black over them.
4. Blur the Background
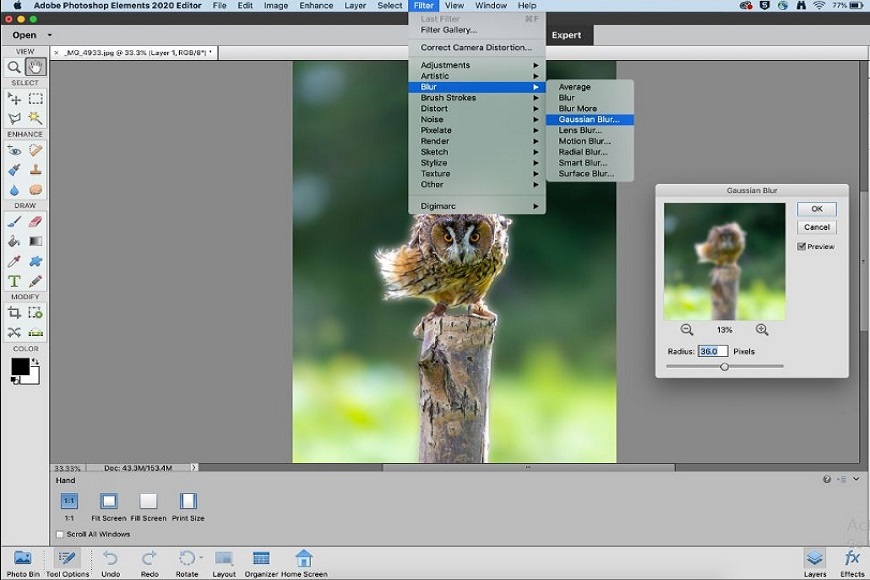
The next step in our background blurring process is implementing the blur effect.
Click on the eye icon in the second layer to reveal it.
Then open Filter, select Blur and choose Gaussian Blur to begin blurring your image.
I recommend setting a value of 36px to achieve more subject separation in your image. Once done, click OK.
5. Remove the Subject

To prevent compromising the quality of the final image, you’ll need to eliminate the subject from the blurred layer.
Click the Clone Stamp Tool in the left toolbar while holding Alt to see the good parts in your image. Paint over the subject until you remove it entirely.
6. Sharpen the Subject’s Face
The final step when blurring an image’s background in Photoshop Elements is sharpening your subject’s face.
Reactivate the top layer by clicking the eye icon beside it and pressing Ctrl/Cmd + J for a duplicate.
Click Filter, select Other, and choose High Pass. Configure the Radius between 2-4px and set Blending to Overlay.
Using your mouse, mask off the entire image except for the face.
After confirming that the edited image meets your preference, save your work.
What Types of Blurs Are Available in Photoshop Elements?
Photoshop Elements provides you with several blurs presets to help reduce sharpness intensities. These are:
Average
The average blur preset identifies the average color of your selection and fills it with that color for a smoother look.
For example, when you select a region with grass in the image, the filter transforms the area into a homogenous green patch.
Blur and Blur More
Blur filters are perfect for softening a selection and prove useful when retouching image elements.
The blur effect focuses on eliminating noise in significant color transition regions. It facilitates smooth transitions by averaging the pixels’ color values next to the shaded areas and hard edges of defined lines.
On the other hand, Blur More guarantees a more substantial blur effect on your selection.
It would be wise to deselect the Lock Transparent Pixels option in the Layers panel before you apply a blur filter.
Gaussian Blur
This blur preset is among the most common filters used in Photoshop Elements to blur the background.
It provides a practical approach to quickly blur a selection using adjustable intensity values.
Note that Gaussian refers to the bell-shaped curved generated by Photoshop Elements.
The Gaussian Blur effect creates a hazy effect on your image by adding low-frequency details.
Luckily, you can adjust the blur radius for the filter to limit how far it searches for distinct pixels to blur.
Lens Blur
You should consider the Lens blur preset if you aim to provide a narrower depth of field effect. It also allows focusing on the subject while blurring distracting features.
The blurred image sections and those enhanced ones significantly depend on several factors. The factors include the layer mask, transparency settings, and the saved selection applied.
The iris shape chosen also affects how the blur appears in your image.
You can use the preview option to observe how the blur effect chances of identifying the best configuration for quality images.
Motion Blur
The Motion blur preset focuses on manipulating pictures of a moving object.
The filter blurs your selection in a specific direction (from -360 to +360 degrees) and specific distances (1 to 999).
It would help to note the effect is analogous and works best on photos with a fixed exposure time.
Some buttons can adjust the blur angle and distance during image manipulation.
Radial Blur
Using the Radial effect produces a soft blur by simulating the blur of a rotating or zooming camera.
The Spin option allows you to specify a degree of rotation while blurring the selection along concentric circular lines.
The other option is the Zoom preset, which blurs along radial lines. Configuring the zooming in or out effect lets you specify an amount from 0 to 100.
Specify your blur’s origin by dragging the pattern in the Blue Center Box.
Smart Blur
You can consider Smart blur to avoid the tedious adjustments in blurring images in Photoshop Elements.
This filter precisely blurs your image and allows you to specify the radius top which the effect will execute blurring.
You also get to set a threshold to determine the ideal state of the different pixel values before elimination, guaranteeing you control over blur quality.
There’s also an option to choose between two modes available. Normal for the entire selection and Edge and Overlay Edge for color transitions along the edges.
Note that Edge Only results in black-and-white edges while Overlay Edge applies white.
Surface Blur
The Surface preset applies blur to your image but preserves its edges.
This filter is helpful for editors who want to create special effects in their images or remove noise and graininess.
Toggling with the Radius options allows you to specify the size of the sampled area for the blur.
A Threshold option also exists to control the tonal values of neighboring pixels diverging from the center pixel value to get the blur effect.
All pixels with tonal value differences below the Threshold value will get eliminated from the blur.
Frequently Asked Questions
What’s the easiest way to blur the background in Photoshop Elements?
You can achieve a blurred background in your image using Photoshop Elements in several ways.
Using the Gaussian Blur filter is the most accessible approach. You can find it in the Filter menu at your screen’s top, and it’s the perfect solution for anyone new to image editing software.
After selecting this filter, you’ll observe a slider that allows you to control the intensity of the applied blurring effect.
How can you sharpen a blurry image in Photoshop Elements?
Using the Sharpen tool in Photoshop Elements, you can make blurry images clearer by sharpening them to enhance their edges. Regardless of the image’s source, sharpening significantly improves the quality of most pictures.
Do take note of the following when sharpening blurred images:
- You cannot correct a severely blurred picture by sharpening
- Always sharpen the image on a separate layer to provide more room for adjustments in the future
- Reduce image noise before sharpening to avoid intensifying the noise even more
- Execute your image sharpening project in small chunks for quality results
Can you blur faces in Photoshop Elements?
Photoshop Elements provides a practical approach to blurring several elements in your images, including faces.
The Gaussian Blur filter is the fastest way to blur faces in this image editing software.
In just a few minutes, you can effortlessly blur faces and objects. You’ll need to know how to use tools like the Marquee and Lasso tool for quality results in your editing efforts.
You'll Also Like These:
 How to Blur Background in Lightroom
 7 Best Apps to Change a Picture Background (Add Background to Photos)
 How to Add a Vignette Effect in Photoshop Elements

WELCOME TO SHOTKIT
Enter your email to be sent
today's Welcome Gift:
19 Photography Tools
🔥 Popular NOW:


Shotkit may earn a commission on affiliate links. Learn more.