


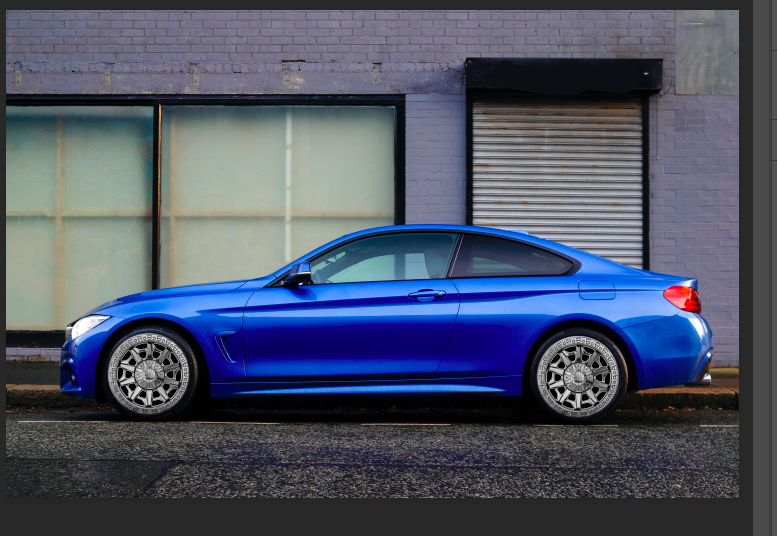
How To Photoshop Wheels On A Car in Record Time
Visualise how a new set of wheels will look on your car using the power of Photoshop. Pimping your ride has never been easier!
By Judyth Satyn
You want to buy new custom wheels for your car, but you don’t know if they’ll look good on it – I get it!
So, why not check out how the custom wheels will look with a visual test run courtesy of Photoshop before committing?
In this tutorial, I’ll show you exactly how to add new wheels to a car image in Photoshop.

Download a free copy of Adobe Photoshop to follow along with this simple tutorial.
How Do You Photoshop Wheels On A Car (6 Easy Steps)
Step 1: Open your Files
The first step is to open two images, one of the car and the other of the wheels.
Navigate to the Top Menu bar and select Edit > Open.
When the car photo is open in your canvas window, open the wheel image.
Navigate to the Top Menu bar and select Edit > Open and locate the wheel file.
See also: How to insert images in Photoshop and car photography tips
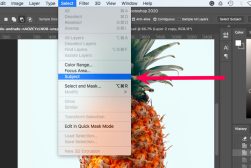
Step 2: Select a Selection Tool
Now we will make a selection around the wheel layer to cut away any unwanted edges.
You can use any selection tool to create the selection, but for this tutorial, we are going to use the Magnetic Lasso Tool.
Navigate to the Toolbar and select the Magnetic Lasso Tool or for the keyboard shortcut press L.
![]()
Click along the edge of the wheel with the Tool’s pointer.
Release the cursor and follow the edge with your cursor, as you move the cursor the Magnetic Lasso Tool will automatically find the edge of the wheel.
When you have completed the selection area press Enter and the area will be surrounded by marching ants.
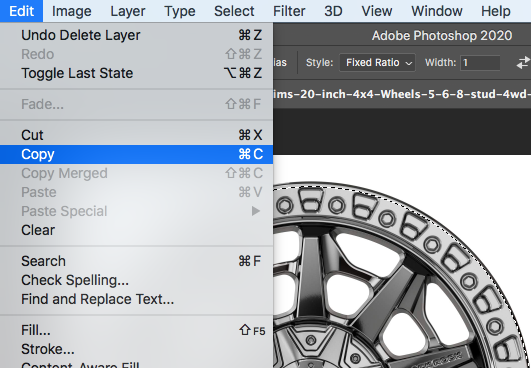
Step 3: Copy
Now you have made the selection around the wheel you can copy the wheel.
Head to the Top Menu bar and select Edit > Copy or for keyboard shortcut press Command and C (for Macs) or Ctl and C (for Windows).
Step 4: Paste
Navigate to the car picture so you can add the chrome wheels to check how they are going to look.
In the Top Menu bar select Edit > Paste or for the keyboard shortcut press V.
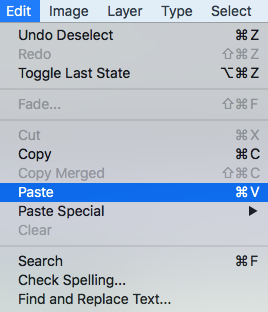
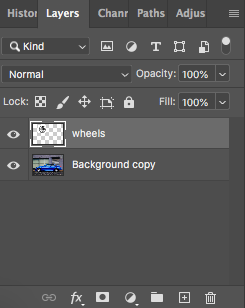
The wheel will now be pasted onto your car image and will appear in the layer panel as a new layer.
Check out my other tutorial if you want to learn more about inserting images in Photoshop.
Step 5: Resize
Undoubtedly the wheels will either be too big or too small to correctly cover the original car’s tyres.
To Resize, we will use Photoshops Transform action.
With the wheel layer active click T on your keyboard or use the Top Menu bar and select Edit > Transform > Scale.
A bounding box will appear around the wheel.

With your cursor drag the corners or sides of the bounding box and resize the wheel.
Step 6: Reposition
When you have the correct size, use the Move Tool to position the wheels.
Press M for the keyboard shortcut or head to the Toolbar to the left of your canvas window and select the Move Tool.
Duplicate the Wheel layer to add another wheel to the second tire.
Make sure the wheel layer is active in the layers Panel and navigate to the Top Menu bar and select Layer > Duplicate Layer.
Reposition the new wheel layer.
Now you have a realistic looking photo of your car with new wheels, you can decide if you like the look.
How to Change the Color of Wheels in Photoshop
You’ve learned how to change the wheels, and that’s great but maybe you just want to change the color of your wheels.
So how do you do this?
To change only the wheel’s color without changing the background layer we will need to use a selection tool.
Select the Magnetic Lasso Tool from the Toolbar and create a selection path around the wheel.
When the wheel is perfectly surrounded by marching ants we can replace the color of the wheels with the Replace Color Tool.
Open the Replace Color Tool by navigating to Image > Adjustments and in the drop-down menu select Replace Color.
When the Replace Color Dialog Panel opens use the Eyedropper to select the color of the wheel from the preview window which you wish to change.
When the color is selected adjust the Hue, Saturation, and Lightness Adjustment Sliders
When you have changed the color to your desired color press Ok.
Learn more about editing color in Photoshop – How to use Selective Color in Photoshop.
You'll Also Like These:
 Car & Mel
 Improve your Car Photography in 2023 (16 PRO Tips)
 How to Make a GIF in Photoshop (+ 8 FREE Methods)
 How to Make a Transparent Background in Photoshop in 3 Easy Steps
 How to Create a Rainbow Gradient in Photoshop (& Save as a Preset)

Judyth is an experienced studio photographer and glass artist. When she isn’t Photoshopping comedians into the bellies of sharks, you can find her cooking delicious treats for her guests.

WELCOME TO SHOTKIT
Enter your email to be sent
today's Welcome Gift:
19 Photography Tools
🔥 Popular NOW:


Shotkit may earn a commission on affiliate links. Learn more.