


How to split a clip in Premiere Pro
Splitting a clip is something you'll need to do hundreds if not thousands of times during your video editing lifetime, so let's learn the best way to do it.
Learning how to split a clip in Premiere Pro is a core editing skill that you’re going to need for any video project.
This guide is going to show you everything you need to know to create multiple clips and split an original clip into as many parts as you need.

Download the latest version of Adobe Premiere Pro to follow along with this simple tutorial.
Start a free 7-day trial today
Premiere Pro is one of Adobe Creative Cloud’s premiere programs and arguably the best video editor available.
I find myself using this video editor more and more as video content becomes a central part of my work behind the camera.
Splitting a video clip with Premiere is something I do multiple times with every video I edit.
In this article, I’ll show you the best way to do it.
Here’s How To Split A Clip In Premiere Pro
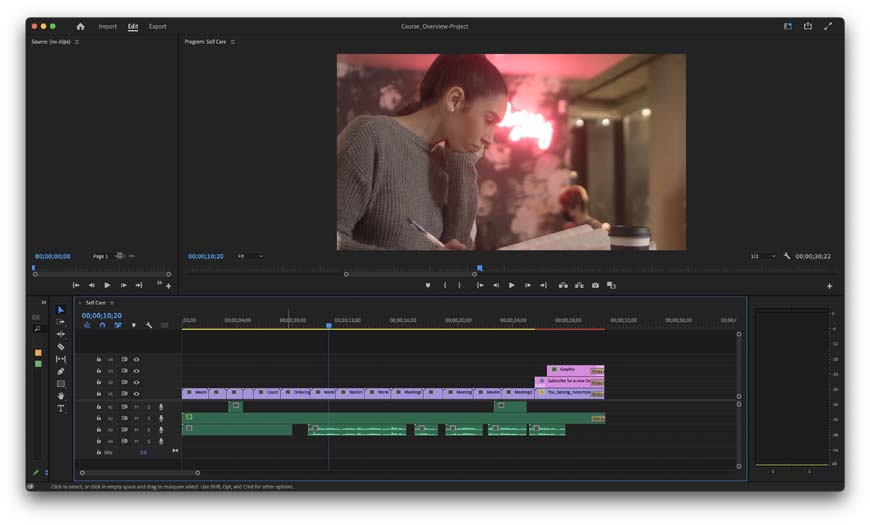
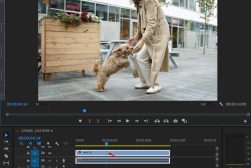
The default Premiere Pro workspace gives you quick access to editing tools.
Splitting clips is a skill you need to pick up right away to make the most out of your video editing.
Being able to turn one clip into two clips lets you perfect cuts, transitions, and match music to the action in your videos.
Splitting a clip is also vital for cutting out unwanted footage or splicing multiple shots together.
If you want to be able to split video clips into something that you can upload to Instagram or TikTok, you’ll need to master these two ways to split clips.
- Related: DaVinci Resolve vs Premiere Pro
Split Clips Using The Razor Tool
The Razor Tool will be your go-to for splitting clips!
The easy way to cut a video clip in Adobe Premiere Pro is to use the Razor tool.
You can switch to the Razor tool by selecting it in the tool window or by pressing the “C” key on your keyboard.
The Razor tool lets you freely select a clip to cut in your timeline. You can cut a single video file or make a larger cut across multiple clips.
The Razor tool is ideal for trimming off unwanted sections of a video or for creating hand-cut splits in your footage.
You don’t need to be worried about “aiming” your cuts with Premiere Pro. The default settings cause the Razor tool to automatically snap to cuts in clips either above or below your selected clip.
Premiere can even automatically line up cuts between audio clips, video clips, and animated sequences.
However, you do need to make sure you’re cutting at the right moment. A misplaced cut can cause serious problems down the line when you’re trying to match cuts for an edit or sync music to your video.
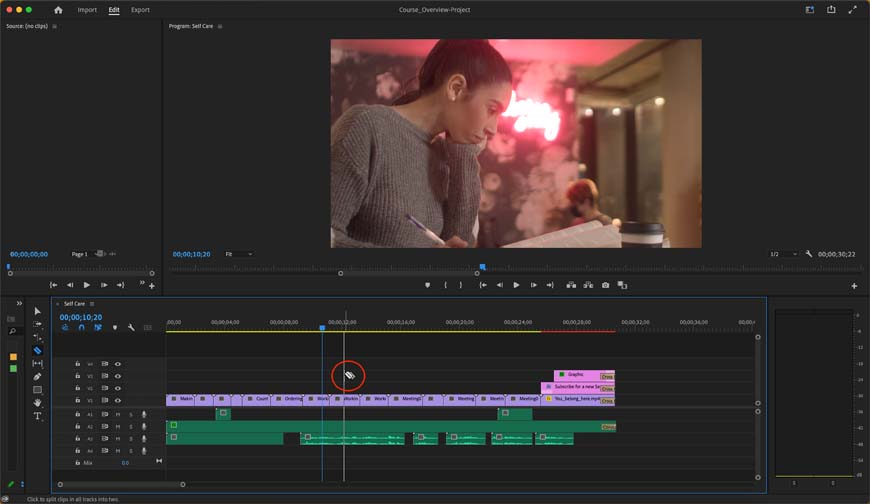
Cut Video Clips At The Current-Time Indicator
A fast way to split a clip in Premiere is just to automatically cut your clips based on the current-time indicator.
The current-time indicator, commonly called the playhead, shows you the exact frame that you’re currently at. Rather than having to “aim” your Razor tool, you can simply split a clip at the exact moment you need one.
You can quickly fire off a split at your Current-Time Indicator by using the CTRL+K or Command+K keyboard shortcuts whether you are on Windows or Mac respectively.
This saves you plenty of time scrubbing through your footage trying to find the right place to cut. If you see the frame where you want to make your cut in the playhead, then tap that keyboard shortcut to split your clips at the exact right moment.
The tradeoff with using the Current-Time Indicator and keyboard shortcut split is that it doesn’t give you the same level of detailed control as the Razor tool. This is more for those quick, sweep splits than it is for precision cleanup jobs.
How To Use Ripple And Trim Tools In Adobe Premiere
You’ve got more tools for shaping up your final cut than just the Razor. You can also use the Ripple Delete and Trim tools to really shape up your work with this video editor.
Ripple Delete
Normally, when you delete a clip, it just leaves a blank void in your workspace. Ripple Delete allows you to delete a clip and then delete the gap it leaves behind in your clips.
You can Ripple Delete a clip by holding Option on Mac, or Control on Windows, while deleting an unwanted clip.
Trim

The Trim Tool is perfect for shortening a clip without making a cut.
Trimming allows you to shorten the length of a clip. You can trim a clip by hovering your mouse pointer over the end of a clip, waiting for the pointer to change to the red and black Trim selector, and then dragging your clip to the desired length.
Clips will automatically snap to match the length of other clips around them. This is a useful feature for quickly shortening the overall length of clips—like when you want to edit the runtime of a video down to a certain length.
You can also use the Program Monitor to get a much more precise trim.
Double-click on the clip you want to trim and then it will appear in the Program Monitor. Now, when you trim that clip, it will automatically display the length of the clip and let you trim with greater precision.
Trim and Ripple Delete are ideal tools for finishing up a video. I get the most mileage out of these tools when I’m cleaning up final edits, but I also frequently use Trim when I’m reworking clips during my initial pass.
- Related: How to add test in Premiere Pro
Keyboard Shortcuts For Splitting A Video Clip In Premiere Pro
Creating an efficient editing workflow for yourself is all about mastering Adobe keyboard shortcuts. These are the three keyboard shortcuts you’ll be using all the time when you’re splitting clips.
- C—Switches your active tool to the Razor tool
- Ctrl+K (Windows) or Command+K (Mac)—Automatically cuts your clips at the Current-Time Indicator
- Option + Delete for Mac or Ctrl + Delete for Windows—Switch to the Ripple Delete Tool
- V—Changes the active tool to the Select Tool (Always switch back to the Select Tool after using the Razor to avoid accidental cuts)
How To Display The Toolbar In Adobe Premiere
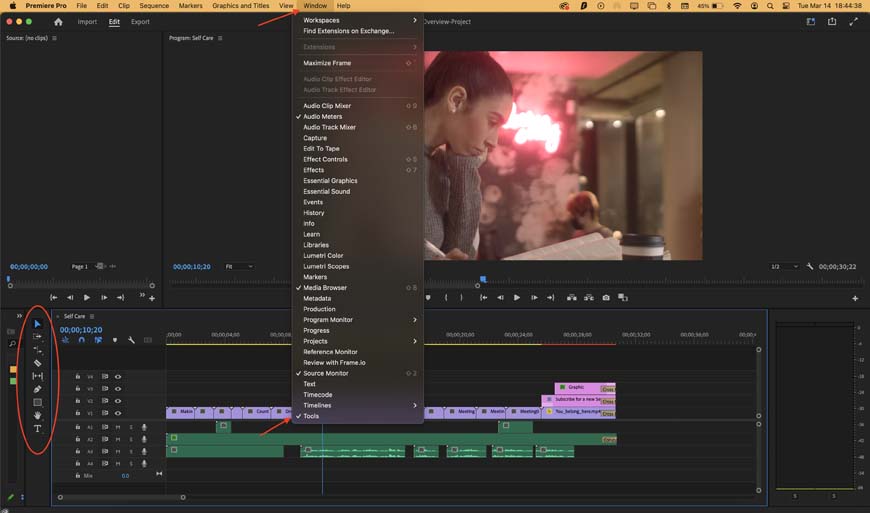
Never worry about losing your Premiere Pro tools, you can always get them back in the Windows menu.
In order to use the razor tool effectively, you’ll need to make sure the Tool window is open on your workspace.
This window is open by default, but it might get closed on accident while you’re editing.
You can open the Tools menu by clicking on Windows > Tools. It should be open on the left-hand side of your editing workspace.
Related: Adobe Premiere Pro review
Wrapping Up Splitting Video Clips In Premiere Pro
Now you’re ready to split clips in Adobe Premiere Pro, but this is just the tip of the video editing iceberg.
Photographers are starting to make more use of Adobe’s video editing programs as they branch out into TikTok, Instagram Reels, and other video platforms.
These video editing guides will help you make the jump from still photographer to videographer in no time!
Let us know your favorite Premiere Pro tips in the comments and don’t forget to check out our other articles for more tips on using Adobe CC programs!
You'll Also Like These:
 DaVinci Resolve vs Premiere Pro (Key Differences to Know)
 How to Export Video from Premiere Pro (Best Rendering Settings)
 How to zoom in on Premiere Pro (3 Simple Methods)
 How to add text into Premiere Pro

Ashley is a photographer, writer, and film critic. When Ashley’s not writing essays on photography, cinema, and theory, he’s out taking pictures with retro film cameras.

WELCOME TO SHOTKIT
Enter your email to be sent
today's Welcome Gift:
19 Photography Tools
🔥 Popular NOW:


Shotkit may earn a commission on affiliate links. Learn more.