How to Use Adobe Audition in 2023 for Better Audio
Learn how to create, mix and design sound effects with the industry's number-one digital audio editing software, Adobe Audition.
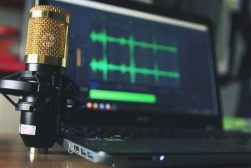
I’m going to show you how to use Adobe Audition to record better audio in 2023.
Audition might seem daunting at first, but it’s actually really straightforward once you’ve had a quick tour around the features.
I use Audition several times a week to carry out various audio recording tasks.
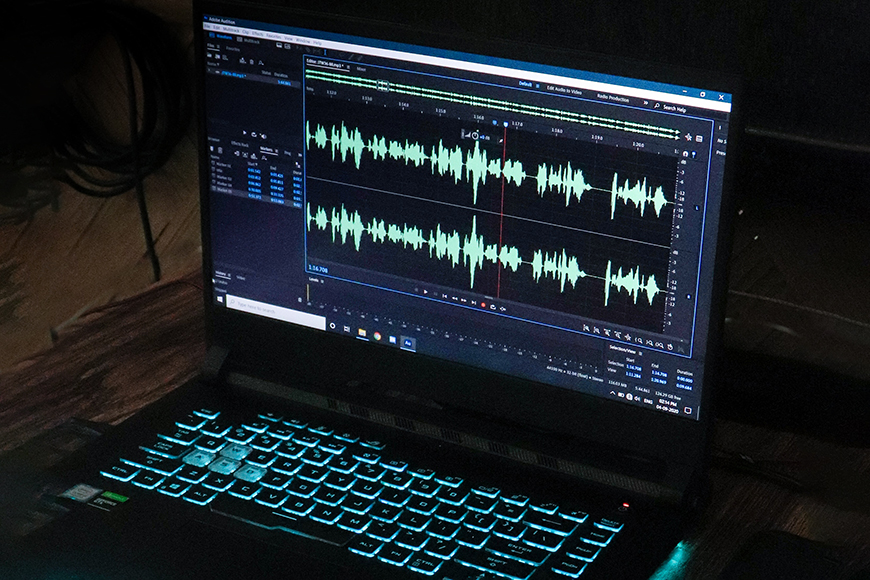

Great features, regular updates, cloud storage - the Single Plan is the most affordable way to get Audition.
Whether I’m working on a videography project or doing audio for a podcast, this is among my top three Adobe programs right there, next to Lightroom and Premiere Pro.
It’s time you dove into the powerful audio editing app that came with your Creative Cloud subscription.
Here’s your crash course for Audition.
What is Adobe Audition?
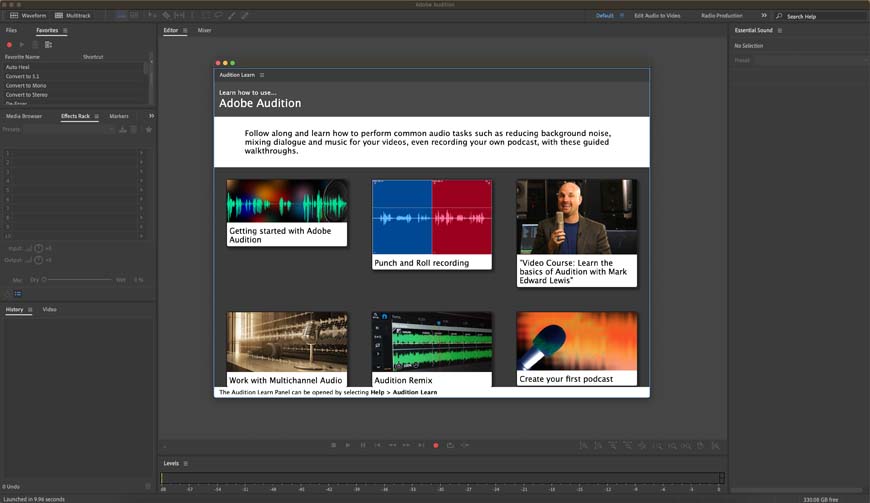
Adobe Audition comes packaged with great beginner tutorials
- Designed to work with other Adobe products like Premiere Pro
- Syncs to Creative Cloud
- Comes prepackaged with some Adobe CC subscriptions
- Used by professional documentarians, musicians, podcasters, and more
- Comprehensive suite of editing tools
- The best audio repair and restore tools out there
- Audition is just as pricey as other Adobe programs
- Audition notably lacks MIDI support
Adobe Audition is a Digital Audio Workstation—more commonly known as a DAW.
Audition gives you the tools you need to edit, mix, and restore audio files. It works just as well on the spoken word as it does on music.
This DAW is a capable tool for anyone working with MP3, WAV, and other file types.
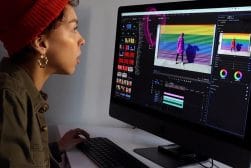
Audition can integrate with Premiere Pro, which can help you take your videos to a new level.
You might be wondering what Audition has to do with photography.
With the prevalence of videography and the rise of social media videos and podcasts, it pays to have a working knowledge of audio editing software that comes packaged with your other Adobe programs.
System Requirements for Adobe Audition
Audition requires much less processing power than Adobe Premiere, After Effects, or even Photoshop.
Here’s what your Windows or Mac computer will need to fire up this software.
Windows
- Processor—Multicore processor with 64-bit support
- Operating system—Microsoft® Windows 10 (64-bit) V20H2 or later
- RAM—4GB of RAM
- Hard disk space—4GB of available hard-disk space for installation
- Display—1920×1080 or larger display
- OpenGL—OpenGL 2.0 capable system
- Sound card—Sound card compatible with ASIO protocol, WASAPI, or Microsoft WDM/MME
Mac
- Processor—Multicore processor with 64-bit support
- Operating system—macOS Big Sur v11.0 or later
- RAM—4GB of RAM
- Hard disk space—4GB of available hard-disk space for installation
- Display—1920×1080 or larger display
- OpenGL—OpenGL 2.0–capable system; optional GPU for optimum video playback performance
In my experience, I recommend having a bit more than the bare minimum of 4GB of RAM. Audition starts to demand a little more power once you’re working with larger and more complicated multi-track sessions.
How do I start editing in Adobe Audition?
Audition can feel like a big leap, especially if you’re used to editing photo and video. I got my start after years of working with Photoshop, and now I’m an Audition pro.
Once you’ve read through this quick-start guide, this program will be just as natural to you as your favorite photo editing tools.
Setting Up Your Audio Session
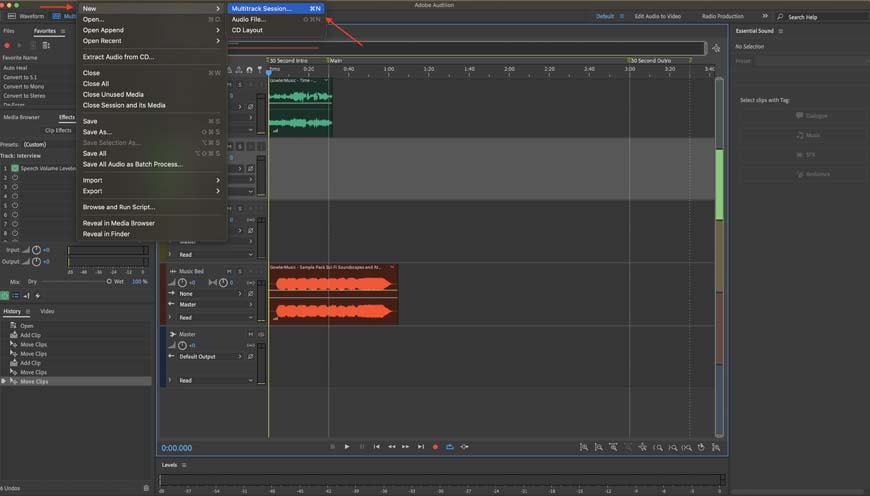
You can quickly start a new Audition session from the menu
There are a few steps that you need to go through before you hit record on your first session. When you first open Audition, you’ll have to choose between recording a multitrack session or a single audio file.
Multitrack sessions are great for podcasts with guests or music. Multitrack is also where you want to be if you’re doing the final mixing and mastering on a song.
A single audio file is ideal when you just need to record your voice. An example of that might be recording the voice-over for a video that you’ll post to social media.
You’re also going to need to decide on your recording channel. The mono channel is ideal when it’s just your voice for spoken word recordings, while stereo is perfect for music or vocals.
You also have options to change things like the bit depth, but your best bet is to leave that where it is at 32 (float)—for now. (That’s the industry standard for recording, and everything else is a bit more specialized.)
Selecting Recording Hardware
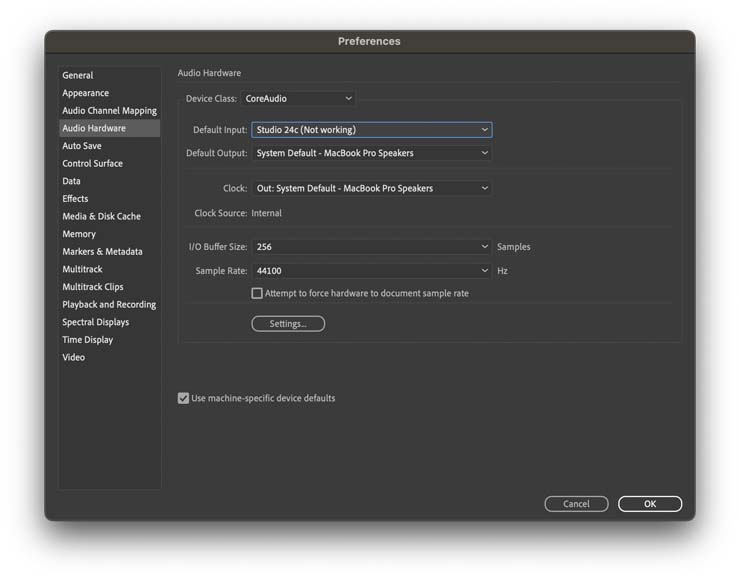
Always double-check your audio hardware settings in the Preferences menu before hitting record!
There’s nothing more disappointing than recording an hour-long session only to find out that you selected your laptop’s on-board microphone rather than the expensive recording equipment that you should have picked when you first started.
Here’s how you can always make sure you’re using the right equipment to record your session.
- Select Adobe Audition
- Open the Settings menu
- Select Audio Hardware
- Choose the audio equipment you want to use for this recording
Recording Your First Audio Track with Audition
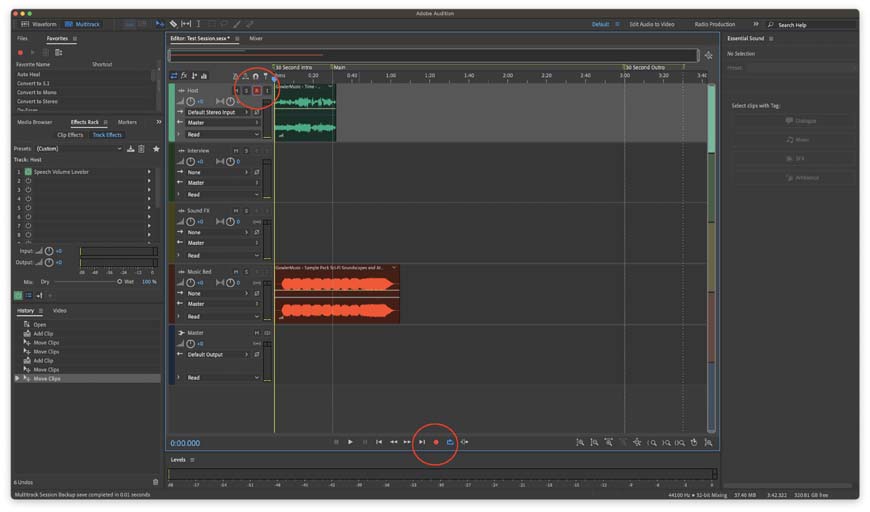
You need to “arm” tracks before you can record them
Before you can hit the red record button, you need to “arm” your tracks. Yes, it sounds very cool, but all it does is get the track ready for recording.
You can arm your track by clicking the “R” button right next to your track. You’ll have to do this for each input you’ll be recording in this session.
Finally, all you need to do is hit the circular, red record button on the bottom of your Audition workstation to start rolling!
Remember, if you don’t see a waveform generating on a track, it’s not recording.
Mastering Your Recordings with Audition
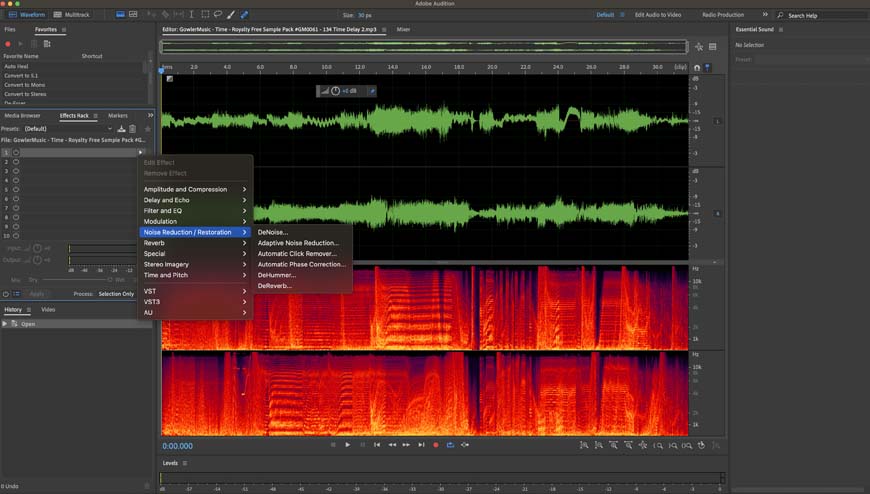
Mastering lets you clean up any noise and perfect your recording
Now we’re getting into the fun stuff. Mastering and mixing are the two essential components of editing any audio file.
Mastering refers to any editing that you do to a single audio track. This is a fine-tuning process that allows you to get rid of any audio errors as well as add any special effects.
You’ll do your mastering on the waveform screen. This lets you focus on a single track before you head over to the multitrack screen and mix it all together.
Here are a few of the audio mastering tools in Audition that you should get to know.
- Auto Heal—The Auto Heal tool is going to be the one most familiar to Photoshop users because it lets you use a brush to paint out blemishes in your audio recording
- Convert To—You’ll have options to convert your file to mono or stereo as needed
- De-Noise—De-Noise is an automatic tool that analyzes your audio recording and removes any unwanted noise. You can have this automatic tool go as heavy, or as light, as you want on your audio recording
- Normalize—Normalizing sets of peak for your audio file which means that any sound higher than that peak is going to be lowered while quieter sounds are boosted
- Compression—Compression might not be great for photography, but it’s pretty standard in audio editing. Compression reduces the difference between the highs and the lows so that the audio is more present and consistent throughout the entire recording
- Silence—Shift Q is the keyboard shortcut for Silence and it’s going to become your best friend as you highlight and remove unwanted coughs and bad takes from your recording
- Equalizer—You can think of the Equalizer as the curves tool in Lightroom. This lets you edit specific frequencies individually so that you can do things like boost the base or smooth out your midtones
- Fade—Fade In and Fade Out gradually increase or decrease the volume of an audio element. As a general rule, always fade in new audio elements unless you’re mixing music with specific artistic goals
- Special Effects—This wouldn’t be an Adobe program without a wealth of built-in special effects tools. Audition comes with everything from built-in presets for old-timey radio vocals to distortion effects that make your voice sound like a robot and everything in between
Take the time to explore all of these editing tools and special effects while you’re mastering your tracks. Remember, if you don’t like something you can always hit “Control Z” and undo your last edit.
Mixing Your Final Track in Audition Using Multitrack Editing
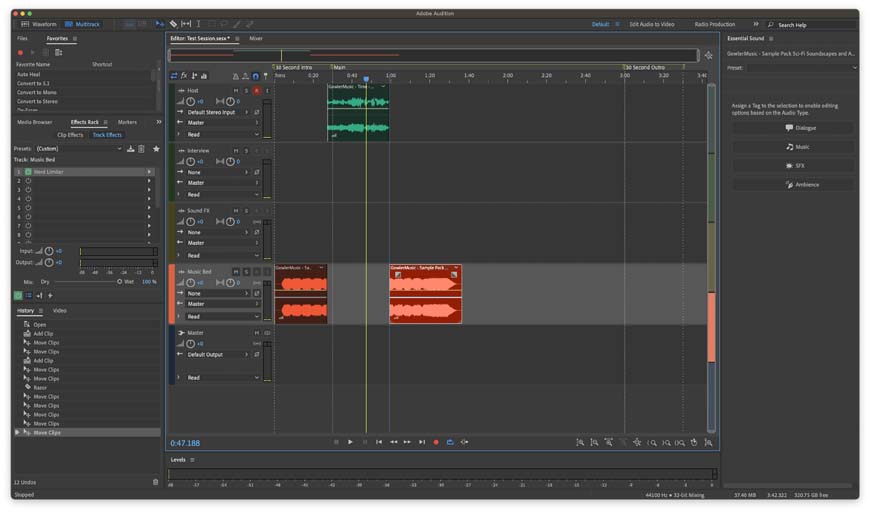
Mixing lets you rearrange and blend separate audio tracks
Mixing your final track is going to be done on the multitrack editing workstation.
This allows you to mix and edit multiple tracks together. Essentially, every podcast, radio program, and song you’ve ever heard was put together using multitrack editing.
Multitrack editing is going to allow you to weave together several files so that they become one complete track.
The controls here are going to feel right at home to anyone who’s worked with Adobe Premiere Pro or Adobe After Effects. You’ll have a timeline of clips that you can drag, drop, and cut to your heart’s content.
You can also use some of the effects that I talked about in the mastering section during multi-track editing.
In fact, I prefer to add any special effects here in multitrack editing since it’s non-destructive and you can walk back your edits a lot easier—more on destructive editing later.
Once you finish mixing your recording, you are ready to export your file.
Adobe Audition gives you countless file types to choose from when exporting your recording. MP3 and WAV are two of the most popular, but there are a few others which are ideal for adding audio to video projects.
2 Key Tips for Mastering Adobe Audition
Now that you’ve gotten a tour of the three basic editing features inside of Audition, let’s take a look at two tips that you need to know before you hit record on your first session.
Develop Your Project Storage System
One of the big downsides to Adobe Audition is that it doesn’t come with the same types of library or catalog tools that you get with other programs like Lightroom.
Yes, you can store your projects to the cloud, but you’ll still need to come up with a good way of organizing your audio projects.
I strongly recommend coming up with a system that works for you personally and works with the types of projects that you’ll be creating audio for.
Videographers might want to store all of their Adobe Audition sessions inside the folder that contains all of their raw footage. In contrast, individuals recording audio only might want to organize things by date.
No matter which way you go about it, it’s up to you to create a file storage system that’s going to make sense for you in the long run.
Destructive VS Non-Destructive Editing
Just like with photo editing, there are some destructive and non-destructive editing tools built into Adobe Audition.
If this is your first time encountering this lingo, know that destructive editing creates permanent changes to your files, while non-destructive editing creates changes that you can walk back to at any time.
Here’s a good shorthand that I always keep in mind so that I know whether my edits are destructive or non-destructive.
Whenever you are editing or recording in the waveform workstation, you’ll be working with destructive editing. You’ve got a limited number of “Control Z’s” that you can press—otherwise, your changes are permanent.
The multitrack editing workstation features exclusively non-destructive editing. Audition will remember every change that you make. This means that you have an endless ability to take back steps if you’ve made mistakes during your workflow.
Why Photographers Use Audition
There are plenty of important reasons why photographers should get familiar with Audition. I’ll cover the two that got me started.
Picking up clients and getting noticed on social media has gotten a lot more difficult for traditional photographers.
After the pivot to video, it’s expected that we photographers should be at least familiar with putting together some basic video content.
Audition can help you get better-sounding audio whether you’re trying your luck with TikTok videos or you’re making your own “How To” guides on your YouTube channel.
Adobe Audition is also going to give you the resources that you need to create professionally recorded audio.
This is ideal if you want to start a photography podcast or if you’re just looking to record a professional voiceover for your video footage.
Audition also naturally interfaces with other Adobe programs, which makes it the perfect choice for an audio editing tool if you’re already using software like Photoshop or After Effects.
After years of editing photo and video, I thought why not learn one of Adobe’s other flagship apps.
Adobe Audition FAQ
How Long Does it Take to Learn Adobe Audition?
You can pick up the basics of Adobe Audition in a single day, but it takes years to master this complicated program fully. There are built-in tutorials as well as guides online that can help you fine-tune your audio editing skills.
Is it easy to learn Adobe Audition?
Adobe Audition is mostly beginner-friendly thanks to the included tutorials and the wealth of guides you can find online.
Once you’ve mastered the basics, you can take a deep dive into more complicated features. Just like other Adobe programs, Audition is just as easy or complicated as you need it to be.
Is Adobe Audition Free?
Adobe Audition is not free. You can purchase Adobe Audition through the Adobe Creative Cloud subscription. Adobe often has a free trial available for Audition and other software.
You can also pick up Adobe software at a discount if you’re a student, teacher, or eligible for other cost-saving programs. Check here to see if you qualify.
Is Adobe Audition Good For Making Music
Adobe Audition is a good DAW for musicians, whether you’re a hobbyist or a working professional. It’s best used for post-production or when working with MP3 or WAV files.
However, there are better options out there if you’re looking for a DAW that can compose music rather than just edit and mix it.
Final Words for Audition Beginners
Knowing how to use Adobe Audition isn’t as hard as it might seem for a first-time audio producer.
You’ll find that you’re mastering and mixing tracks like a pro in no time since you’ve read this guide.
Now that you know how to edit audio in Audition let us know the first project that you’re going to work on.


Great features, regular updates, cloud storage - the Single Plan is the most affordable way to get Audition.


