


How to Clone in Luminar Neo to Remove Objects FAST
Cloning is a useful way to quickly and effectively remove unwanted objects from your photos. Using the power of AI, Luminar Neo makes this dead simple.
By Andrew Dilks
Learning how to clone in Luminar Neo is an essential technique for removing unwanted elements from your photographs, whether it’s a stranger who wandered into your shot or unsightly power cables.


Download the latest version of Luminar Neo to follow along with this simple tutorial.
Use code shotkit10neo to save $10
As a landscape photographer, I’ve used the clone Tool to help transform a good image into a great one, deleting features from a photograph to deliver a more pleasing composition.
In this tutorial, I’ll break down how you can use the Clone Tool in Luminar Neo to remove a variety of details and get the best results while using this technique.
Related:
How to Remove Objects from your Photos using Clone in Luminar Neo
The clone tool in Luminar Neo is incredibly easy to use. With the ability to fine-tune the size and softness of the tool’s versatile brush, it makes removing unwanted objects a pleasure rather than a chore.
You can use it to change sky and landscape elements, as well as merge these elements with people and objects to remove them from the image altogether.
To use the Clone Tool in Luminar Neo to achieve these results, simply follow these steps:
Select the Clone option in the Edit settings
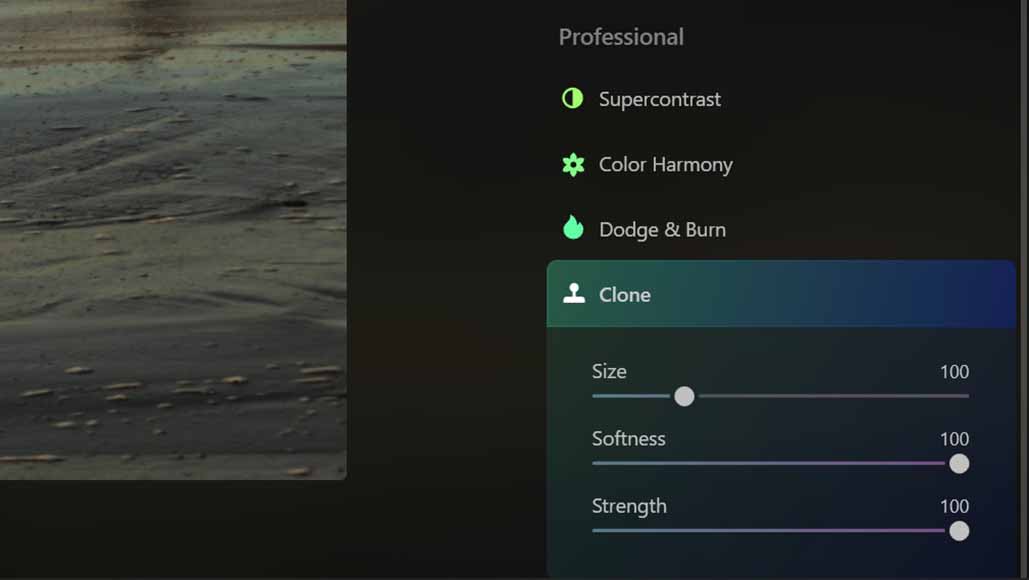
The Clone Tool is easily accessed via the Edit menu
After choosing the image you wish to apply the Clone Tool to from your image Catalog, head over to the Edit tab where you can select the tool from the list of options.
You’ll find this tool at the bottom of the menu in the list of Professional tools that includes Supercontrast, Color Harmony, and Dodge & Burn.
The Clone Tool is the final option in the Professional tools menu, so click on this to bring up the tool’s options.
Adjust the size, softness, and strength of the Clone Tool
Next, you’ll need to adjust the size, softness, and strength of the Clone Tool before you apply it to your photograph and select the area to clone.
Size increases or decreases the circumference of the tool’s circle, which softness can be altered to fine-tune how the edges of the tool blend into their surroundings.
Likewise, strength will weaken or strengthen the effect of the clone tool, with lower strength used if you don’t want the cloned area to replace the subject completely.
A general tip for these settings is that a slightly softer clone tool will lead to less jarring results, and if you want to remove an element from the image completely, you should keep the strength up at its full setting.
Choose the source element of the image you wish to clone
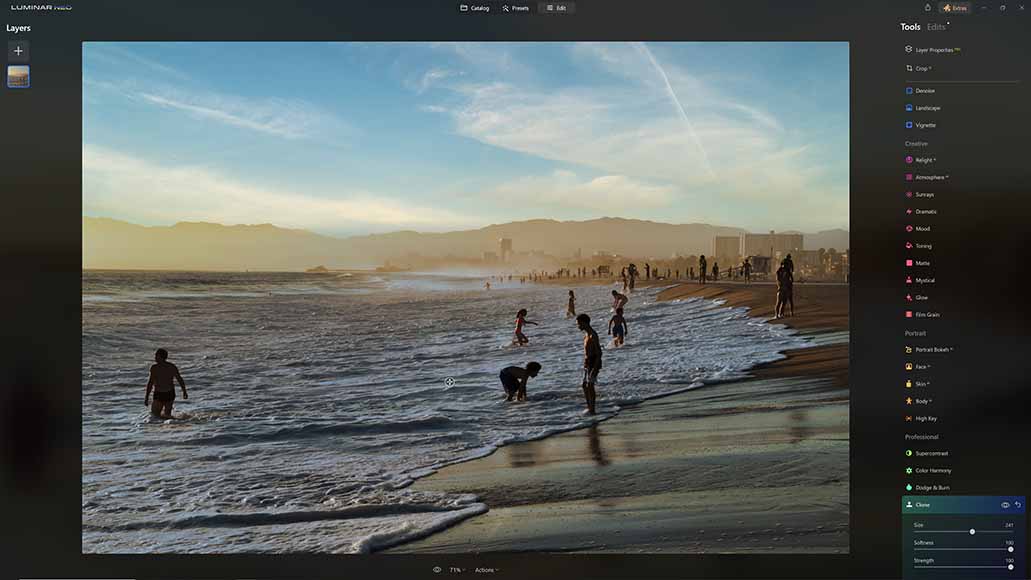
Selecting the area to clone is easy with the intuitive crosshair
With the size, strength, and softness of the Clone Tool, set, you can now select the area you wish to clone and repeat over the unwanted elements of your image.
To do this, click on the area you wish to clone using the crosshair, and Luminar Neo will log this section for the next step.
If you’re new to using the Clone Tool, spend a little time playing around with the initial tool settings, and try different sizes and softness levels to tailor the tool to different image elements.
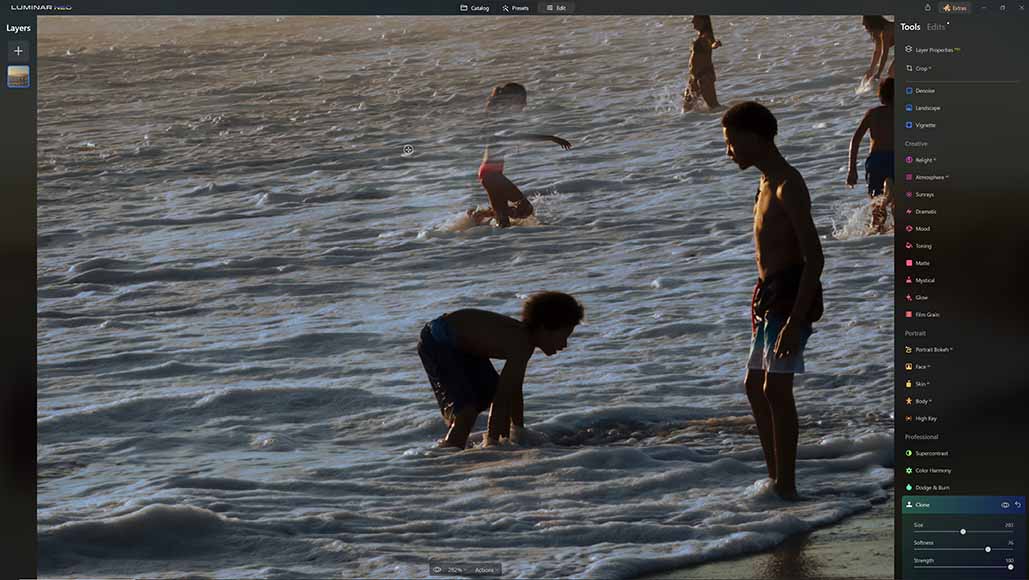
Apply the Clone Tool to the area you wish to remove

To apply the clone, simply click on the area you wish to remove
Once you’ve selected the area you wish to clone, move the cursor over the element you wish to remove and click again to stamp the cloned area in this position.
You’ll notice the smaller crosshair moves in parallel with the larger clone stamp icon, and as you move the cursor around to apply the clone again, it will correspond to the position of the small crosshair.
Pay attention to where this crosshair is, as it may lead you to clone inappropriate areas of the image over the subject you wish to remove.
Fine-tune the Clone Tool when necessary
Zoom in on the image to apply the clone tool to the details
If you’re cloning and removing multiple elements in an image or smaller details in the background, you can zoom in on the image to fine-tune the process for accurate results.
You may find that the areas to the sides of subjects and elements you wish to remove are different, so resetting the area to clone according to its proximity to the subject will make sure the background merges well when fully cloned.
Creating duplicates of elements within an image can also be easily achieved with the Clone Tool by simply adjusting the brush size to match the element you wish to clone and stamping it where you wish it to appear.
How to clone in Luminar Neo – frequently asked questions
I’ve covered everything about using the Clone Tool in Luminar Neo in detail, but these answers to frequently asked questions will concisely clear up some of the key points.
Where is the Clone tool in Luminar 4?
If you’re using Luminar 4 rather than Luminar Neo, you can locate the Clone Tool, referred to as the Clone and Stamp Tool, by selecting the Canvas Tools group in the Edit sidebar.
This can also be accessed by pressing Cmd+J (macOS) or Ctrl+J if using the Windows version of the software, allowing you to use the tool as outlined in the tutorial above.
Is there a clone stamp in Luminar Neo?
There may be some confusion if you’re coming to Luminar Neo after using a previous version, where the Clone Tool was known as the Clone and Stamp Tool by users.
Don’t worry; this is the same tool you would use in Luminar Neo, where it is referred to as simply the Clone Tool in the Edit options.
You'll Also Like These:


Andy Dilks is an experienced landscape photographer and former games industry veteran. When he isn’t taking photos or reviewing the latest tech gadgets, you can find him hiking and wild camping in the Peak District.

WELCOME TO SHOTKIT
Enter your email to be sent
today's Welcome Gift:
19 Photography Tools
🔥 Popular NOW:


Shotkit may earn a commission on affiliate links. Learn more.