Capture One for iPad Review: Powerful Mobile Photo Editing App
It's great that Capture One is a leader in desktop applications, but the question today is how does Capture One for iPad fair in the modern workflow?
By Athol Hill | Last Updated: September 12, 2022
iPads have come a long way since the early versions, and modern iPads use the same chips as Laptops. As a result, it’s not surprising that photo editing tools include iPad applications in their list of available workflow options.
Some users have switched to iPads for their entire workflow, which may seem extreme for some. I still believe that hybrid workflows are the best, which is one of the reasons why more often than not, I have my M2 MacBook Air with me.
I won’t get into the argument of hybrid 2-in-1 options with Windows for this review; we are reviewing an iPad app, making it irrelevant. This isn’t a Mac vs PC review.
Capture One is one of the leading desktop applications on the market at the moment, and it’s currently my photo management tool for 90% of my editing. The other 10% is the heavier editing I do in Photoshop.
It’s great that Capture One is a leader in desktop applications, but the question today is how does Capture One for iPad fair in the modern workflow?
I’ll try to cover this in two areas to ensure that prospective users can make an informed decision:
- How does Capture One for iPad work for those looking for a hybrid workflow where you intend to do light editing on the iPad and heavier editing on a desktop later?
- How does Capture One for iPad work for those looking for an iPad-only workflow, where all your editing is conducted on an iPad?
Let’s take a closer look at my review of Capture One for iPad.
What is Capture One for iPad?
Capture One for iPad is an iPad photo editing application for photographers looking to edit photos on their mobile devices. It offers the ability to import images from various sources and edit them directly on the iPad before exporting them back to Capture One or to a final image for distribution.
The application is available only on iPad and does not require a desktop version of the software, so it can be used in the stand-alone form if required. It also caters for most raw camera formats allowing you to edit the raw file directly rather than converting it to JPG or other formats where quality may be lost.
User Interface
Capture One is one of the better user interfaces in their desktop version, so it should come as no surprise that Capture One did an outstanding job on the iPad version. It has a minimalist look whilst remaining functional.
I equate it a little to Apple and their design ethos where something doesn’t have to be ugly to be functional. Everything is where you expect to find it, and the methods to enhance images don’t require instruction. It’s simply working it out yourself.
I find the real test of anything is whether you must use a manual or whether feeling your way around will eventually get you there. So many applications cram every conceivable option in a way that makes it hard to go through menus to find what you need. (I’m looking at you, Sony)
Like any application, it does still take some getting used to, and that’s nothing to do with whether it’s intuitive or not; it’s simply getting used to doing things with a different UI. You’ll find yourself adjusting up instead of down or down instead of up, but you get there quickly.
I’ve included a quick 1-minute edit (speeded up) to show the process of a quick edit in the application. The video excludes the import and export processes, which are also intuitive.
Features
Import, Organise and ratings

Capture One shows thumbnails to help you during the selection process for importing.
Under this section, I’ve grouped the core organisation features we find available in most applications from an import and management of images. Capture One seems to be as expected in this area with the elements covered.
The importing process is relatively simple. Capture One for iPad allows you to import from many sources, including Dropbox and Microsoft OneDrive. That means you don’t have to have the images with you at the time.

The sources available for importing should keep any user happy.
Given the remote nature of the files when using cloud-based storage like dropbox, the thumbnails do take a little while to appear. This is considerably faster with items on local storage.
From an importing perspective, the process is seamless and self-explanatory. I would prefer the word “Import” over “Open” when adding images to the library, but that may be a personal preference issue rather than a broad criticism. Feel free to let me know if you agree.
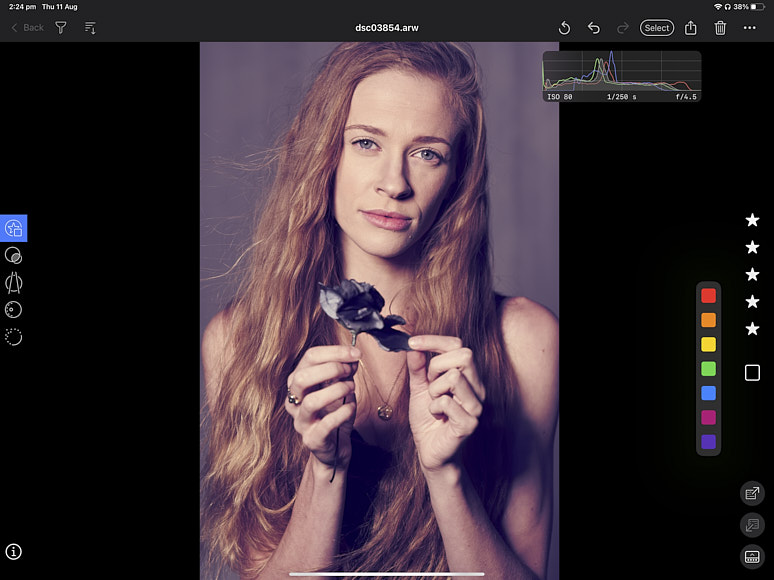
After importing, you can rate any images using the stars and add colour flags if required. I’m a big advocate of colours in my processing and typically have them attached to shortcuts on my keyboard. When I import on my desktop, I rate based on image quality, and I use the colours to gauge where I am in an image processing workflow with Capture One.
Nothing indicates untouched, orange would indicate I’ve started processing and green would indicate completed processing with the final result exported. I use yellow to indicate I am now working with a different copy of the image, for example, when I create a copy of the raw file for processing in photoshop with some frequency separation or other heavier processing.
The info button in the bottom left corner will show basic image information (file name, date, resolution, file size) but doesn’t seem to show any EXIF data. I would expect them to add the EXIF data in future as this is an important item for photographers.
Aside from that, there is the option to delete images if required.
Quick Editing

White balance offers the dropper option but not the pre-selections via dropdown.
I equate quick edits to what you would do to get an image out quickly as a rough draft. That means a light touch two-minute edit with little to no photoshop work unless there is a major concern that may detract from the image.
The basics are covered well here. My workflow normally involves starting with the white balance as it changes the whole look of the image, and Capture One provided an option to adjust Kelvin and Tint.
What is missing is the ability to select defaults in the white balance, such as flash, sunlight, shade etc. This is something I would expect to add in future versions, but it does offer the grey card selection dropper, which is my preferred method.
Also missing is the ICC profile which may disappoint Fujifilm users where film simulations are common. I consider this something important for modern professional users. Many GFX users I know still use these religiously with RAW files, and to be frank, if Sony provided the quality of film simulations offered by Fujifilm, I’d also be using them. I use them on my X100V when I carry it around.

From there, it follows the usual key adjustments you’d expect to find. All of these are aligned to the Capture One desktop application, which is critical for synchronisation between desktops and mobile devices, as well as familiarity for existing desktop users.
In conjunction with this, Capture One styles are also offered. The default styles are provided. These can be combined in the same way as the desktop application. Selecting a second will result in selecting both, so you must unselect one before selecting the next if you only want to apply one.
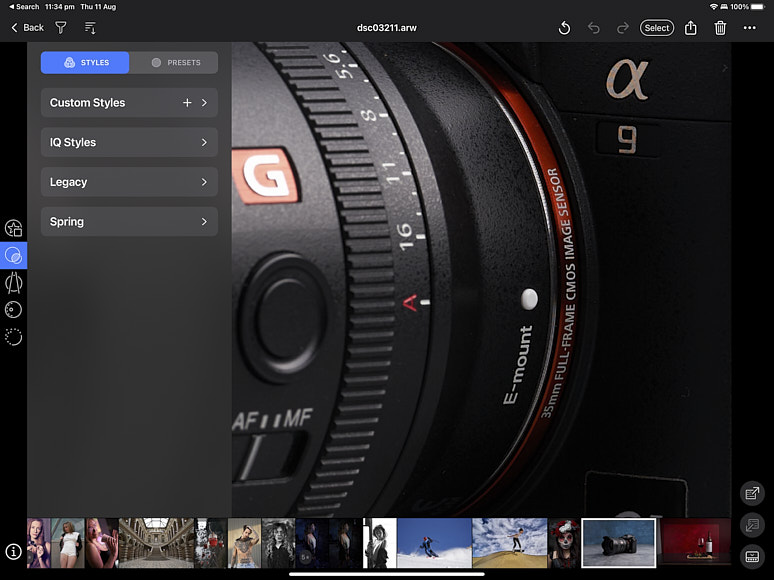
Zooming into images allows you to see how sharp the images are. Rendering takes a couple of seconds but the results are good. This is a 100% crop on a 36MP picture.
You can create custom styles, but there is no option to import styles if you have purchased them, so I assume this will come later. The adjustments are offered using the usual menus (exposure, clarity, HDR, dehaze, colour editing), Each works in the same manner; you select the adjustment and make positive or negative adjustments with the wheel on the opposite side the screen.
Capture One incorporated some presets for exposure, colour editing, B&W, sharpening and film grain in a tab where the styles are applied. I would only use the sharpening and grain for this editing, but I understand why they were included.
Advanced Editing

A two-minute edit in Capture One for iPad.
The advanced editing is where Capture One falls behind the competition. It doesn’t offer much outside of the basic editing, and it’s only really the colour editing capability that extends to more advanced editing. The above image was edited using the color editing tool.
The colour editing functionality is good, with the ability to select colours and edit them individually with hue, saturation and lightness (brightness). Capture One has indicated layers will be part of the next release, and I feel these are fairly important.
Even at a basic level of editing, I use gradients and brushes and the ability to do this isn’t available in the current version. With the popularity of the Apple Pencil, the ability to use the brush is a big loss in this version and may have pushed some additional users to the application.
Whilst Capture One could offer the basics of offering editing on the go, I would like to see them extend this, if possible, to a Wacom-like experience they can.
Exporting/Publishing

The export functionality is good enough for what I would expect from an iPad application. It won’t match desktops, but that isn’t to be expected, even for more mature iPad applications. This could change in time as iPad applications become more stand-alone orientated.
Capture One includes some presets for full size, web optimised and Instagram, along with file renaming and watermarking capability. The latter is important for those looking to provide images to customers while ensuring they don’t publish them prematurely.
Nothing like an excited bride wanting to publish half-processed images to her Facebook feed. It doesn’t include logos, but the text should be sufficient to discourage overly enthusiastic clients.
The integration between Capture One desktop and iPad is still extremely lightweight. It only offers the ability to export an image (raw/jpg) with the adjustments to a location. Capture One indicates that this integration will improve in future versions.
How Much Does Capture for iPad Cost?
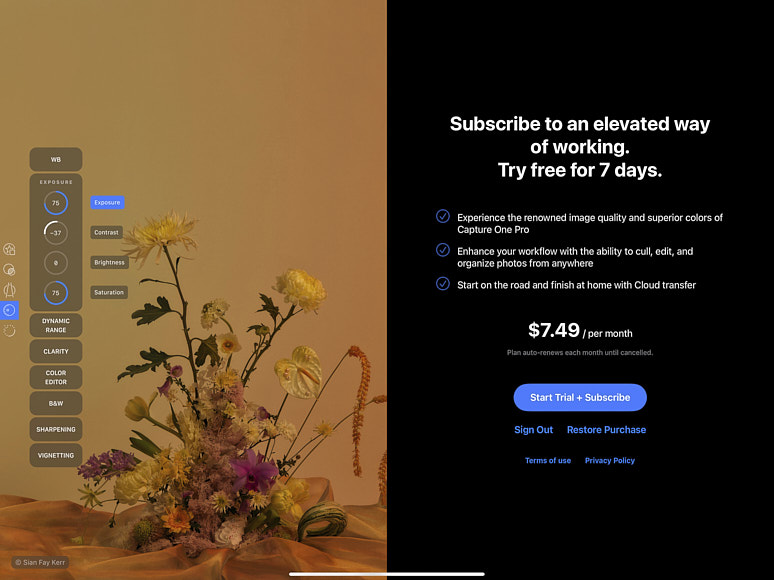
The amount shown here is higher as it’s offering Australian Dollars, not US Dollars.
Capture One for iPad costs $4.99 (at the time of writing), which seems fair for a photo editing tool of this calibre. It is a professional photo editing tool, but it isn’t a complete tool yet, and perhaps some discounting for early adopters might be warranted until the functionality catches up.
The advantage that Capture One offers over Adobe is that Adobe only offers its mobile option as part of the Creative Cloud option. Capture One is more competitively priced if you’re looking to buy an iPad-only tool, as the only offer Adobe has is twice the price.
This may seem like a fair price if you’re not an existing Capture One user. However, the added $5 may not be appealing for existing Capture One Desktop subscription users, considering that they already pay slightly more than Adobe’s Photography bundle at $25 vs $20. Adobe also includes its iPad app in the bundle, a more mature offering.
Final Words

An example of a quick edit with Capture One for iPad. Not a finished product, but good enough to show a customer what you’re trying to achieve.
In summary, Capture One is a good first version of their software. It offers a lot of capability one would expect from a mobile editing application, and it does so intuitively and accurately compared to the desktop version, which is essential.
Mobile processing is progressively becoming more mainstream, and mobile photographers shouldn’t have to compromise their quality when they are on the road. The iPad application provides a great result with UI that looks good and offers excellent usability.
While it’s a great first version, it’s a first version and a light one at that. Capture One has a way to go before this is more professional-ready. I’d expect to see layers with gradients and brushes to take this to the next level.
Perhaps Capture One might consider offering it at a discount to increase adoption.


