


How to Resize an Image For Print (With or Without Photoshop)
A tutorial on resizing images for print using Photoshop, your computer's native image editing software, and/or online apps. (Also iPhone/iPad/ and Android.)
Every photographer should know how to resize an image to print.
I’m a firm believer in print photography. Digital might be the name of the game right now, but holding prints of your photographs in hand and being able to share them with people you care about is a part of photography that we shouldn’t lose touch with.
I just got some fresh prints in the mail from digital images I took with a mirrorless camera. I’ve even printed out pics I’ve taken with my smartphone and they look fantastic.
I’m going to walk you through the basics of print images and a step-by-step guide for resizing an entire image.
Related guides:
- How to resize an image without losing quality
- How to resize an image in Photoshop (without distortion)
How Print Size Works
Printing off your photographs is a lot like photography itself.
It’s really easy to get started with the basics of photography by picking up a point-and-click camera or just shooting on your smartphone. However, you can quickly level up your photography game by mastering a few basics.
Likewise, you can just hit print and hope for the best or you can master a few basic details about print images that will take your photo prints to a whole new level.
It all starts with pixels and dots. Every digital screen measures its resolution using either pixels per inch or pixels per centimeter depending on where in the world you live.
Pixels per inch, or PPI, only measures the screen resolution of your images. Printers, on the other hand, use a similar measurement called dots per inch.
The global standard for printer resolution is 300 DPI. if you have a 300 DPI image file, you’ll get high quality prints in just about any regular size.
Aspect ratio is the next thing to unpack when it comes to how print size works.
An aspect ratio is the measurement of the horizontal and vertical lengths of an image. The 3×2 aspect ratio is one of the most popular for photography, but the right aspect ratio for your print will depend on your artistic goals.
Printer power is also going to impact the size of your print images. If your printer can’t handle 300 DPI, you might be restricted to smaller print sizes.
Now that you’ve had a crash course on what influences print size, it’s time to talk resolution and image size.
What is Image Resolution?
Image Credit: Suzy Hazelwood
I see a lot of misconceptions about image resolution. There’s a lot of marketing hype around big pixel dimensions, but I’m going to demystify this subject so that you can always print high quality photos.
You’re probably used to hearing resolution talked about in terms of pixels and megapixels. A 24 megapixel image has a pixel height and pixel width of 4,000 x 6,000.
Your camera’s sensor was built to pick up a certain amount of megapixels. The Sony a7 III has a 24.2 megapixel sensor while the new Apple iPhone 14 Pro Max has a 48 megapixel sensor.
Pictures with a higher megapixel count will hold more information and have a larger image size. This allows you to produce prints that are larger and have a higher DPI. It’s also easier to resize images if they have more pixels to work with.
Megapixels aren’t everything when it comes to image quality. Resolution is easy to measure in terms of pixels per inch, but hard to measure in terms of subjective standards.
This is called “sharpness.” Sharpness is how refined the details of an image appear to the human eye. There’s no way to measure sharpness—it’s just something you subjectively experience when viewing a picture.
Refined sharpness and high resolution are not always ideal. A blurry background is ideal when it’s bokeh in a portrait and lo-fi photography has made a huge comeback over the last few years.
Print size and resolution go hand in hand, but there are a few important details you should know.
How Does Image Resolution Affect the Print Size?
Image Credit: George Milton
Resolution, print size, and the quality of your prints are all directly linked together.
Here’s the short answer. Enlarging images is easier when you have a big file size and plenty of pixels to work with. The lower your image resolution goes, the smaller your print sizes need to be in order to retain quality.
If you’ve ever tried to right-click and download a picture from a website and then print it, you’ve probably experienced a lot of blocky, low quality prints.
This is because websites typically use images that are roughly 600 by 400 pixels. This resolution is more than enough to look great on tablets and laptops and still load fast even on a slow data connection.
That same 600×400 size is going to be way too small to get a good quality print. You’re going to need a bigger image with a higher resolution if you want to get a good quality print.
I’ve put together a quick guide and how you can increase image resolution in order to get a good print.
What is Interpolation?
Interpolation is how photo editing software, like Photoshop, increases the size of a photo beyond what’s included in the pixels that came with the image file.
Interpolation uses software to determine how many new pixels to add and what color those new pixels should be.
There are several different processes for interpolation, but they all run the risk of producing artifacts or distortions in your image. These artifacts often pop up in high detail areas like sharp edges and your risk of distortion increases the more you resize an image.
Resizing vs Resampling
Resizing and resampling might seem a little complicated on the surface, but it’s actually really straightforward.
When you resize an image, all you are doing is changing the discrete value of the width, height, or both. No pixels are added and the image is simply resized to fit new dimensions.
Resampling is slightly more complicated. When you resample an image, you allow the computer to use the interpolation I just covered to add new pixels to the image.
Resampling can create an image with a higher resolution and quality, but you do run the risk of getting some distortion especially in high detail areas.
Resizing Images for Print Using Your Computer’s Native Software
You don’t need complicated image editing software to resize your images for print. In fact, all you need is the computer you already own.
How to Resize an Image for Printing in Windows Photos
Step 1: Open Your Pic in the Photos App
The windows photos app allows you to resize images for print. The first thing that you need to do is open your photograph in the photos app.
Step 2: Open the Menu and Select “Resize”
Once you get your image open in Photos, the next thing you want to do is open up the expandable menu.
You’ll see an option called resize. Clicking the resize menu will pop open a new window that will present you with some resizing options.
Step 3: Select Your New Size Options and Save
The Windows Photos app gives you a few built-in presets to choose from. You can pick one of these for a quick resizing or you can set custom sizing options for your printing needs.
Take the time to play around with these options and find a size and aspect ratio combo that works for your photo print.
Once you get the right size, all you need to do is click “save as” to create a new image that’s resized and ready to send to the printer.
How to Resize an Image for Printing on Mac
Step 1: Open Your Image in the Preview App
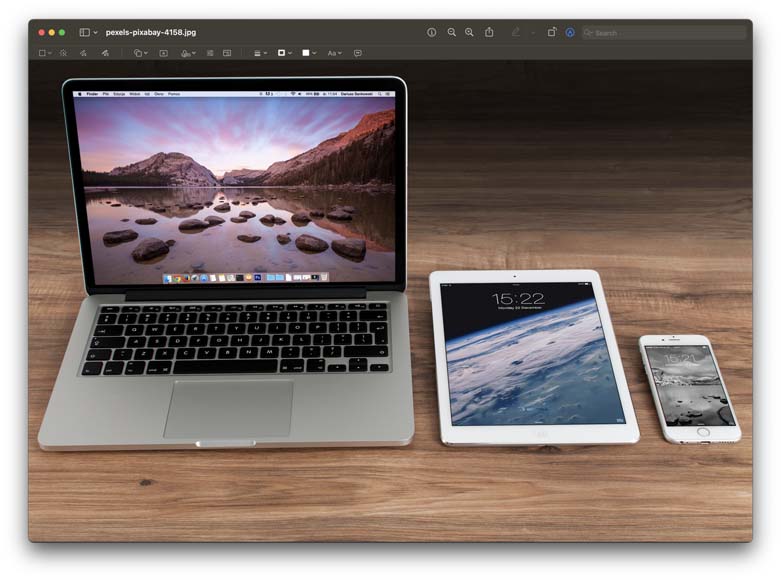
Resizing an image in Mac is just as easy as it is in Windows. The only difference here is that you’ll be using the Preview app as your image editing software.
Your first step is to Simply open your photo in the preview app.
Step 2: Select the Markup Menu
Next, you want to click on the markup menu which expands the editing options that come with preview.
Step 3: Select the Adjust Size Icon
The “adjust size” icon looks like a series of boxes and it should have popped up underneath the markup icon in a new toolbar.
Click on the adjust size icon and you’ll see a new window pop up with plenty of resizing options and tools.
Step 4: Resize Your Photo and Save
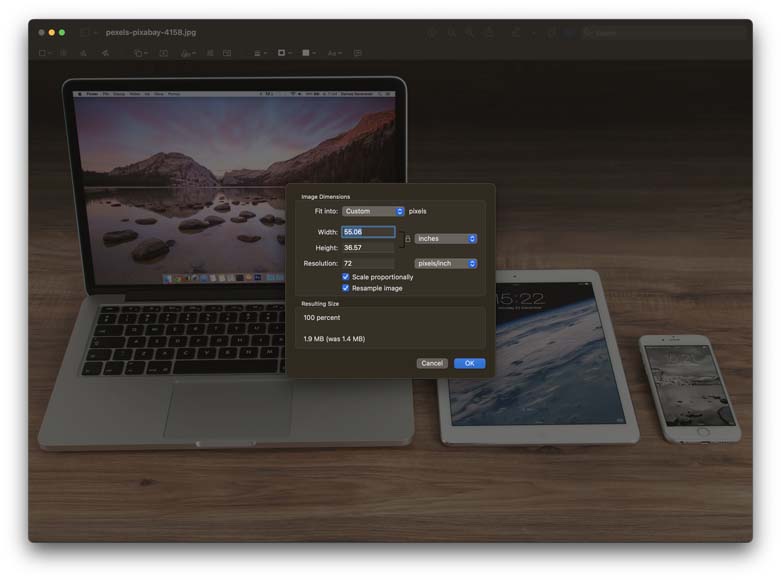
All you need to do now is select your resized pixel dimensions and hit the save button. Your image will be resized and ready to print.
How to Resize Images for Print with Photoshop
Photoshop is the premiere image manipulation program and it’s my go-to when I need to resize an image for print.
I’ll walk you through my workflow for changing the actual image size without losing quality.
Step 1: Open Your Image in Photoshop
The first thing that you want to do in Photoshop is open your image. You can either drag and drop your image into Photoshop or open it up from your image library.
Step 2: Select Image > Image Size
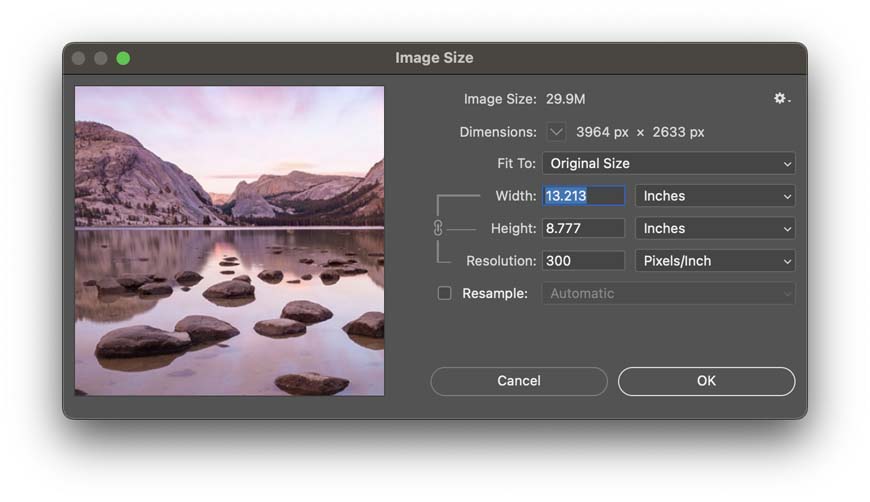
Once your image is open, click on the image menu and then select the image size option. Be careful not to accidentally select canvas size which opens up a similar menu and is located near the image size option.
Once image size is open, you can resize and resample your image as needed. You can adjust the height and width to match the size of your print and increase the DPI to 300 for a high quality print file.
Make sure to deselect resample image unless you need Photoshop to fill in some blank space after you resize.
Step 3: Save and Print
Photoshop is the premier image editing program for a reason. It’s a simple two-step process to resize and resample your image to get it ready for high quality printing.
Other Desktop Software for Resizing Images
Image Credit: George Milton
Learning how to resize an image doesn’t have to mean spending a lot of money on Photoshop. In fact, this is a popular feature that comes prepackaged in countless image programs.
Here’s a few other desktop software options for resizing images for print.
- Adobe Express
- GIMP
- Social Image Resizer Tool
- Microsoft Paint
- Image Resizer
- inPixio
Resizing an Image for Print Using an Online App
Resizing images is such a popular feature that you don’t even need to download new software to get it done. There are online web apps that allow you to resize an image without you having to worry about installing anything.
Visit these websites and you can resize an image instantly without any new software.
- PicResize
- Simple Image Resizer
- Adobe Express
- BeFunky
- Free Image Resizer
- Resize Pixel
How to Resize Photos on iPhone/iPad for Printing
The iPhone and iPad have the mobile version of the Preview photo app. Resizing images for print on a mobile Apple device is going to be a little bit different than on your Mac laptop.
Step 1: Open Your Photo
The first thing you’re going to want to do is open up your photo in the Preview app.
You should see an edit button in the top right corner. All you need to do is tap that edit button and you’ll be ready to crop and resize.
Step 2: Crop and Resize
You have an impressive range of options when it comes to cropping and resizing images on an iPhone or iPad.
You can select from a few presets for aspect ratios or use the crop tool to freestyle it.
Step 3: Use Third-Party Apps for DPI
Unfortunately, the tools available for changing the DPI of your image aren’t available by default on mobile devices. However, this is an easy problem to fix.
You’ve got no shortage of apps that you can pick for getting the ability to change the DPI of an image on an apple device. The mobile options I listed above also work for mobile devices.
How to Resize Photos on Android for Printing
Resizing images on an Android device is going to be a little bit more challenging. This is because there are so many different photo apps for Android devices and only a few of them offer resizing features.
Here are a few apps that you can download for adjusting image size on android.
- Pixlr
- Resize Me
- Codenia Image Size
- Photo & Picture Resizer
FAQ
Can I resize images for print on iPhone or Android?
The easiest way to resize your images for print on an iPhone or Android is to use your native photo app to crop the image or change its aspect ratio. You could also download a third party app like Image Resize or XGIMP which offer more nuanced resizing tools and can even let you increase the image’s size.
How much resolution do you need for high quality prints?
You need a minimum resolution of 300 pixels per inch for high quality prints—this translates to 300 dots per inch once the file makes it to the printer. The higher PPI or DPI you can get, the better. The minimum size for a 5″ x 7″ print should be 1024 x 768 pixels with higher resolutions offering better quality.
What’s the best DPI for Printing?
When printing your photos, the best DPI is the industry standard of 300 DPI. A DPI lower than 300 is considered to be low quality and won’t produce as good of an image. A DPI of 600 or higher will produce a high quality scan, but a DPI above 1,600 will only have a noticeable advantage under close inspection by a profession.
How do I resize an image for printing without Photoshop?
There are plenty of ways to resize photographs without using photoshop. The easiest ways are going to be to use either Preview on a Mac or Photos on a Windows PC to resize an image. You could also use other applications like GIMP or even use websites that can resize an image.
How do I resize an image without cropping?
You can easily change the size of an image without cropping by using two different editing techniques called resizing and resampling. Image editing programs like Photoshop let you resize without cropping by going to the Image menu and selecting Image Size. You can also do this edit in other programs or on web apps that have a resize tool.
How do I resize an image to print 8×10?
There are a few things you need to change to resize an image for an 8×10 print. You’ll get the best image quality with a file that is 300 DPI or higher and you should also make sure it is in 4:5 aspect ratio which matches your final 8×10 print. An 8×10 print has a dimension of 1536 x 1024 pixels for best quality.
Final Words
Resizing images for print all comes down to making sure you select the right image size, aspect ratio, and you ensure that you have as close to a 300 DPI image as you can get.
Keep those three things in mind and every image you print is going to look just as fantastic in your hand as it does on screen.
What are some of your favorite tips for printing out your digital photography? Make sure to let us know and check out our other articles from more tips on making the most of your photography.


Check out these 8 essential tools to help you succeed as a professional photographer.
Includes limited-time discounts.
You'll Also Like These:
 How to Resize an Image in Photoshop (Without Distortion)
 How to Resize an Image Without Losing Quality
 How To Photograph Portraits at Night (With or Without Flash)
 How Big Can You Print a Photo? Settings for BEST Quality Prints
 How can I use Lightroom without paying?

Ashley is a photographer, writer, and film critic. When Ashley’s not writing essays on photography, cinema, and theory, he’s out taking pictures with retro film cameras.

WELCOME TO SHOTKIT
Enter your email to be sent
today's Welcome Gift:
19 Photography Tools
🔥 Popular NOW:


Shotkit may earn a commission on affiliate links. Learn more.