


9 Ways to Create a Full Black Background for Photos
You may be surprised to learn that there are actually several ways to create a perfectly black background in photography! Discover the 9 secrets in this guide.
By Ana Mireles
Images with a black background are extremely popular. If you do a quick browse through your social media, you’ll notice how many people post photos of food, flowers, animals, products, people, headshots and all sorts of subjects on black backgrounds.
In fact, these images aren’t just trending on social media; you can find them in ads and editorials, magazines and websites. It’s an extremely appealing look that can convey mystery or elegance.
Black background images are also highly requested in portrait photography because it gives a professional look to the photos. And the best part is that even though they look professional, you don’t have to do them in a professional studio – you can do them everywhere.
More great news: you don’t need to have expensive gear or experience to achieve a plain black background in a portrait. What you need is to have the right tools and information, and you’ll be adding this skill to your photography in no time.
In this article, I’ll show you different ways to get perfect black backgrounds according to your own needs. In some of them, you need more equipment, in others more skills – this way you can choose which one works best for you.
You’ll also find some amazing example images for inspiration.
Let’s get to it!
10 Ways to Create a Black Background
“I’ve been 40 years discovering that the queen of all colors was black.” This quote by the painter Pierre August Renoir is something that many artists have expressed throughout art history – if not in words, in their artworks.
Black was one of the first colors used in art, as charcoal was the first material turned into pigment. Black was also the first color of ink used for printing. Therefore, we can’t consider art if we don’t consider the color black and its multiple uses and implications.
Throughout history, it’s been used to represent evil, darkness, mystery, mourning, elegance or power depending on the culture. But, what about black in photography?
Many famous artists and photographers have used black backgrounds throughout different periods and for different genres. A few famous examples from portrait photographers are Annie Leibowitz in her self-portrait; Sharon Stone, photographed by Peter Lindbergh; and Audrey Hepburn, by Richard Avedon.
Aside from portraits, black backgrounds were used by Edward Weston to photograph some of his famous photos of still life. Robert Mapplethorpe’s flowers are another inspiring example.
In 1930, photographer Ansel Adams created something called the zone system. As you can imagine by the time period, it was formulated for film photography. However, most of its principles still apply in digital photography.
The zone system is a tonal scale formed by 11 different tones – each called a zone – going from pure black to pure white. These are usually represented by Roman numerals; zero (or 0) corresponds to pure black, and ten (X) is pure white.
The middle grey from zone V is the one that you know from grey cards. All camera metering systems are calibrated to measure light as if the object being measured was a middle grey. This is an important concept that will serve you to create black backgrounds.
Shooting images on a black background can be tricky. Some people think it’s very difficult – which is not; some others think it’s as easy as buying a black photography backdrop – which is also not true.
Achieving good black background images is all about lighting (this is especially important for headshot backgrounds). When you have the right light and the correct exposure, you can turn anything into a black backdrop – regardless of its original color.
Of course, there are also different ways to do it in post-processing. So, if you like how a black background looks in photography, there’s no excuse not to have it in your own photos.
Here are 9 ways to create cool pictures with a black background with all the information you need in each case. Which one you use is your choice.
1. Use a black backdrop
Credit: Prem Pal Singh
The easiest and most straightforward way to create black background photographs is to use a black backdrop. Just like anything else in photography, it has its tricks.
First of all, you need to choose the right material. To paraphrase the authors of the book Light, Science & Magic: we tend to believe that light is the active player in lighting, but different surfaces change light differently, so the subject plays an active role too.
A black backdrop is perceived as black in a photograph if it’s not bouncing back any light towards the camera. A plastic or shinny material will be harder to work with.
Instead, a material that absorbs light will be easier to control. If you’re working with fabric, velvet is the best choice for a black background.
Most professional paper backdrops have non-reflective dye. However, you can buy your own paper to craft a DIY backdrop. Just make sure it has a matte surface.
2. Use a grey card
Credit: Skitterphoto
Cameras work by analyzing the light that comes in through the lens to tell you the correct exposure for your photo. So, they measure the light that’s reflecting from the objects in front of them.
However, the light meter inside your camera is calibrated using the principles of the zone system I was telling you about at the beginning of the article.
This means that the camera will think everything is grey. (Ok, that’s a very simplistic way of putting it, but bear with me, and I’ll explain with a practical example!)
Forget about the subject for a second. If you photograph a black background using the reading from your camera’s light meter, it will come out grey. If instead you photograph a white background, it will come out grey too.
That’s because your camera is trying to compensate for what it thinks is an under or overexposed photograph.
If you measure the light on a grey card, when you photograph a black background, it will actually look black. This is because the camera is exposing to the light that reflects from a grey area; it no longer thinks that the black is underexposed.
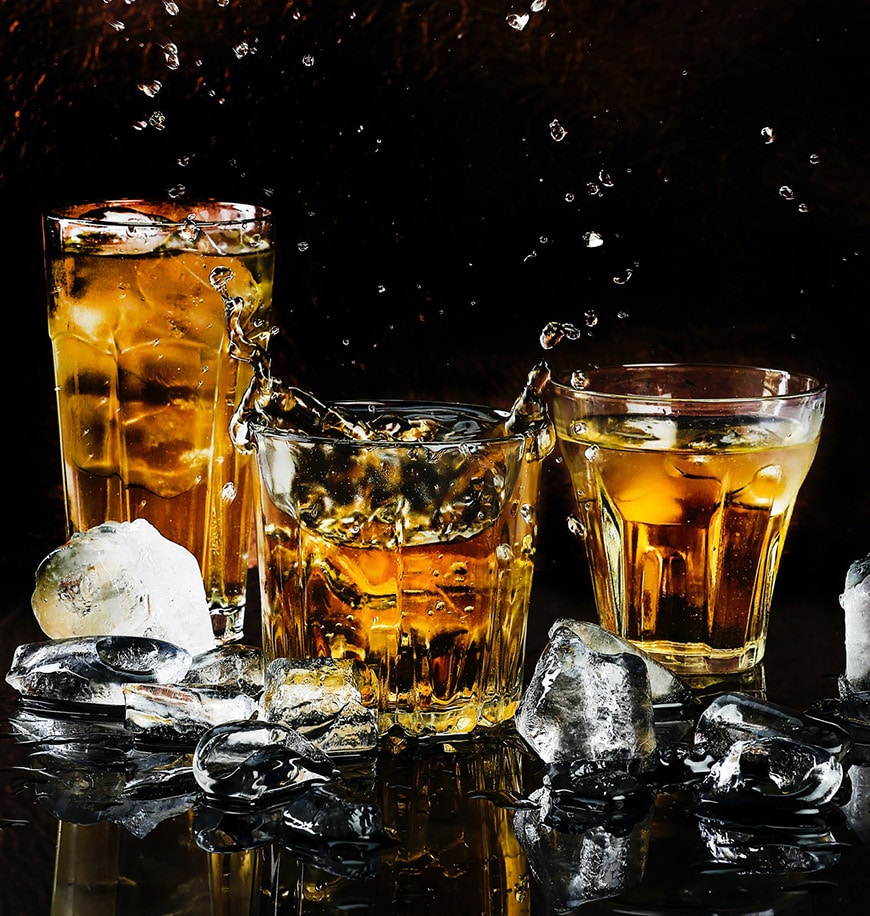
3. Use an external light meter
Credit: Brandon Day
In the previous two ways, I explained how you can avoid black backgrounds looking grey as a result of incorrect light measurement from your camera.
So, another way to solving this issue is to avoid using the light meter in your camera. You’ve probably seen professional photographers using a handheld external device to determine exposure. That device is an incident light meter.
There’s a difference between the light that’s hitting the subject (called incident light) and the one that bounces back from the subject to hit the sensor in the camera (reflected light).
External light meters measure the incident light, so they don’t care if the subject is black or white, metallic or wooden. This means that the subject won’t be assigned to a particular tonal zone.
Some photographers wonder if light meters are obsolete, but we’d argue that they are still definitely useful in certain situations where accurate light readings need to be made.
If you adjust the camera settings based on the light meter’s reading, you’ll be bypassing the step where the camera interprets it as middle grey.
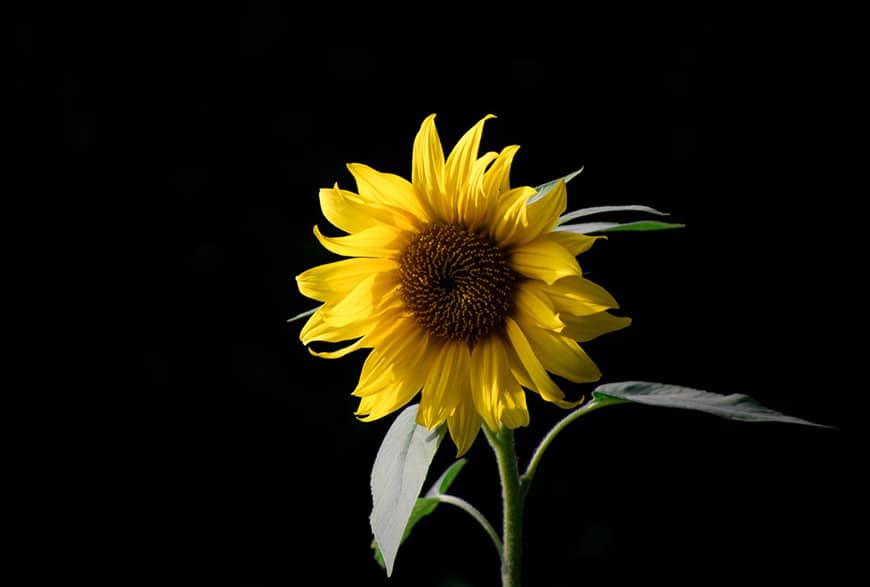
4. Use spot metering mode
Credit: Daniel Putzer
If you don’t have a grey card or an incident light meter, you can still use the camera’s meter to get the correct exposure. To do this, you need to use the spot metering mode.
Keep in mind that spot metering mode is only available if you use your camera in manual or a semi-automatic mode such as aperture priority or shutter speed priority.
Spot metering ‘reads’ the light from a small area of your photograph. In most entry and mid-level cameras, this spot is the center of the frame. In some high-end cameras, it’s possible to toggle the spot from the center to the focal point.
Check your user manual to understand where the spot is on your camera and whether you can change it.
Once you’ve set your metering mode, frame your scene in a way that the subject or the highlights (depending on what you’re looking for) are being measured.
This way, the camera won’t consider the background or the rest of the image when it gives you the reading. You have to adjust the camera settings using this reading. You can reframe if you want – just ignore the new reading if the highlighted subject is not in the spot anymore.
5. Blacken the backdrop using flags

Credit: Daria Shevtsova
Any background – even a white background – can be black if it doesn’t receive any light. However, it’s not always that easy because light can spill onto your backdrop.
To prevent any light fall-out, you can use accessories called flags. Flags are tools used to direct light – since they’re solid black, they completely block the light.
For example, let’s say you’re taking a portrait in your studio with a Rembrandt lighting setup. This lighting style is achieved by placing the light high and to the side of the subject.
Using flags or barn doors to shape your lighting lets you create a black background with a pictorial affect.
If you want to prevent that light from illuminating the background, you can put a flag in between the light and the backdrop.
Make sure you angle it in a way that you don’t interfere with the light falling on the subject. Of course, you can also block part of it and create a special effect that illuminates only a portion of the face, as shown in the image above.
Another light modifier that works for this type of effect is the barn door attached to a strobe unit. These accessories have four flaps that move independently. You can open or close them to widen or narrow the lighted area, thus keeping your black background in darkness.
These techniques often work best for creating a black background during indoor photography, but you can apply the same principles to outdoor photoshoots as long as you can get the sun to work with you—or just shoot at night!
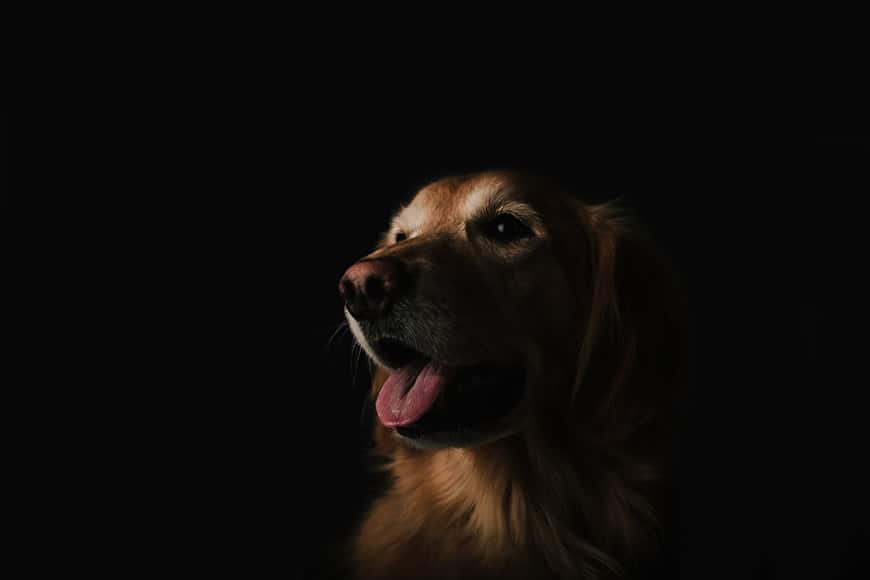
6. Look for shadow areas
Credit: Anastasiya Lobanovskaya
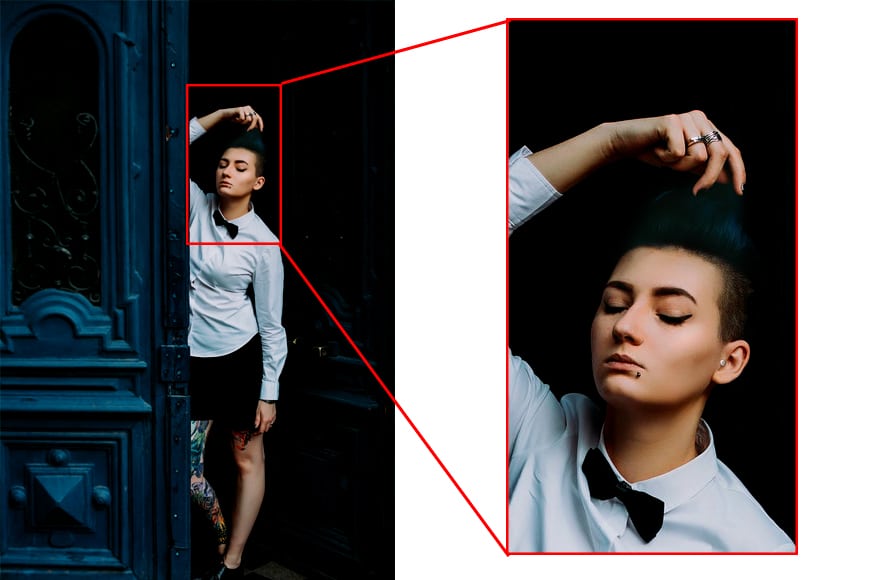
When you’re photographing outdoors, and you don’t have any gear other than your camera, you can still create a black background.
You need to position your subject in front of a shadowy area. For example, in a doorway, as shown in the image above. Obviously, the inside needs to be dark.
Another naturally dark area is a tunnel. You might not have noticed before, but there are plenty of opportunities like this – start looking for them, and you’ll see they’re not that difficult to find.
The right pose will help your model work with the uneven lighting to create a black background. It will also help you better crop and edit the image in post.
Make sure you’re using the correct exposure to avoid the camera overexposing the shadows and making them look grey. You can use tips #2 or #4 from this article to do it.
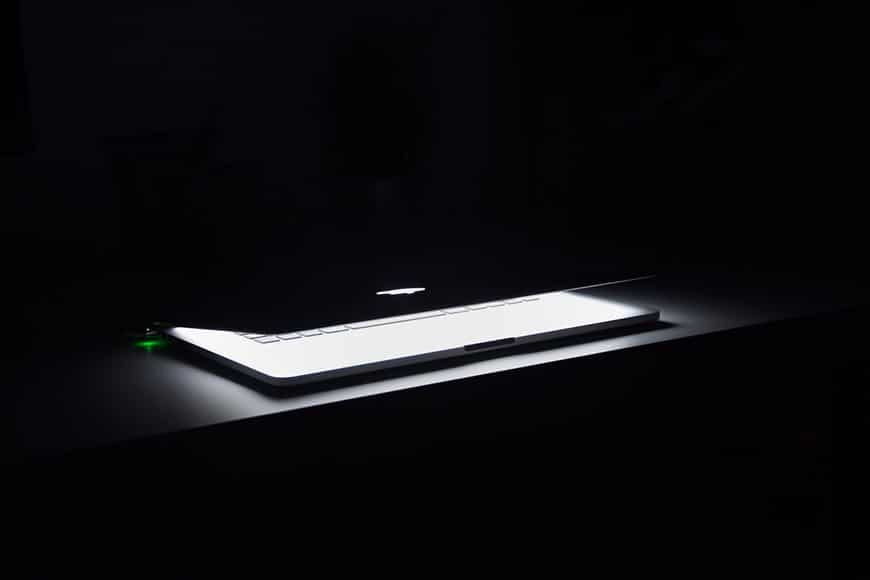
7. Create a black background using a Speedlight

Credit: Akshat Vats
This way of creating a black background is also called an “invisible background”. It can be done with any kind of flash, even with a Speedlight.
The idea is that you’ll overpower the existing ambient light to properly illuminate your subject and leave the rest in complete darkness. You can create a black background during any photoshoot using this technique.
To use this lighting technique, you’ll need a light modifier to confine the light to your subject and avoid any fall-out into the background. It can be a softbox or an umbrella if you don’t fully open it.
The first thing you have to do is adjust the camera settings to underexpose the image – so much so that you can’t see any details.
As you probably know, you need to adjust three factors when exposing a photograph: aperture, shutter speed and ISO.
In this case, you need to keep the shutter speed below the maximum sync speed. That’s the highest speed that your camera can use to sync with a flash. For most cameras, this is 1/250 sec.
Then, lower your ISO to 100, or 50 if your camera allows it. Not only will this make your image noise-free, but it also makes the sensor less sensitive to light. Finally, close the aperture.
Once you take a picture and you can’t see anything, then you have the right settings. That ‘nothing’ is your black background.
It’s time to incorporate the subject. Position your subject as far as you can from the background; this way, there are fewer chances of the light spilling.
Then, place the light directed only at the subject. You can make use of flags if you need to, but a directional light modifier should do.
Now, connect the camera to the flash and start shooting. If your subject is underexposed, pump the power of the flash. You shouldn’t change the settings in the camera because that would impact the background.
8. Change the color of the background using Photoshop
Credit: Mahbod Akhzami
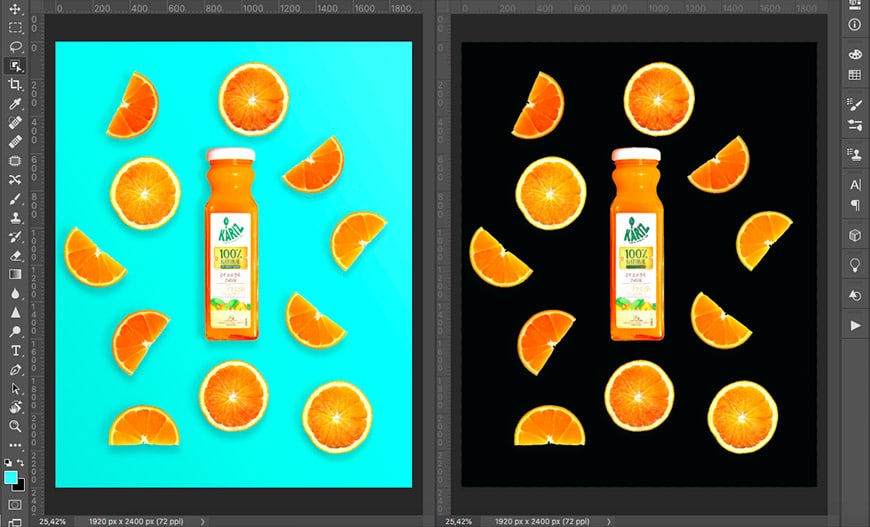
If you want to create a black background digitally, you can do it with photo editing software. I’m going to explain how to do it in Photoshop because it’s my go-to program, but there are many others that will work.
Some free options that you can use online are Photoscissors, Pixlr and Photoshop Express. Another free option is GIMP, but it doesn’t have a browser version – you have to download it.
If you want to follow along, use Adobe Photoshop. The first thing you have to do is select your subject. To do this, you can use any of the selection tools that Photoshop offers.
The most accurate is the pen tool, but it has a steep learning curve. There are some other automated methods, such as object/subject selection, that have become very refined over the years. And there’s a range of other tools in between that you can use.
There isn’t one perfect tool to select – most of the time, you’ll need a combination of tools to select subjects properly. It depends on the shape, the contrast between the subject and the background, and your photo-editing experience and skills. For this example, I used the Color Range selection.
If instead of selecting the subject you selected the background, you need to invert the selection.
Now, duplicate the layer and add a layer mask. At this point, you won’t see any changes, but if you look at the Layers panel, you’ll notice the mask thumbnail with the subject in black and the rest in white. Remember that in layers, anything in black is blocked, and things in white are visible.
Click back on the original layer in the layers panel. Then, add a Solid Color Adjustment Layer and choose black. This will create a new layer that’s fully black in between the other two.
Since the top layer has a layer mask, you’ll only be able to see the black in the background area, while the subject will remain the same.
Remember that you’re working non-destructively, so you can fine-tune the selection any time you want.
For example, if you can see a border from the original color around the subject, you can go to the layer mask and paint it black with the Brush tool. If you overdo it and accidentally brush over the subject, you can toggle the color to white and repaint it to make it visible.
That’s it. Now you have your subject on a black background regardless of the color from the original background.
9. Darken the background in post-processing
Credit: Kirill Balobanov
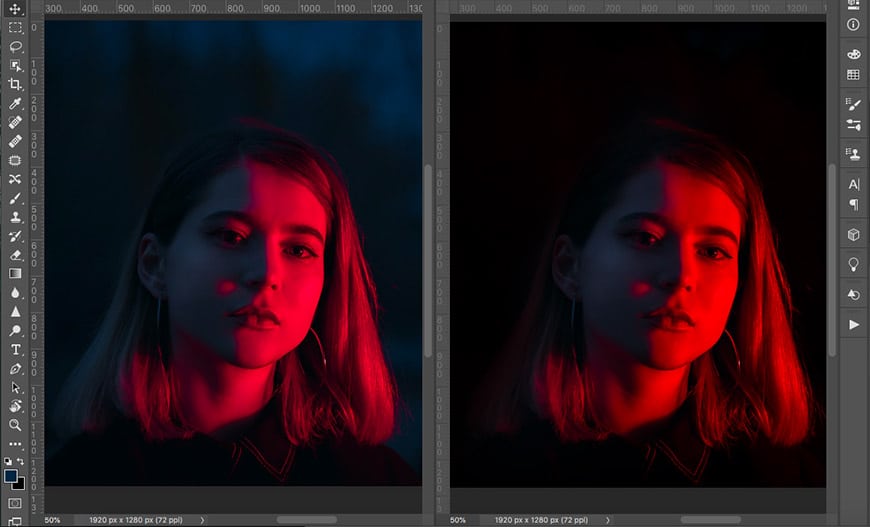
Despite your best efforts, sometimes the black background in your photograph doesn’t look fully black. Fortunately, this is something that can be easily fixed in post-processing.
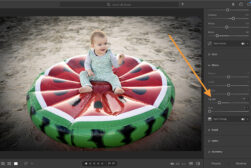
Again, I’m using Photoshop, but you can do this with Lightroom or any other editing software. There are many tools and techniques to do it. For the example above, I used a Curves Adjustment Layer.
To do it this way, you have to go to the Layers panel. Then, add a Curves Adjustment Layer on top of your original layer.
In the Curves properties panel that pops-up, you can adjust the tonal range of your picture. On the left side, you’ll see three eyedroppers. Click on the top one – that’s the one that controls the blacks.
Now click on your background. This way, you’re telling Photoshop that the background is the blackest black in the picture.
This will make your background black, although it will modify the entire tonal range darkening the entire picture. If you like it, there’s no problem. If, instead, you want to keep your subject as it was originally, you need to give visibility to the subject from the layer underneath.
To do this, go back to the layers panel. You’ll notice that the Curves Layer you added has a white thumbnail – that’s a layer mask. So, grab the brush tool and paint it black on top of your subject. You can use a low flow to do this gradually; this way, you won’t have any rough transitions.
That’s it; you darkened your black background in post-processing. The same process can be done using Levels or adjusting the Brightness and Contrast instead of using Curves.
The Burn tool is also useful for this type of editing. This tool is based on a darkroom technique from film photography.
When you were printing a negative film in the darkroom, you first exposed the entire image correctly, then covered everything but the part that needed to be ‘burned’. Next, you would add some extra exposure to that part to make it darker. In Photoshop, using the burn tool darkens specific areas of your image.
If you don’t need to darken the entire background but want to get rid of reflection highlights, you can use any of the Healing tools or the Clone Stamp.
In a few clicks, you can create a fully black background in your photographs.
10. How to take photos with a black background in mobile apps
Learning how to blackout the background in a photo isn’t just limited to people shooting on DSLRs or mirrorless cameras. You can create a black background photo with the smartphone in your pocket.
There are plenty of free apps for both Android and iOS smartphones that can let you change the background of a picture. Here’s a list of the 7 best apps for changing a photo’s background that you can try today.
These apps also let you do some basic color correction so you can make your colors stand out more on a black background.
Now you know how to make a black background image whether you’re shooting on Android or iPhone!
Final Words
Knowing how to create a black background is useful for any photographer. After all, dark backgrounds really have so many applications in photography.
I hope this article gave you all the information and inspiration you need to go out and try for yourself.
Have you tried creating a black background for your images? If you have any other tips, ideas, questions or comments, let us know below.


Check out these 8 essential tools to help you succeed as a professional photographer.
Includes limited-time discounts.
You'll Also Like These:
 How to Remove Background of an Image Using GIMP (4 Easy Ways)
 7 Best Apps to Change a Picture Background (Add Background to Photos)
 How to Create Fine Art Black & White Photos with Radiant Photo
 How to Remove Background in Photoshop (4 Foolproof Ways)
 How to Create a Bokeh Background to Make a Subject Stand Out
 How to Create a Vignette in Lightroom (3 Fast & Easy Ways)

Ana Mireles is a Mexican researcher that specializes in photography and communications for the arts and culture sector.

WELCOME TO SHOTKIT
Enter your email to be sent
today's Welcome Gift:
19 Photography Tools
🔥 Popular NOW:


Shotkit may earn a commission on affiliate links. Learn more.