8 Ways to Show Emphasis in Photography
Showing emphasis in your photos is a powerful compositional technique to direct the viewer's eye to where you want it to go. Here are the best 8 ways to do it.
By Ana Mireles
Have you heard of using emphasis in photography?
You can put emphasis on any of the elements of your photos with framing, composition, camera settings and various other techniques.
In this article, I’ll explain what emphasis is and why it’s important.
I’ll also give you some tips on adding emphasis and show you some example images to get you inspired.
Ready? Let’s get started.
What is Emphasis in Photography?
Emphasis in photography is a tool you use to give importance to the focal point in the picture.
Have you ever seen a photo where you don’t know what you’re supposed to be looking at?
That’s an image without emphasis!
Why use Emphasis in your Photography?
You use emphasis in your photography because you want to tell a story.
When you’re talking or writing, you stress specific words to indicate something important, right?
It’s the same thing in photography. When you use emphasis, you highlight the main subject to help the viewer know its importance.
How to Bring Emphasis to your Photography Subject
Here are some techniques to emphasize the main subject. Some of them have to do with composition, others with color theory, etc.
In any case, you can use many of them as building blocks to create more compelling emphasis photography.
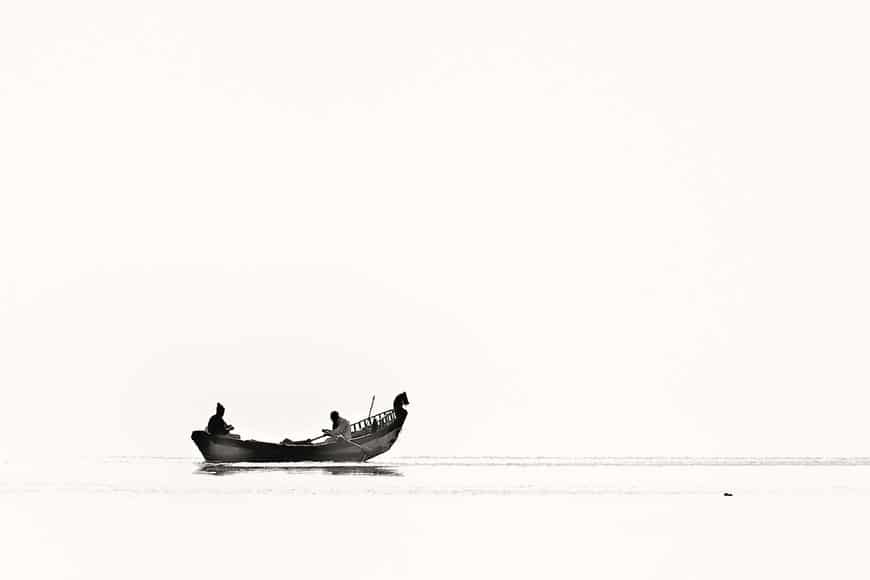
1. Negative space

Credit: Jayant Kulkarni
Negative space is a concept used in art and design, and it refers to the part that’s left as empty background. Usually in photography refers to the area around the subject.
When there’s ‘nothing’ else to see, your eye will be immediately drawn to the subject – even if it’s really small in comparison to the background.
Negative space can be the subject too. Do you know Rubin’s vase? It’s a drawing where some people see a cup and others see two faces.
Another example is the work of M.C. Escher, who uses negative/positive space to create an optical illusion between fishes and birds.
However, this effect is not commonly used by photographers.
2. Shallow depth of field

Credit: Pixabay
Shallow depth of field is one of those photography terms that can sound scary, but it’s nothing to worry about. All it means is that only a small part of the photo looks sharp while the rest is blurry – it’s also known as selective focus.
In digital photography, it’s even easier to achieve because you can check the results immediately – if the depth of field is still too wide, you can adjust on the fly.
The three factors that influence the depth of field are aperture, focal length and the distance between the camera and the focal point.
If you want to save yourself some trial and error, you can use a depth of field calculator – you can find them as websites or apps.
This way, you can emphasize one element by blurring all the other elements. Look at the photo above – the photographer used selective focus to draw your attention towards the chess piece instead of the person.
With this creative decision, the emphasis goes into the play and not to the player.
3. Leading lines

Credit: Aaron Kang
Using leading lines, you can guide the viewer’s attention towards the leading character of the story. That’s why you can use them to give emphasis in photography.
Leading lines are part of the background. The lines can be physical – for example, a pier guiding you towards a boat or a line of trees leading to a cabin in the woods.
However, they can also be implied – for example, a person looking or pointing at something. Even if they are just suggested, these lines are effective because the viewer will instinctively follow to discover what the subject is interested in.
In the portrait photo shown here, the background is somewhat busy. However, the subject stands in a place where the road, the fence, the wall, etc., converge. This way, the leading lines draw attention to the subject’s face, making it the photo’s focal point.
The subject is also in the center and more in focus than the background. You can see how the photographer used multiple emphasis techniques.
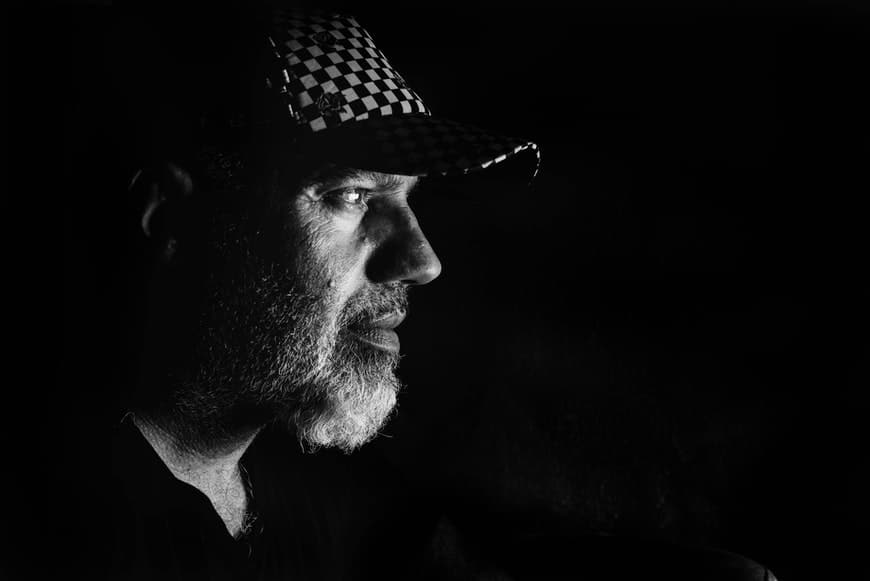
4. Contrast

Credit: Danny Doneo
Another way photographers emphasize their subject is by using light – more specifically, the contrast between highlights and shadows.
When you have a very dark photo, whatever it’s in the light will draw the viewer’s attention. This is the basic principle of low-key photography.
The higher the difference between light and shadow, the more emphasis it will put on the elements in the composition.
5. Texture

Credit: Laker
Texture has more visual weight than a smooth surface. That’s why you need to find the right balance that allows you to emphasize the subject while maintaining a harmonious composition.
6. Colors

Credit: João Jesus
A great way to use emphasis in photography is with the use of colors. Color theory is a very extensive and interesting topic – as a photographer, you should know some of the basics.
In this case, what can be of help are complementary colors. This concept refers to the colors that are opposite to each other in the color wheel.
When you use them together, you create a bold contrast that will immediately emphasize the subject. An example of complementary colors is red and green – used in the photo above.
7. The rule of thirds or the golden grid

Credit: Pixabay
Most cameras have an overlay showing the rule of thirds, so you’re probably familiar with it even if you’ve never studied photography composition.
The rule of thirds divides the whole frame into nine equal parts by drawing two lines vertically and two horizontally. To emphasize a subject, you need to place it along a line – ideally where it intersects with another one.
You can apply this principle to all types of photography. Let’s say that you do landscape photography – then you can position the horizon in the bottom third of the photo and a tree or a mountain in the right or left third.
The same goes for portrait photography, still life, etc. Pick the focal point of your scene, and place it where two lines intersect.
A more advanced photography composition rule is the golden grid. This also divides the frame into nine sections, but they aren’t equal. Because it follows a 1:0.618:1 ratio, the middle sections are smaller. This creates a more center-based composition.
8. Get close

Credit: Noelle Otto
“If your pictures aren’t good enough, you aren’t close enough”, said photographer Robert Capa. Whether you’re a photojournalist or not, this principle still applies.
Think about a scene with a busy background, for example, a market. If the point of interest is one of the vendors or one of the products – you want to zoom in to that. Otherwise, the viewer won’t know what you’re trying to show.
That was a very obvious example because you can get lost and overwhelmed in a busy market, even in real life.
Think about a photo of a person where you want the emphasis to be on the eyes. Then, take a close up of the eyes. This way, you eliminate any distracting element, and the viewer will focus on the subject’s eyes.
Final Words
As you can see, photography composition rules can help you bring attention to the main subject in your picture. The same goes for color theory or the focal point and depth of field.
There are many ways to put emphasis in photography, and it will make your photos more interesting and compelling.
It might sound complicated at first, but once you internalize some basic rules – they will change the way you capture your photos forever.
If you have any questions or want to share more tips, please do so in the comments section.


Check out these 8 essential tools to help you succeed as a professional photographer.
Includes limited-time discounts.


