Creative Lighting Tips
Carefully controlled lighting can help you create fantastic images in-camera. Read on for tips about how to use light creatively to step up your studio game!
Light is all around us, but controlling it can be daunting task even for seasoned professional photographers. After all, photography is one of those things that you are supposed to be learning for life and as I always say “be a sponge”, so you can always absorb new knowledge.
Therefore, with some technique, you can control most lighting scenarios, and I am a firm believer of doing work in-camera as much as time, budget and location allow.
On that note, I’ve compiled 7 creative lighting tips I use on a regular basis, that I hope help you in your creative path.
Use a Little Flare

Sony A7RIII + Sony 70-200 f/4 G
| 1/250 f/11 ISO 100
It may be a trick as old as the hills, but by letting your hair light leak in the frame and shine directly into the lens, you can reduce contrast from an already contrasty scene (i.e on black seamless).
Screw on an old school star filter or light diffusing filters such as the Tiffen Black ProMist and you can bloom the highlights to soften the edges. I recommend a 1/4 grade to 1/2 grade filter.
Negative Fill Can Frame Your Subject

Sony A7RIII + Sony 85mm f/1.8
| 1/160 f/14 ISO 100
Large modifiers can help fill your scene with soft light, but when shot straight on, they often create light that feels flat. Bring back the contrast by adding negative fill.
Add a black v-flat or flag to either side of your subject, so you can create negative fill which helps frame your subject.
Think Color

Canon 5D Mark III + Canon 100mm f/2.8L
| 1/200 f/11 ISO 100
Try to create the photograph in your head before it happens.I recommend everyone take a look at color.adobe.com to create a color palette that works with your vision.
Also, don’t be afraid to break out of complementary color palettes, and to explore monochromatic options.
How about an all pastel-blue scene with a your subject’s skin tone as the accent?
Grids, Grids, Grids

Canon 5D Mark III + Canon 100mm f/2.8L | 1/200 f/9 ISO 100
Even if you only have one light, invest in light spill management (grids, flags). Grids should be an essential part of your lighting kit.
I own a couple of Profoto 7-inch hard reflectors, and have purchased 10, 20, 30 and 40 degree circular grids for them.
Profoto makes wonderful grids, but if your budget is limited, take a look at these from B&H. They work just as well, and fit the standard 7” reflector.
See also: can you use a ring light for portraits?
Aperture, Strobes, and ND Filters
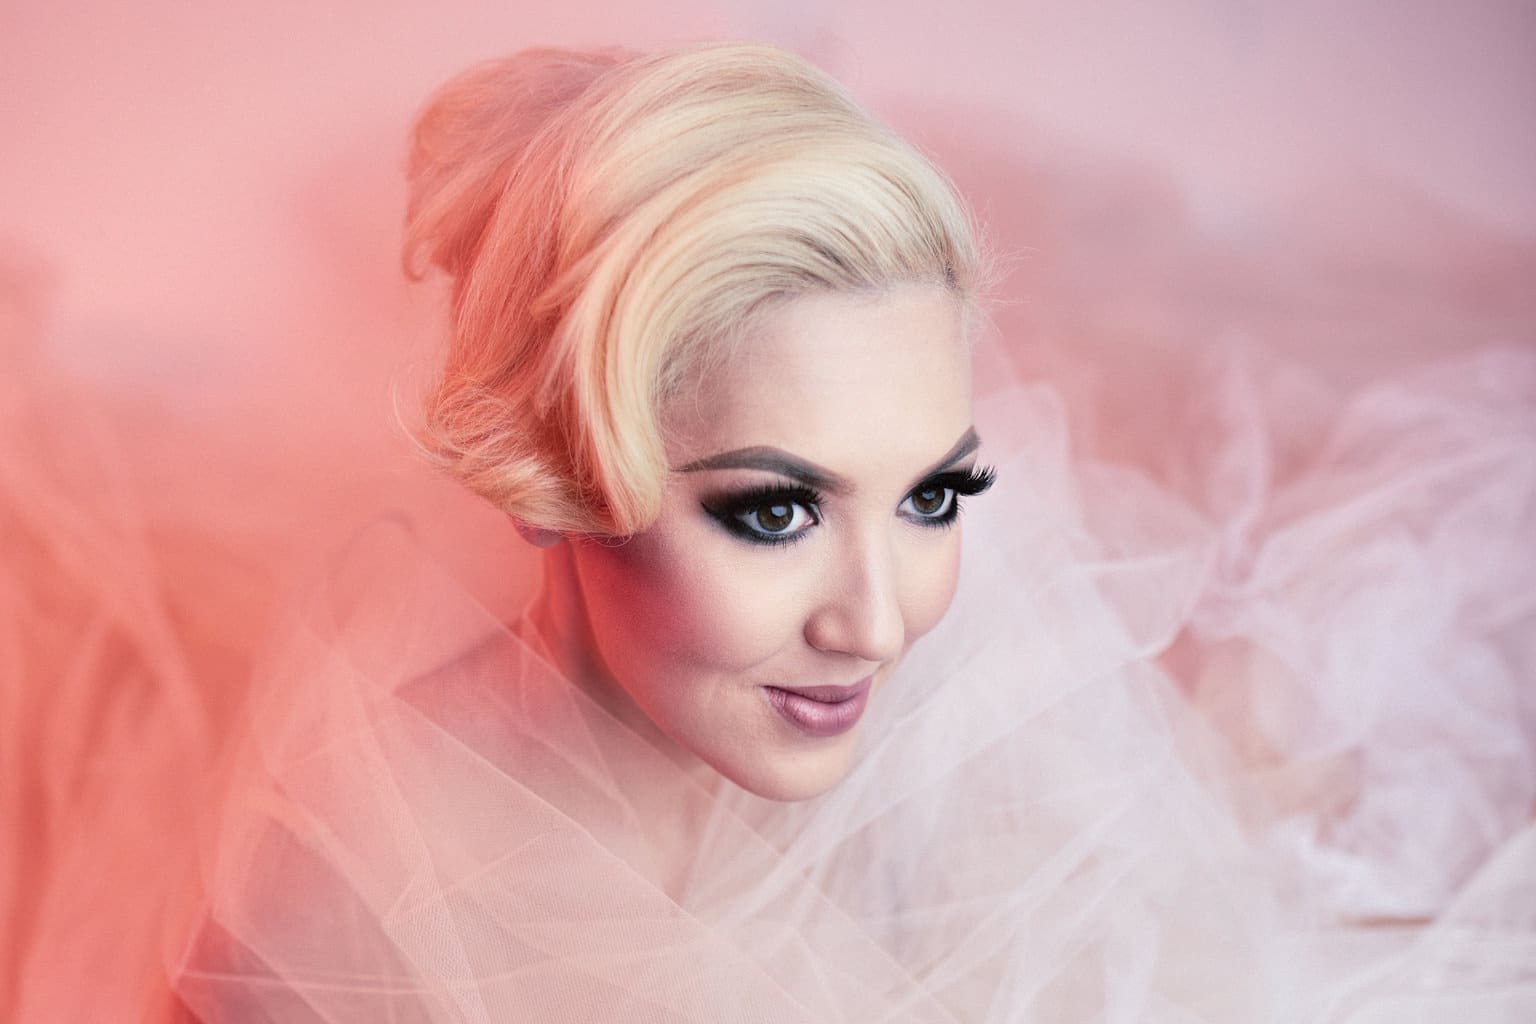
Canon 6D + Sigma 35mm ART f/1.4
| 1/160 f/2 ISO 100
When shooting with strobes, your camera aperture affects your light control and your edge sharpness.
For example, say you want to artificially light your subject’s face with a flash and have the eyes in focus, but have your background and everything else around your subject be out of focus (shallow depth of field).
In this case your aperture not only controls your depth of field, but also your strobes.
If you shoot at 1/200th (average flash sync speed), ISO 100 and aperture at f/2.0, you are letting in lots of light through your lens, and you image will be overexposed.
To combat this, and reach your desired results, you either need to have your flash at a very low power setting or add a neutral density (ND) filter to your lens.
If your desired results are sharp edges, then shoot at smaller apertures such as f11, just remember to turn up the power in your lights.
Freeze Movement Like a Boss

Canon 5D Mark III + Canon 70-200mm f/2.8L II | 1/200 f/11 ISO 100
All sorts of manufacturers are making flash heads that shoot incredibly fast such as the Profoto B1X, but time and time again, I see images with blurry edges.
As someone who shoots hair often, I’ve discovered that you don’t always need the latest and greatest pro packs to freeze flying hair or objects. Instead, what you need is an understanding of your flash recycling time and its limitations.
I’ll keep it simple. The lower your flash power, the faster it will recycle, and as mentioned in tip 5, the narrower your depth of field, the sharper the edges.
With that in mind, if you are shooting something with lots of movement, you need lots of light set at lower power. Now, shooting at low power and a greater DOF will result in underexposed images, so here is where your ISO saves you.
In today’s full frame camera sensors, using a higher ISO is no problem at all, so turn up your ISO to compensate for the loss of light. Your edges will be sharp and your movement captured.
Backlighting with a Purpose
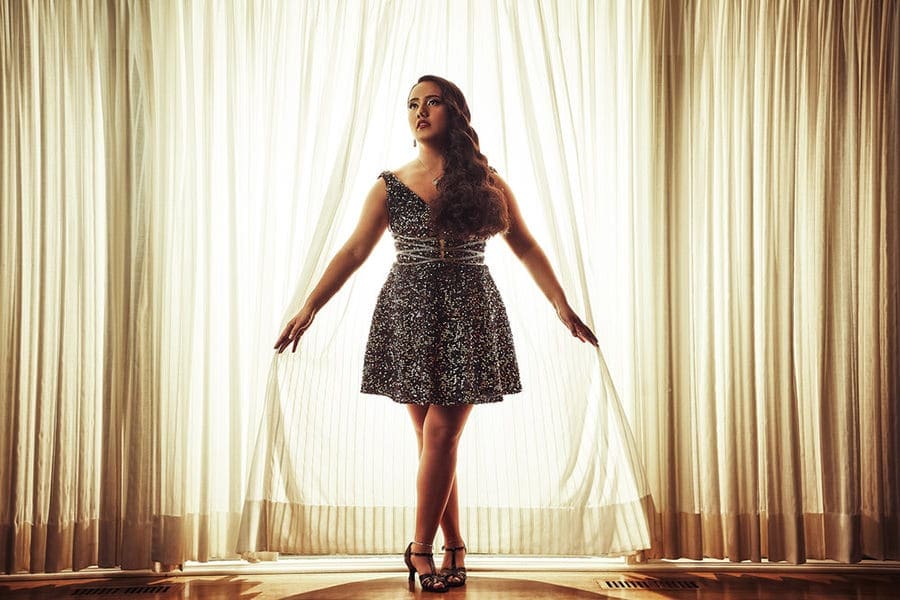
Sony A7RIII + Sony 24-70mm f/2.8 GM
| 1/125 f/5 ISO 800
When backlighting, think of why you are doing it.
It could be because you want to separate your subject from the scene, or you want to highlight a certain feature.
Did you know, though, that you can also use backlight to simulate the sun coming through a window or even to enhance another light in the scene?
Conclusion

Canon 5D Mark III + Canon 100mm f/2.8L Macro
| 1/200 f/10 ISO 100
As mentioned, I am a believer in doing as much work in-camera as possible, since the look of amazement from a client’s face cannot be replicated when they see a collection of images come to life on the spot.
In conclusion, repetition refines technique, and the more you practice the above tips, the better your images will get.
Leave a comment below and share your experience with these creative lighting tips, as I’d love to see what you have created with them!
Disclaimer: All recommendations are impartial and based on user experience, with no bias to the products or the brand. The products in this post may contain affiliate links.


Check out these 8 essential tools to help you succeed as a professional photographer.
Includes limited-time discounts.


