Can you batch edit in Luminar Neo?
Learning how to batch edit in Luminar Neo will save you a lot of time. Applying edits across photos using artificial intelligence is a powerful editing skill.
By Jeff Collier
If you’ve just come back from holiday or a photoshoot with a camera full of photos to edit, you’ll be happy to learn that you can batch edit in Luminar Neo!
In this guide, we’ll show you a few of our favorite ways to batch edit photos to save you a ton of time.
If you don’t already own Luminar Neo, tap the button below to find out the latest pricing.
You can also learn more about Luminar Neo in our full review.

Powerful AI editing tools improve photos in less time. Affordable one-time price and expandable features.
Use code shotkit10neo to save $10.
How to Batch Edit Using Luminar Neo
When you’re on a photo shoot, you may photograph tens or even hundreds of images with similar conditions and settings.
It, therefore, saves considerable time (and avoids repetition) when you’re able to apply the same adjustments to all images from a session.
This is called batch editing, and Luminar Neo’s Catalog and Export tools give you all you need to achieve this.
Find your editing style
First, open your Catalog and select an image from the photo shoot.
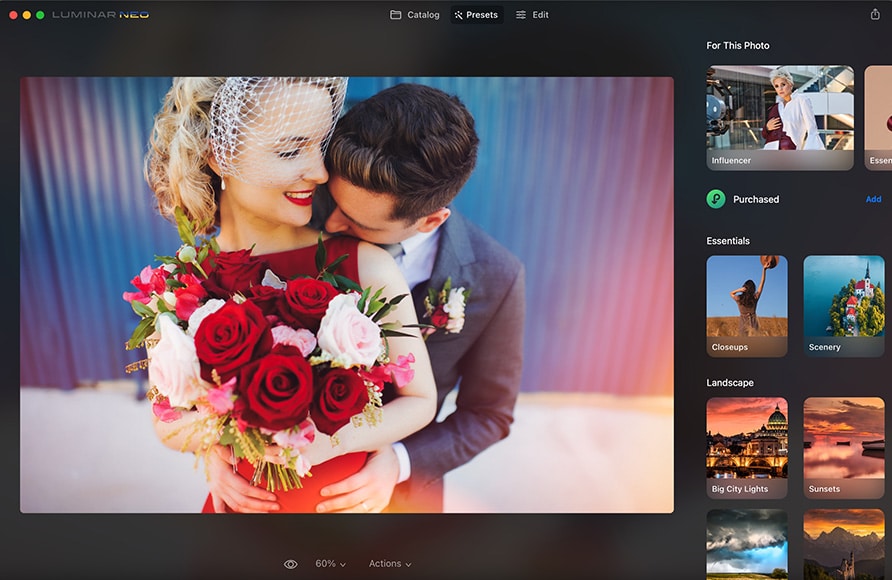
To begin with a Preset, click the Presets tab at the top of the application. Luminar Neo will suggest some Presets for you at the top of the Presets tab, under the heading For This Photo.
Alternatively, use the scrollbar on the right to browse a range of Presets grouped by style. Upon clicking a Preset’s name, the adjustments are applied.
To start your edit from scratch, choose Edit at the top of the application window and use Luminar Neo’s tools to produce an image you’re happy with.
If a Preset isn’t working for you, select Actions > Revert To Original at the bottom of the application window to start again.
Saving your own Preset

Once you are satisfied with your edits, you may consider saving this look as a Preset.
When you’ve made adjustments to an image that you really like, you can save this recipe as a Preset to use again later. Remember: There is no limit to how many Presets you can create within Luminar Neo.
To save a Preset, choose Actions > Save As Preset at the bottom of the application window and give your Preset a name.
If you started with an existing Preset, don’t worry — you won’t overwrite it. Choosing Save As Preset will create a new Preset instead.
Adjusting Luminar Neo’s built-in Presets and saving them just how you like is a great way to start your library and better understand how various tools interact to build a specific look.
Apply this look to multiple images

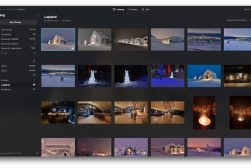
Return to your Luminar Neo Catalog and you will notice the thumbnail of your recently edited image has changed to reflect your adjustments. With this image highlighted, select any other images that you’d like to apply the look to.
You can select images individually:
To do this on both macOS and Windows, hold down Cmd on your keyboard and click the images individually.
Alternatively, you can select multiple sequential images. To do this, select the starting image, then hold down Shift on your keyboard and select the last image in the sequence.
All the images in between will be selected. This shortcut is the same on both macOS and Windows.

Now that you have selected images, right-click on a selected image and go to Adjustments > Sync Adjustments.
Once pressed, Luminar Neo will copy all of the adjustments from your first image to all of the selected images.
This process could take a few minutes, depending on the number of images selected and the speed of your computer.

Once complete, you will notice all the thumbnails of your selected images have changed to reflect your adjustments.
There are some caveats with this approach that you need to be aware of.
First, note that Erase AI adjustments — removing dust spots or power lines — cannot be synced in this way.
Second, any tools which are selectively applied with a mask will have the same mask applied when adjustments are synced. This is usually fine when shooting on a tripod, but when shooting handheld, this means the mask may drift from where you need it to be.
Batch exporting
After selecting all of the images you would like to export, go to File > Export. A dialog box will open, allowing you to choose the folder where these images will be exported.
Next, click on Options, which allows you some control over the format of the exported files.

Sharpen. Automatically apply a sharpening effect to the exported images. If you already sharpened your images as part of your editing, you may wish to leave this at None.
Resize. This dropdown offers several options to control the dimensions of the exported images.
- Original. Do not resize.
- Long Edge. Specify the length in pixels of the longer edge of the image, and Luminar Neo will calculate the shorter edge proportionally.
- Short Edge. Specify the length in pixels of the shorter edge of the image, and Luminar Neo will calculate the longer edge proportionally.
- Dimensions. Specify the exact pixel height and width. Luminar Neo will resize to fit these dimensions.
Color Space. Choose from sRGB, Adobe RGB, or ProPhotoRGB. Note that sRGB is designed for consistency and compatibility on the web and digital devices, so this option is selected as default.
Format. Choose from JPG, TIFF, PNG, JPEG-2000, Photoshop (PSD), or PDF. Some of these options have format-specific options. For example, you can specify the quality of JPEG files or preserve alpha transparency in TIFF files.

Press Save and the export process will begin. Depending on how many images are selected and the speed of your computer, this may take a few minutes.
Congratulations! You’ve just saved yourself a ton of time by batch editing in Luminar.
Batch editing is something that can’t be done with photo editing software such as Adobe Photoshop.
You might want to check out the other key differences and similarities in our article: is Luminar Neo better than Photoshop.


Powerful AI editing tools improve photos in less time. Affordable one-time price and expandable features.
Use code shotkit10neo to save $10.


