How to Photograph Glass
Ever wondered how the pros photograph glass? It's not as simple as you might think! From avoiding reflections to creating sparkle, here's what you need to know.
By Ana Mireles
If you want to improve your glass photography, this is the article for you.
Learn about different lighting setups that you can apply to both white and black backgrounds. All the techniques can be performed without expensive lighting equipment or accessories.
You’ll also find some fun ideas and examples to spark your creativity.
So, keep on reading to find out all the techniques to photograph glass.
13 Glass Photography Tips
Ever wondered how to photograph glass? Perhaps a glass ball, glass plate, broken glass, wine glass, etc.?
It’s actually not as simple as you may think…
From getting rid of reflections to achieving the perfect sparkle, here are our top glass photography tips.
1. Use backlight
Credit: Ramakant Sharda
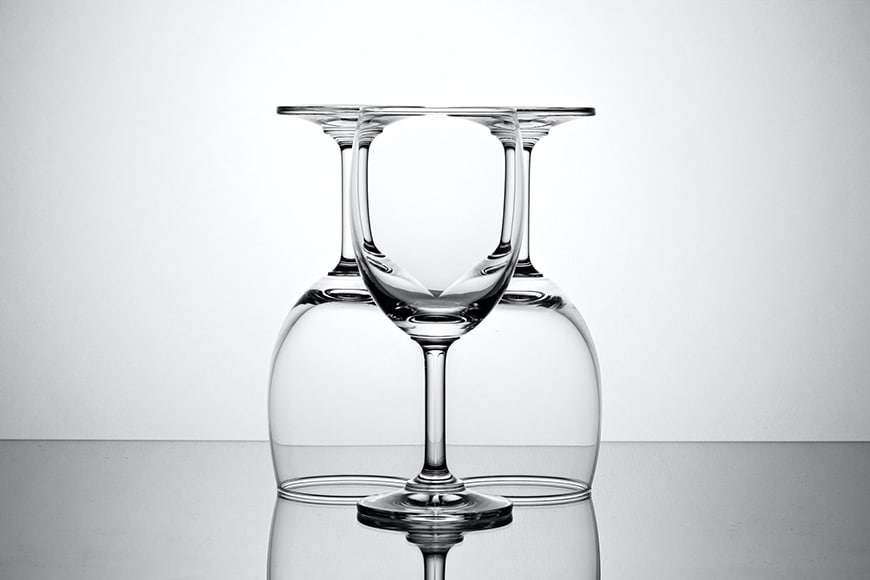
Backlighting is the go-to lighting setup when you have to photograph glass. That’s because it won’t create any problematic reflections or hotspots on your subject.
Even in natural daylight and uncontrolled situations, having the light source at the back of the glass can be your best ally.
If you’re photographing in the studio, use a softbox or a diffuser behind the glass object to light it evenly.
If you’re using a diffuser, you might need to use two diffusion panels to make the light softer. As for the softboxes, just make sure you have the inner baffle attached for double diffusion.
The size of the softbox/diffuser will affect the size of the dark lines that define the shape of the glass.
If you want thicker lines, use a narrower softbox/diffuser and vice versa. I also recommend you choose a white background behind or aside the objects, to help reflect all the backlight forwards.
Here’s our guide to the best softbox lighting kits to help you get started.
2. Use softboxes on the sides

Credit: Ram Ho Cllo (left) / Gabriele Garanzelli (right)
While using backlighting is the easiest way to photograph glass, it may ‘flatten’ the glass objects. To solve this, you can use side lighting.
When you’re placing the light on the side of glass objects, you’ll see the reflection on them. For example, if you use a lightbulb, you’ll see a circular hotspot.
If you want to create an elegant line that follows the shape of the glassware – whether this is a champagne glass or a wine bottle – you need to use softboxes.
Since you will see the reflection, you should consider the size and shape of the softbox – the best kind is a strip box. Make sure it’s long enough to create a reflection through the entire object.
For example, a strip box that’s good enough for perfume bottles might be too short for wine bottles.
This side lighting can be the main setup or added to the backlighting setup described in the previous point.
It’s also possible to have only one light and a reflector on the opposite side (always considering the size and shape) or a strip box on each side.
You’ll want to perform this kind of lighting in a studio environment or somewhere you can really control the light.
3. Use a black background

Credit: Joost Crop (left) / Isaac Quesada
A classic and elegant glassware shot is the one with a black background. I’m sure you’ve seen low key pictures where all that’s highlighted are the glass edges.
Black ground shots create a more seductive, mysterious feel to the traditional white background product photography we’re used to. Photographers typically default to a white background, so why not try something different?
The shots above might look difficult to achieve, but the technique for shooting glassware on a black background is not that hard.
You have to use backlighting: put the glassware in front of a softbox, and put black cardboard between the subject and the softbox.
When you fire up the flash, the light will go around the cardboard, lighting the edges of the glass.
Here’s our guide to creating a perfectly black background for your photos.
4. Frost the glass

Credit: Engin Akyurt
Another way to easily avoid reflections when photographing glass is to make the material opaque. Savvy product and food photographers achieve this in many ways.
Cold beverages can have a frosting finishing, and it fits perfectly with the look that you’re going for – stick a beer mug in the freezer for a few hours before the shoot, for example.
However, you wouldn’t want a bottle of red wine to look frosted because that’s not the way you drink it. Nor would it work with other products such as eyeglasses.
You can use professional sprays designed to provide clear matte finishing. You can find them in an art supply store, stationery store, or home improvement shop.
If you feel like experimenting, you can try some DIY solutions – some hair spray or spray deodorant might do the trick.
See what you have lying around in your makeup cupboard at home!
5. Use hard light creatively

Credit: Tamara Schipchinskaya
While catalogue images and product photography require a soft light that shows the glass object nice and crisply, other types of photography, such as editorial, might benefit from some creativity and personal style.
Using hard light allows you to have strong shadows and specular lights that can be used to your advantage.
For example, in food photography, you can add the shadows of glass to build a composition. This allows you to be more playful, especially if the glass is full of a colorful liquid.
To really profit from hard shadows, make sure you’re considering the basic principles. First, the closer you have the light source to the object, the bigger the shadow and vice versa.
Second, consider the directionality. If the light source is at a lower angle in relation to the object, the longer the shadows will be and vice versa.
For more about hard vs soft light, read this guide.
6. Use interesting backgrounds

Credit: Artem (left) / Dibakar Roy
Thanks to light refraction, you can make unique and creative glass photography. An interesting background placed behind the glass object can enhance it completely.
If you add water to create a reflection, then you can have even more fun. Due to a physics principle called refraction, light waves change direction when they pass through another medium.
Fill a glass with water and use different backgrounds such as two solid colors or a striped piece of cardboard to make some fun compositions.
You can even load up an image on your laptop screen (try googling ‘abstract wallpapers’), and use those as your background in front of which to place the glassware.
7. Change the angle

Credit: Geraud Pfeiffer (left) / Photo Grapher (right)
Changing the angle is always a good idea to get a different perspective, improve your composition, and in this case, help you manage light reflections.
Light travels in straight lines. That’s why the angle of incidence is the same as the angle of reflection.
If you change your position to step away from the angle of reflection, you can avoid the annoying hotspots on the glass.
8. Use a glass ball

Credit: Dids (left) / fly d C (right)
Glass balls have become extremely trendy. You can contain the entire world in a small ball – it will cover a wider area than any ultra-wide-angle lens.
In itself, glass ball photography (aka ‘crystal ball photography’) is a genre separate from glass photography – but who says it has to be? You can mix both things to get new and exciting ideas for photographing glass objects.
If you don’t own any glass balls, consider a magnifying glass or other objects that can add some visual interest to your photos.
9. Make a symmetric composition
Credit: Randy Fath
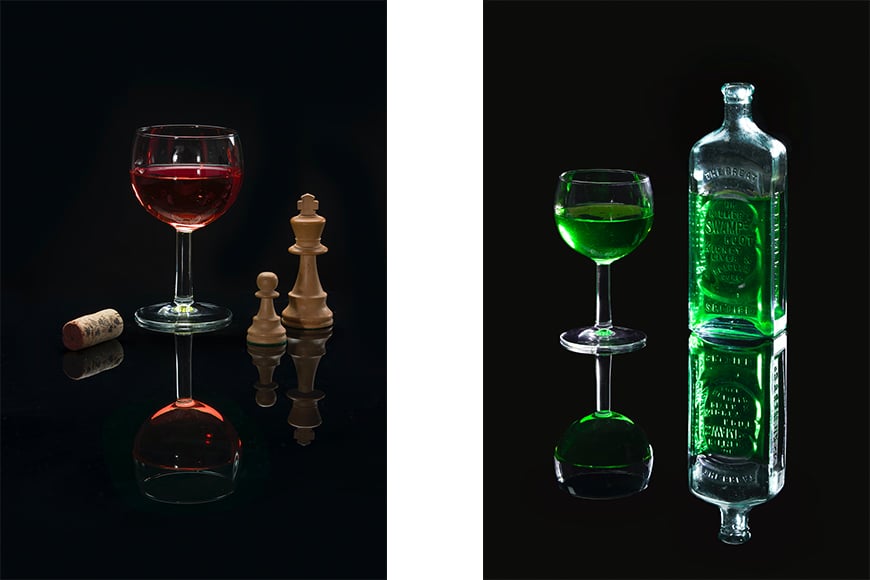
Glassware is particularly fit for making reflections – it looks elegant and beautiful. You can photograph on a reflective surface such as water, marble, metal or glass.
Since that might complicate things (as it can create unwanted reflections from your light source), there’s a hack that you can do.
Turn a glass or a cup upside down, and add another one upright on top of it. That way, you’ll have a symmetric composition without having to deal with another reflective surface.
See our guide on how to use symmetry in photography.
10. Do black and white photography

Credit: Laura Chouette (left) / Mario-Beducci (right) – Original in color
You can use black and white photography for many different purposes. Maybe you want to create a nostalgic feeling, or you just want to remove any distractions and let the viewer appreciate the object’s shape.
Whatever the reason, I recommend that you shoot in color and convert to black and white in post-processing. For one thing, because you’ll always have the choice to use the color version if you change your mind.
Also, turning your image to black and white in Photoshop (or whatever program you use) gives you complete control over the tone scale.
11. Make splash photography

Credit: Thao Le Hoang
If you want to make your glass photography more dynamic, try adding a splash.
This type of photo might look very complicated, but it’s not that difficult. It does take some trial and error, though, so be patient.
First, set up your scene where you’ll be able to do your splashes without worrying about getting things wet. The same goes for your camera – have it further away so that you won’t get any water drops on the lens.
Then, adjust the settings to use a fast shutter speed. Finding the right one will take some practice, but you can start with 1/250 and adjust from there.
Keep in mind that to use a fast shutter speed, you’ll need to have a potent light source or compensate with the aperture and ISO. For this, you’ll need to use your camera in manual mode.
If you don’t feel confident using it in manual, you can use shutter speed priority – according to the brand of your camera, you’ll find it as S or Tv. Also, to capture the perfect moment, you can use burst mode.
Take the first shot without a splash. This can be used as a base if you decide to make a composite in post-processing to have more control over the final look of the splash.
Ok, now it’s time to start trying. Drop different objects into the glass and start shooting. Keep in mind that the object’s size, shape, and weight will create different types of splashes.
Keep lots of towels at hand to clean up in between shots.
12. Make the glassware levitate

Credit: Yulia Matvienko (left) / Johnatan Duran (right)
Levitation photography is very intriguing. It defies the world as we know it, so it grabs our attention and demands we spend more time looking at the picture.
This is especially true if the levitating object is made of glass since we instinctively feel the danger of it falling and breaking.
If you want to put some spark into your glass photography, you might want to give levitation a try. Don’t worry, you won’t have to break any glassware!
The technique involves making a photo composite, so you’ll need some photo retouching skills for this one.
You’ll need to take a photo of the object either hanging with a string or supported from below. Then take a picture of the background without the object.
Use Photoshop, Luminar, or the software of your choice to blend the images, covering up the string or support.
Here’s how to do levitation photography.
13. Use gels
Another creative idea for photographing glass objects is to add a pop of color. To do this, you can put color gels in front of your light sources.
You can use gel on a rim light or on the main light. You can use one color on one side and a different one on the other. The possibilities are endless!
Final Words
I hope you enjoyed these glass photography tips. As you can see, there are many techniques that you can use to photograph glass successfully and take control of reflections – from changing the camera angle to changing the lighting setup.
If you have any questions, or you want to share any more tips, feel free to do so in the comments section. Also, make sure you check out our article on glass photo prints.


Check out these 8 essential tools to help you succeed as a professional photographer.
Includes limited-time discounts.


