


How to Face Swap in Photoshop
Want to swap a face onto another body using Photoshop? This guide steps you through it. Plus, tips and tricks for beginners!
By Ana Mireles
You’ve probably heard of face swapping as a fun thing to do with an app on your phone. But maybe you don’t know that you can do it in Adobe Photoshop for all sorts of purposes.
Yes, you can still have fun interchanging your face with your cat’s, but you can also try out different looks before going to the hairdresser and doing them for real.
Also, creatives can use this to generate new subjects that don’t exist in real life by combining faces and bodies.
Finally, professionals use this method for more than just faces. It’s also used to swap logos and designs from different products.
Overall, it’s a versatile technique that will open up a sea of possibilities. Check out how easy it is to do.


Download the latest version of Adobe Photoshop to follow along with this simple tutorial.
Start a free 7-day trial today
How to Photoshop a Face Onto Another Body in Photoshop
1. Prep Work
First, you need to choose the two images that you’re going to use. For this, you do need to take some things into consideration.
Size and resolution should be similar. If this isn’t the case, then the face you want to swap onto the body needs to be the one that’s bigger.
This is because there’s no loss in shrinking it down. However, if you stretch it out to make it bigger, you’ll end up with blurry and pixelated features in an otherwise sharp head.
Something else to consider, especially if you’re using this technique for the first time, is that the subjects should be facing the same way (i.e. have their faces on more or less the same angle).
The light needs to be similar too, so that the blend is more realistic. And lastly, start with faces where there aren’t many details to match. So avoid using portraits where the hair is flowing across the face or anything like that.
Ready? Let’s go!
2. Open Your Images
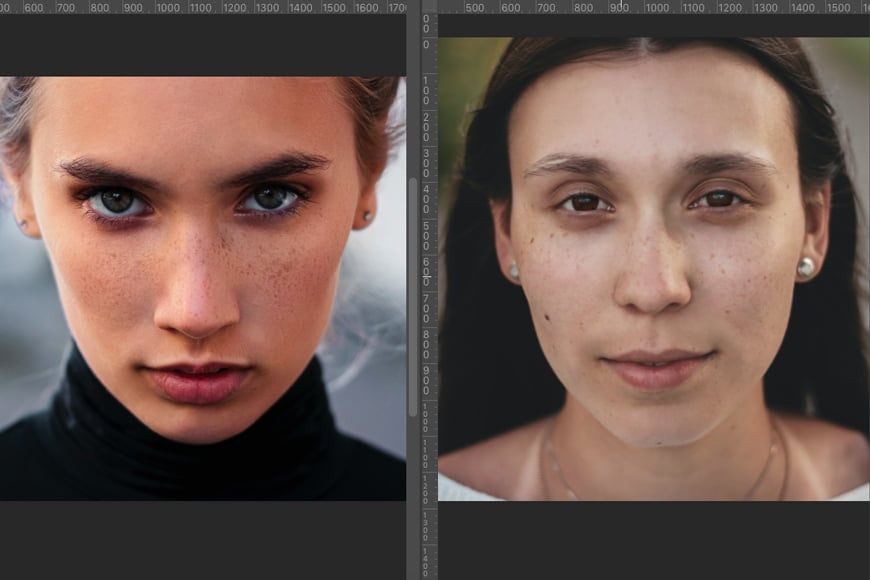
Credit: Andrey Zvyagintsev (left photo) and Anastasia Vityukova (right photo)
You need to open both images in Photoshop.
You can do this keeping them as tabs, which is the default view, or you can place them in separate windows if you prefer to see them side-by-side.
The latter view is helpful as you can make sure the faces match for this kind of work.
To use this view you can go to the menu Window, Arrange, 2-up Vertical (or 2-up Horizontal, depending on what you need).
3. Select and Copy the Face
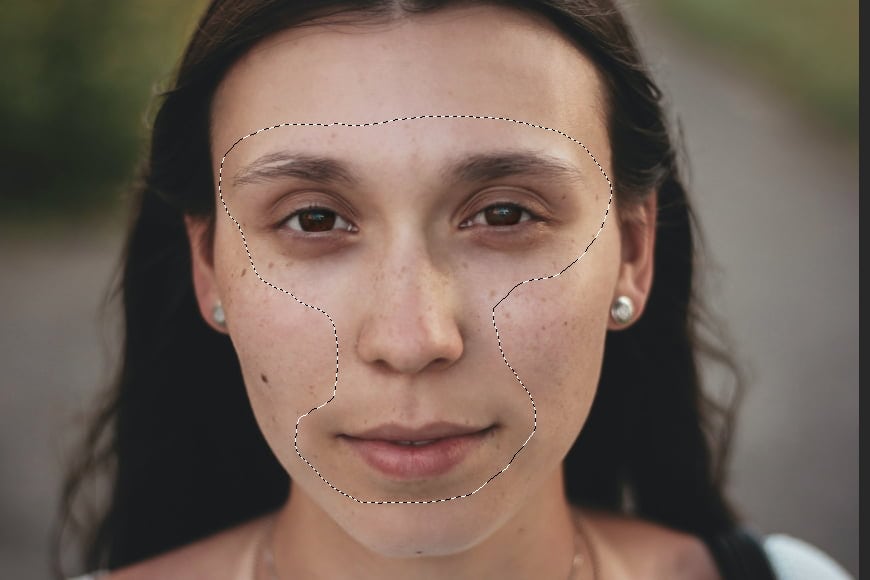
Go to the tab or window where you have the image of the face you want to swap onto a different head.
Here, you can select the face using the Lasso tool because you don’t need to be very precise.
Click and drag around the main features of the face to include everything from the eyebrows to the chin if you want to swap the entire face.
Of course, you can select only specific parts like the eyes or the nose if that’s what you’re after. For this tutorial, I’ll show you how to swap the faces in Photoshop entirely.
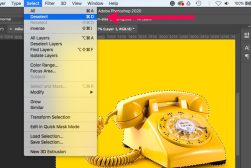
Once the face is selected you can copy it by going to the menu Edit, Copy, or using the keyboard shortcut Cmd + C.
If you’re working in separate windows you can just click and drag to the other window without the copy command.
4. Paste
Go to the tab or window where you have the recipient’s head. You can now close the other one as you won’t be needing it anymore.
Paste the face in this document using the shortcut Cmd + V or going to the menu Edit, Paste.
Now you have the original image in a locked background layer and a second layer on top with the new face.
5. Transform
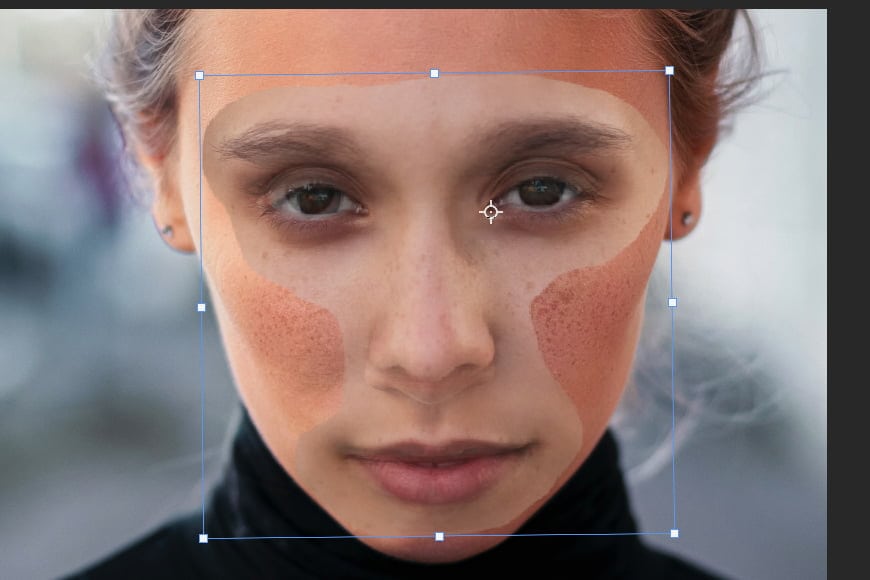
Now you need to match, as closely as possible, the new face to the features of the original image.
Start by lowering the opacity of the face layer in the Layers panel. This way you’ll be able to see the original underneath as a guide for your adjustments.
Then, activate the Free Transform tool using the shortcut Cmd + T. Start by adjusting the size using the handles on the corners.
Position the reference spot where you find it’s best – for example, one of the eyes or the mouth. It all depends on your images.
Make sure you’re maintaining the aspect ratio on the face layer as you resize it. If you’re using the newer versions of Adobe Photoshop, this is activated by default.
If it’s not, you can just hold the Shift key while you move the handles. Alternatively, you can click on the chain icon in the options bar on top.
If the head is a little tilted, your next step is to rotate the face layer to match the angle.
Also, if the subjects were mirrored, you can right-click to open the Free Transform menu, then choose Flip Horizontal.
6. Duplicate the Original Image

Once you have everything set into place, you can accept the transformation and turn the opacity back to 100%.
Turn off the visibility of the face layer by clicking on the eye icon next to it and let’s prep the receiving layer with the head and body.
It’s never a good idea to touch the original image in case something goes wrong. So, create a copy where you’re going to be working.
You can do this by dragging the background layer into the Create New Layer button at the bottom of the Layers panel.
Alternatively, you can do this by right-clicking on the background layer and choosing Duplicate Layer from the menu. Then leave the settings as default in the dialog box and click OK.
You can turn off the visibility of the original background layer because you won’t need it anymore. It’s just going to stay there as a backup.
7. Delete the Original Face

Before you add a new face, you need to delete the original. To do this, click on the thumbnail of the face layer while holding the Cmd key.
It doesn’t matter that it’s invisible at the moment, it will select the content of the layer. In other words, it will create a selection around the features you copied and pasted from the second image.
Now, double-check you’re back in the background copy layer. As we’re going to blend layers in the next step, we’ll make the selection a little bit smaller to create some space for the transition.
Do this by using the menu Select, Modify, Contract. The number is not fixed, you can experiment with different values depending on the image.
Now press the backspace key to delete the content of the selection.
8. Blend the layers


Ok, it’s time to make the magic happen. Turn back on the visibility of the face layer.
Then, select both the face layer and the background copy layer by pressing Cmd and clicking on them.
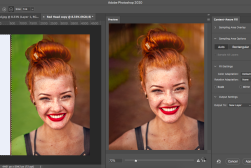
Now, go to the menu Edit, Auto-Blend Layers. This will open a dialog box. Here, confirm that the option of Panorama is selected.
Then, check the boxes for Seamless Tones and Colors and Content-Aware Fill Transparent Area. Click OK.
That’s it, just wait for Photoshop to do its thing.
9. Fine-Tune the Details
Photoshop generally does a pretty good job of achieving seamless tones and colors between the face swap images, but you may still need to manually correct some small details.
Click on the Create Layer Mask button from the bottom of the Layers panel.
This will create a white layer mask in your merged layer. You won’t see any changes, but anything that gets painted black on it will be hidden.
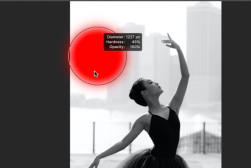
So, you can use the brush tool with soft edges to paint over any areas that you don’t like. Use a low flow value to create transparencies instead of completely blocking these pixels.
With this, you can smooth out any imperfections from the blending. If this isn’t enough, you may need more transitional area when you blend layers.
Try repeating the process above, creating a bigger transition area in step 6. Simply input a higher number to contract the selection more.
Other Uses for the Face Swap Technique


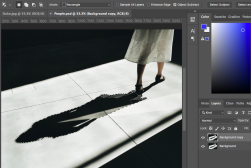
Credit: John Matychuk
As I mentioned in the introduction, the technique to swap faces in Photoshop has numerous uses.
And you don’t need to stick to faces. This method also works for objects.
In this example, I took a 50% sign from a window shop that was having a sale. Then I used the face swap technique to put it into the street sign.
Tips and Tricks for Beginners
The two images that you want to merge in Photoshop need to have as many technical similarities as possible. For example, the lighting needs to be similar and have the source in the same direction.
Also, make sure that the sharpness is the same. If you want to blend in an image that has everything in focus with one where the depth of field is very narrow, it won’t give you a realistic result.
To make things simpler, especially if you are a beginner, try using different images from the same photo session.
Imagine you end up with one shot where the position of the body looks great, but the model has their eyes closed. Then you have another image where the facial expression is perfect but the body doesn’t look natural.
This is the perfect set of pictures to start gaining confidence in doing a face swap in Photoshop.
You know that the lighting, the perspective, and the focal length are the same. You also know that the skin tone, hair, teeth etc. will match. So merging the faces in Photoshop will go very smoothly.
From there, you can start to move on to more difficult situations until you go from beginner to pro.
Another Way to Do a Face Swap
If the technique to swap faces in Photoshop doesn’t work well for you, or you don’t have an Adobe Creative Cloud subscription, then you can try Luminar.
Luminar is an amazing photo editor that makes creative photo-editing an easy process thanks to Artificial Intelligence (AI).
If you don’t have it, you can download a free trial here and see for yourself how much simpler it is to use.
Final Words
As you can see, doing a face swap in Photoshop is a simple technique that can be used for many things.
It may take a little practice to really nail it, but once you’ve learned how to swap faces in Photoshop, you can use the method for more complex post-production effects.
Neither the Shotkit team nor I endorse the use of these type of edits for unethical purposes. Just keep it professional, have fun, and let your imagination go wild.
Download the latest version of Adobe Photoshop to follow along with this simple tutorial.
Start a free 7-day trial today
You'll Also Like These:
 How to Deselect in Photoshop (5 Quick & Simple Methods)
 How To Import, Edit & Save a PDF In Photoshop (3 Easy Steps)
 How to Change your Brush Size in Photoshop (with Shortcuts)
 How to Extend a Background in Photoshop (3 Techniques)
 How to Remove a Shadow in Photoshop (Two Easy Methods)
 How to Use the Lasso tool in Photoshop (All 3 Versions)

Ana Mireles is a Mexican researcher that specializes in photography and communications for the arts and culture sector.

WELCOME TO SHOTKIT
Enter your email to be sent
today's Welcome Gift:
19 Photography Tools
🔥 Popular NOW:


Shotkit may earn a commission on affiliate links. Learn more.