Pocket Guide to Photography for Beginners (With Essential Tips)
Wanting to get started in Photography? This pocket beginners guide is a must-read to get you started or take your shots to the next level!
By Ana Mireles
Now that you’ve decided that you like taking photos and you want to learn photography – you might find yourself a bit lost.
Don’t worry, that’s normal. There’s tons of information, photography tutorials, books, and so many other tools that it’s difficult to know how to get started with photography.
This is a compilation of photography tips for beginners to help you take better photos – and you can start today! It’s a pocket edition beginners guide if you will.
Here you’ll find an introduction of all photography basics with links to dedicated articles and photography tutorials so you can delve deeper into each topic.
This way, you can keep learning photography at your own pace. Let’s get started!
13 Photography Basics for Beginners
Learning photography is a process – so you need to be patient and practice. There isn’t only one way to improve your photography skills so you can follow these tips in any order you want and you’ll keep getting better over time.
As for where to learn photography, there’s a ton of content right here on Shotkit, or you could join or start a photography club to trade information with other students.
1. Learn the Composition Rules

Credit: Mike Kononov
If you want to learn photography but you don’t know how to handle the camera settings, or perhaps you don’t have a camera yet – learning about composition is a good place to start.
Why is this? Because composition refers to the way you frame the scene in your photo. What is in front of you and how you position the elements around it. Here are some basic rules that are essential for beginner photography.
- Rule of thirds
This technique is based on dividing your image in a 3 x 3 imaginary grid – that’s why it’s called the rule of thirds in photography. The idea is to arrange the scene to follow the lines and place the most important elements in the intersections.
- Visual weight
This rule is all about finding a balance between the elements of your photo. The subjects that immediately grab your attention have more visual weight than the rest.
For example; the eyes have the most visual weight in a portrait. In a low key photo, the highlights have it and so on.
- Eye-lines
Have you ever seen someone on the street staring at the sky and everybody turns to see what it is they are looking at?
In photography, you can apply the same principle. If you have a person in your image that is looking in a certain direction, the viewer is going to follow the same eye-line as the subject.
This is a powerful tool to tell the viewers what else they need to focus on or the direction they need to follow to ‘navigate’ through the image.
- Triangles
Creating shapes with the elements of the photo is the easiest way to compose it. Triangles are one of the most versatile shapes there are.
Think about a still life image – you can have a tray with cheese or grapes as the base and the bottle of wine to create the triangle.
You can also use it for portraits. Imagine a headshot of someone with their elbows on the table and their hands-on their chin – there are endless applications for triangles in photography. Try it out.
- S Curves
The S Curve is one of the many leading lines of composition rules. Your eyes will naturally follow any line within a photo.
For example, placing the subject at the end of a fence will lead the viewers to it. In the same way, S curves will make the eyes wander through the frame.
An S is a very organic line that pulls you into the image in a dynamic and pleasing way.
- Balance
This can be achieved by any of the previous methods of composition. With balance, you can create a pleasing result that will make the viewer comfortable. You can also break the balance intentionally if you want to create tension in a photo. One popular example of this technique is using radial balance.
2. Understand Exposure

Credit: Md Iftekhar Uddin Emon
Exposure is the term that refers to the amount of light that you let into the camera to take a photo. This applies to film and digital photography.
This is determined by three elements: aperture, shutter speed, and ISO. These are known as the exposure triangle.
Finding the correct exposure is something that most beginner photographers struggle with. If your image has too much light, it’s overexposed. If it’s too dark, your photograph is underexposed.
To help you understand any problems in your image, you can use the histogram.
Histogram
This is a graph that shows you the tonal values of your image. It’s important to know and use it because it will give you accurate information about your exposure.
When you just check your image on the LCD screen of your camera, it might look OK even if it’s not. In your histogram, you can check that the graph reaches both ends. If it has a peak on one of the sides, it might be under or overexposed.
Now let’s talk about the three elements of the exposure triangle.
3. Learn Shutter Speed

Credit: Randy Fath
The shutter is the curtain that protects the sensor (or film) from the light. When it’s open, the light comes in and imprints the photo.
The amount of time that you leave it open is known as the shutter speed (see guide). This is one of the elements that control exposure, but it also influences other aspects of your photo.
When something is moving, you can freeze it with a fast shutter speed or caption the motion blur with a slow one. Shutter speeds are valued in seconds; most cameras go from 30 sec. to 1/8000 sec.
In order to master the exposure triangle, you must first gain a thorough understanding of how shutter speed affects your photos.
4. Learn Aperture

Credit: Hassan Pasha
This is another component that controls the correct exposure of your images. Aperture is not about the amount of time, but the amount of light. It determines how big or small the hole is that lets the light into the camera – technically called the diaphragm.
The aperture is represented with the f-number. Prime lenses can reach apertures of f/1.2 while zooms have a maximum of f/2.
On top of the exposure, the aperture controls how much of your image will be sharp. First, you put your main subject in focus, then with the aperture, you can control how much of the scene in front and behind it will be in focus too.
For example, with portrait photos (guide), you want the background to be blurry to make your subject stand out. In a landscape photo (guide), you want as much of the scene as possible to be sharp, so you use f/16.
Understanding how aperture affects your photos is an important step in producing visually pleasing images.
5. Learn ISO
Credit: Todd Diemer
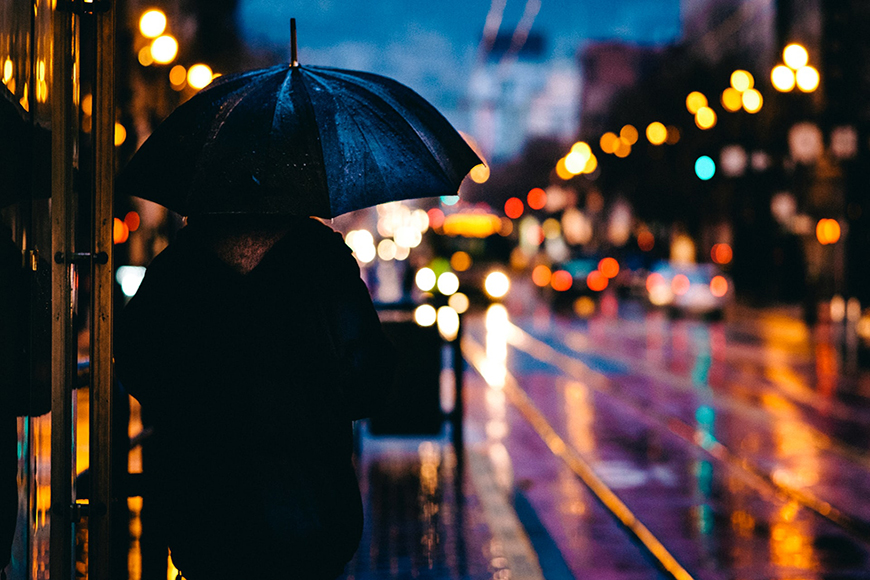
The ISO controls the sensor’s (or film) sensitivity to light. When you are photographing in low light situations, you might want to use a high ISO. This, however, can create some digital noise, so try to balance things using aperture and shutter speed.
Many people get confused when talking about ISO, since its effects aren’t as noticeable while shooting images – it’s ore often when you’re editing your photos on a big screen that you’re more likely to see how a higher ISO can negatively affect the final image quality.
In general, the more expensive the camera, the better it can handle high ISO. Professional photographers who often need to shoot in low light rely on cameras with great high ISO capabilities, but this comes at a cost.
6. Use Different Shooting Modes

Credit: Leo Cardelli
- Program (P)
This is the first step out of full auto mode. The camera will automatically decide the best exposures, but the dials are not locked. This way, you can move them while keeping the aperture and shutter speed balanced.
- Shutter-Priority (S / Tv)
This is a semi-automatic mode. This means that you can control only the shutter speed and the camera takes care of the rest.
This is great when you have moving subjects, and you need to decide if you want motion blur or not.
It’s also useful if you’re shooting handheld in low light situations – this way you can avoid camera shake.
This aperture priority mode lets you choose the f-number, and it will compensate for your choice with the correct shutter speed.
This is used when the depth of field is the most important thing you need to control. Aperture Priority mode is often used in conjunction with Auto ISO.
- Manual (M)
The manual mode is used when you already master all the settings, and you can adjust the exposure by yourself. This gives photographers complete control of the exposure triangle and is one of the photography basics that’s essential to master.
7. Learn to Set the Right Metering Mode
Credit: Eduardo Gorghetto
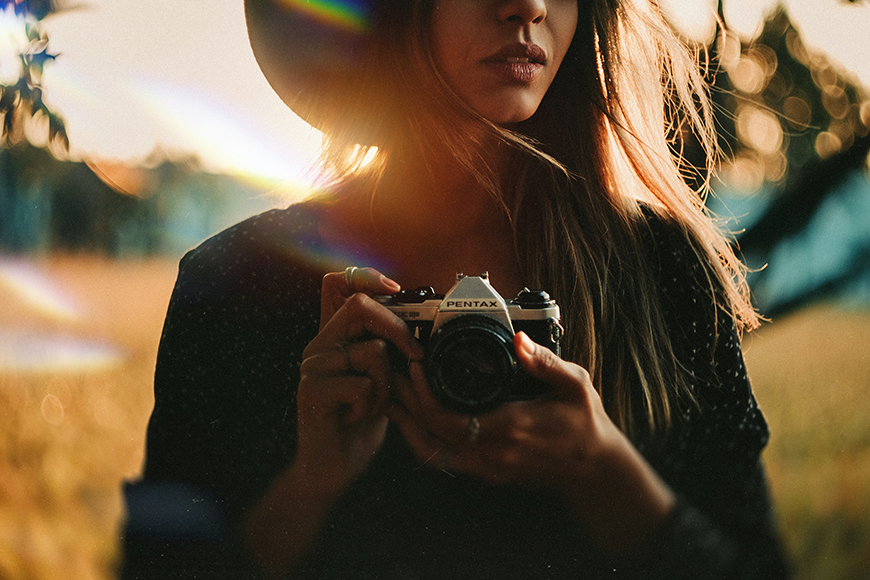
For your camera to know the correct exposure, it needs to ‘read’ the light from the scene. To do this, it has different modes which relate to metering in photography.
- Spot Metering
This reads the information from a small part of the image – usually the center. More professional cameras let you move the spot metering to the focus point.
This is very useful when you have a very contrasted scene such as low or high key lightings, or when you are photographing the moon.
- Average Metering (Center-weighted)
This metering mode takes an average reading from everything inside your frame. It does, however, consider more important information from the center because it considers that the main subject will be there.
This is useful when your image does have the subject in the center, or it covers most of the frame – as a headshot would do.
- Matrix/Evaluative Metering
Matrix is Nikon’s version, and Evaluative is Canon’s name for the same basic concept. They do, however, work on different algorithms, and that’s why they have proprietary names.
Both brands use this as a default metering mode in any auto and semi-auto program. It will read the entire scene and decide the best exposure.
Normally it works very well for evenly lit photographs, but it doesn’t do very well with high contrast images.
8. Understand Focusing Modes
- Manual
This is as straightforward as it sounds. You manually adjust the focus of your photograph by moving the focus ring on your lens. This is very useful for still life photography, macro photography, focus stacking and other techniques.
- AutoFocus
This is the opposite of manual focus. When you press the shutter half-way, the lens focuses on your subject, (and you can recompose if you want), then you take the photo.
- Continuous Focus
This mode changes its name according to the brand. Canon calls it AI-Servo while Nikon is AF-C.
Whatever brand you use, the idea is that you can focus on a moving subject just once, and it will readjust automatically as it moves.
This is great for sports photography, children or pets photography – basically any fast and active subject.
- AI-Focus and AF-A
These modes are from Canon and Nikon respectively. Both of them give full control to the camera to decide if autofocus or continuous focus is best.
For beginner photographers, it sounds great, right? Yes, in theory. In practice there are many times when it doesn’t do a great job, so get to know your gear and see how it reacts in each situation to decide if you trust this mode or not for your needs.
Fortunately, most starter cameras for beginners include these modes.
9. Learn About White Balance

Credit: Marcel Milder
You’ve probably noticed when you buy a light bulb that it has warm or cold written on the package.
That’s because light has different colors, and we associate them with temperature. For example; the golden hour that is so valued by landscape photographers gives warmer tones because it’s low on the Kelvin scale.
High values give cold blue-ish light, while the white neutral light corresponds to sunny midday. The white balance settings on the camera take care of compensating for color casts.
When you learn to control it, you can play with the whole atmosphere of the scene, so it’s very useful. It’s also one of the important photography basics to learn when shooting photos at golden hour.
10. Choose the Right Camera
Credit: Christian Mackie
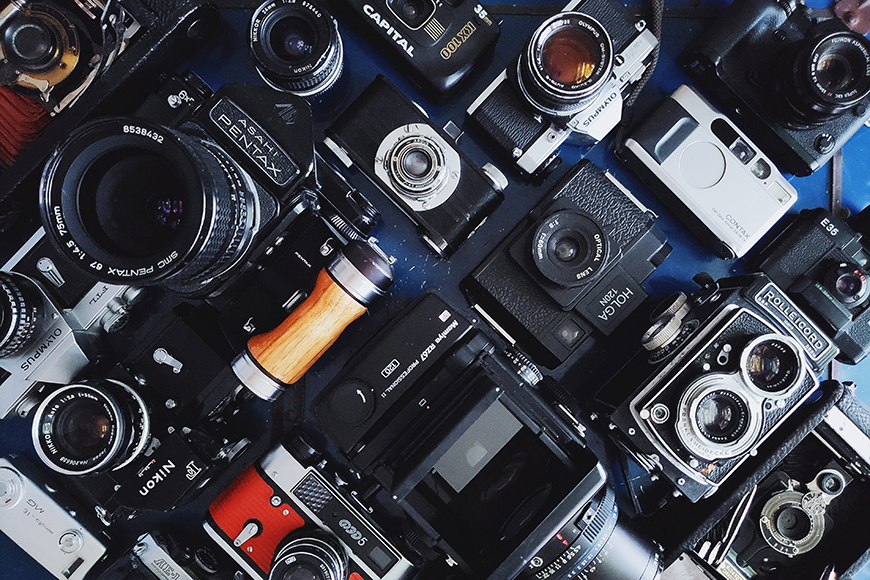
Choosing a camera is an important decision for a beginner photographer. You can apply many of the basics of photography with any camera. So, if you already have a point and shoot or a bridge camera, you can use those.
However, if you need to buy a camera to start as a photographer, you shouldn’t think of it as just a learning tool – it’s an investment.
Most photographers keep growing into the same camera system they started with because you can upgrade little by little instead of buying everything from scratch each time.
Here are the two big choices for photographers:
- Mirrorless
The name mirrorless comes from the fact that they don’t have the mirror that bounces the image towards the viewfinder. Because of this, entry-level cameras only have an LCD screen. The more professional ones have an electronic viewfinder – see our guide to the top mirrorless cameras here.
On the plus side, this saves a lot of space, so they are smaller and lighter than a DSLR. They offer interchangeable lenses, and depending on the budget; you can even find them with a full-frame sensor.
- DSLR
DSLRs come with a cropped sensor on entry-level models, and a full frame sensor on the professional ones.
The price difference is very big, so I would recommend you get a cropped sensor to start if you don’t have a big budget.
However, you can sometimes find some great deals on older model full frame cameras – see this guide for some of the cheapest.
DSLRs have an optical viewfinder which means that the battery life is far superior to mirrorless.
11. Choose the Right Lens

Credit: Chuttersnap
Many cameras come with a kit lens when you buy them. If this is the case with your purchase, it’s a good way for new photographers to start.
A kit lens will have its limitations, but it’s versatile enough to let you experiment with different types of photography to determine which one you need next.
If you don’t own a kit lens, or are thinking about upgrading it, here’s a brief guide to camera lenses. To learn more, you can check out any of our articles specifically dedicated to this topic.
- Standard Lenses
These are the lenses that most resemble the human eye perspective. Because of this, they’re commonly used for documentary and street photography, but it’s one of the most versatile types of lens, so you can also use them for portraits or fine art.
For full-frame cameras (or film cameras), a standard lens has a focal length of 50mm. However, this is different in other cameras depending on the size of the sensor.
These types of lenses are the ones that have a focal length over the standard. They can be a short-range telephoto when they go up to 100mm or 135mm and are great lenses for portrait photography (guide) because of the shallow depth of field – i.e. the ability to create a bokeh background in photos.
The next category goes from around 135mm to 400mm. This is useful for some types of sports or wildlife photography, and also for capturing details in architectural photography.
Finally, you’ll find the super-telephoto lenses that are dedicated to very specific niches of professional photographers. They are big, heavy and usually very expensive too.
- Wide-angle lenses
These have shorter focal lengths than a standard lens, and they are used to widen the angle of view, but they can create distortions on the subject and the lines in the scene.
They are mostly used for architecture and landscape photography. As the focal length becomes shorter, they become ultra-wide-angle and then fisheye lenses. These are mostly used for special effects because of the intense distortions.
12. Get the Accessories You Need
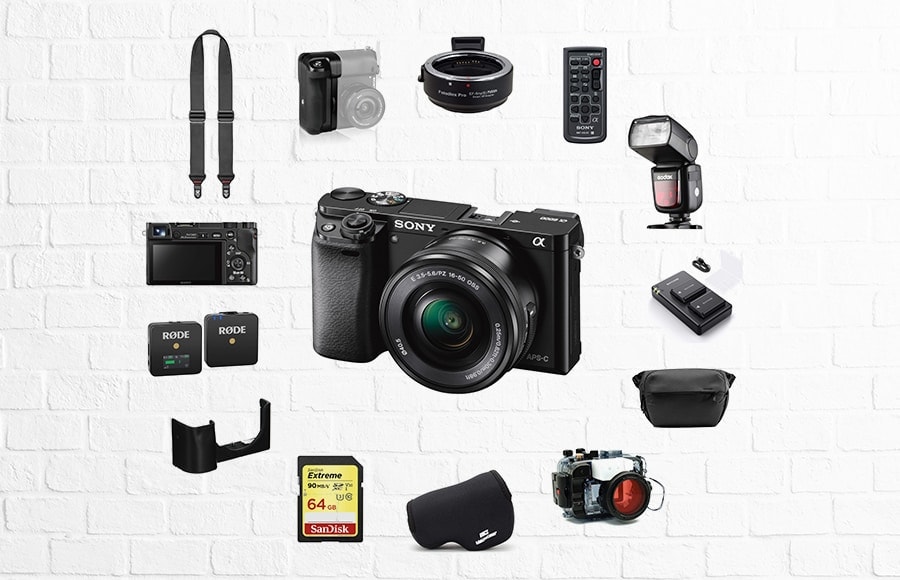
Example accessories for the Sony a6000 – the best selling mirrorless camera of all time.
While you shouldn’t burden yourself with too many accessories for your photography journey, investing in a few key items will allow you top push your creativity in more directions.
Some of the camera accessories are essential, whereas others are ‘nice to have’. Depending on your budget, you should get the essentials as soon as possible, then expand your collection gradually, whenever you feel a need to broaden your creative horizons.
- Flash
This is the first step in using artificial light. Using Speedlights or on-camera flashes are a great way to control your lighting.
- Tripod
This is a must-have accessory! It will allow you to shoot in low light situations without camera shake, experiment with long exposures and level up your composition skills.
Shotkit features several guides to buying tripods, including a guide for iPhone tripods and mobile stands (here).
- Bag
Your camera and photographic gear are expensive and delicate. Make sure you take care of them with a good camera bag (guide), to avoid damaging all your precious gear while you’re on the go.
- Filters
There are many filters out there to choose from, but one of the most popular is the ND filter. It allows you to take amazing long exposure landscape photos during the day. Another handy one is the polarizing filter to avoid or reduce reflections.
13. Learn Post-Processing
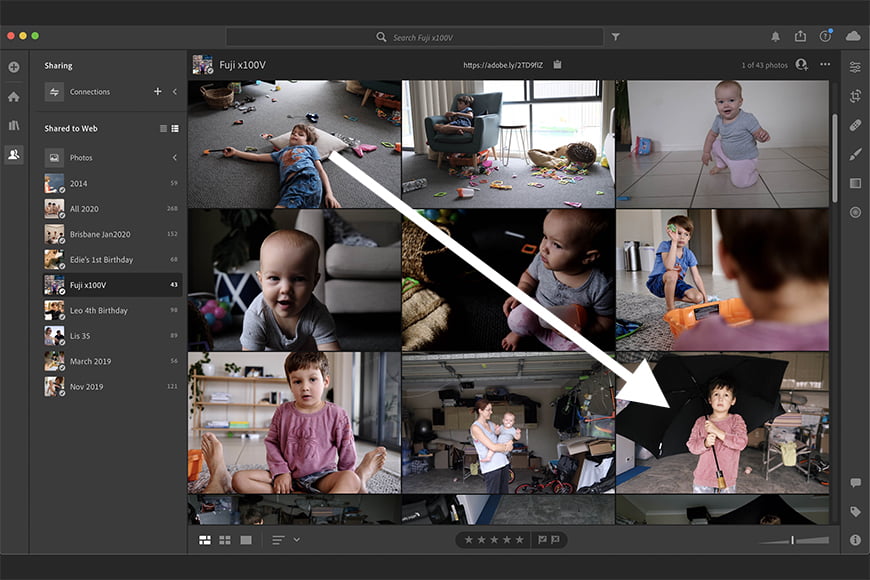
Nowadays, post-processing is an essential part of digital photography. Some of the most common editing programs are Adobe Lightroom and Adobe Photoshop.
These are part of the Adobe Creative Cloud, and require a paid membership. You can try them out 7 days for free and decide if you want to move forward.
If you prefer not to invest, there are some free choices like Pixl-R or GIMP, a substitute for Photoshop.
We’ve also written an extensive guide to alternatives to Lightroom, although it has to be said – Lr is still the most popular option for photographers in 2023.
Photography for Beginners FAQ
Is photography hard to learn?
Photography itself isn’t that difficult to learn – at least at a surface level. However, to really do it well takes time, study, and practice. Follow the tips above and you’ll get a head start.
Is it too late to get into photography?
Absolutely not! It may seem like it’s not worth it because everyone these days can do it. But there’s always room for new creative outlooks. Plus, the technology is ever-evolving, meaning there are always new angles to explore. Regardless of your age or the year you decide to start, it’s never to late.
Do I have to go to college to become a photographer?
While a college degree will certainly teach you much of what you need to know, it’s not a requirement to become a professional photographer. Many photographers get their start simply by practising their craft with passion, finding resources and mentors who can help them learn, and volunteering or interning on jobs so they can gain experience.
Final Words
The overwhelming amount of articles and tutorials available can make basic photography look like a complicated mess. Many people lose interest before they’ve even started!
I hope with these photography tips for beginners; you can stay motivated by seeing your images improve each time you take a photo.
Then you can keep learning a little bit at a time until you master all the basics of photography. If you have any questions or suggestions, leave them in the comments section below.
Best of luck!


Check out these 8 essential tools to help you succeed as a professional photographer.
Includes limited-time discounts.


