Best Luminar Presets & Looks (Free & Paid)
Whether you're looking for free Luminar presets or premium ones, this guide will definitely help! Also known as Luminar Looks, they're a great editing tool.
There are a lot of reasons for investing in Skylum Luminar. Not only is it one of the easiest pro-level photo editing software in 2023, there are also a number of great presets available – what Skylum calls ‘Luminar Looks’.
These presets run the whole gamut of styles and genres, from portrait looks and film emulation to looks for landscape photography.
Using the best Luminar presets can really streamline your workflow, especially if you tend to make similar choices in your editing style.
They can also provide inspiration when you’re feeling a bit blocked or are not sure what changes would really bring out the best in a photo.
Both Luminar 3 and Luminar 4 come with a number of presets installed, but if you find that you want to branch out beyond these, you’re in luck. Luminar’s Marketplace has a number of both premium and free Luminar presets.
Here’s a list of the ones that I think are the most useful.
Best Free Luminar Presets
These 10 sets of Luminar Looks are some of the most versatile offered through Skylum’s marketplace.
Keep in mind, though the latest version of Luminar – Luminar 4 – is still relatively new. As a result, there aren’t quite as many presets made specifically for it as there are for Luminar 3.
This makes a difference some of the time since some of the filters present in Luminar 3 were either consolidated with others or renamed in Luminar 4.
Luminar 3 presets will still work in Luminar 4, it just may be trickier to find the individual filters for fine-tuning.
That being said, let’s get to the Looks themselves, starting with 5 of Skylum’s free Luminar presets and followed by a few premium ones.
1. SmugMug Looks (Designed for L4)
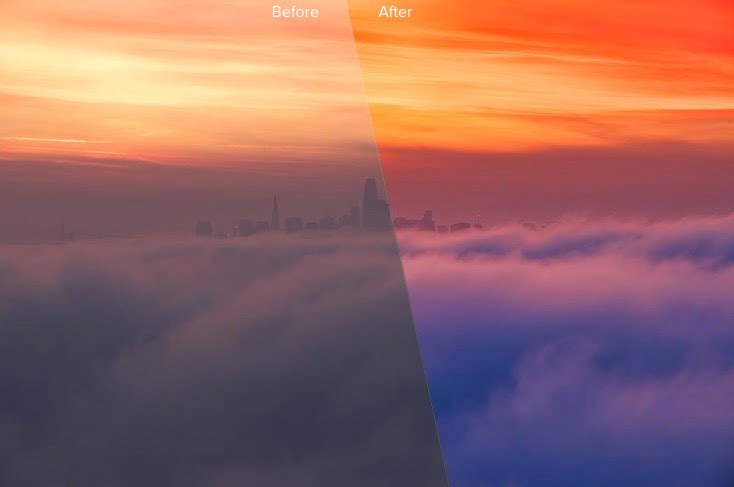
You don’t have to be a SmugMug user to really enjoy this collection of presets. It comes with a variety of options, from landscape enhancers to portrait looks. There’s even a waterfall enhancer.
What I really like about this particular looks pack is that it’s easy to get a natural look in an image. Many presets seem a bit overdone to me, even backed off.
You can see in the image above that things were naturally enhanced, not overdone.
2. Pexels Pack (Designed for L4)
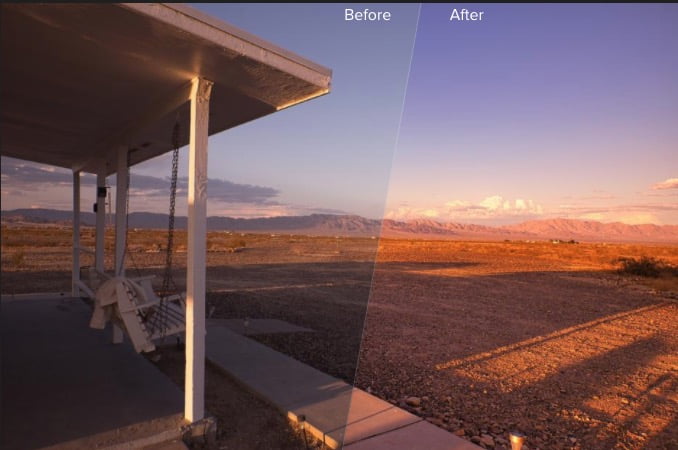
This Pexels preset pack comes with 10 presets, 5 of which are for portraits, 4 for landscapes, and 1 additional preset called “tot camera.”
The AI color and tone enhancements in these are particularly fun to play with, though like many luminar looks, you probably won’t want to use them at 100%
In the image above, you can definitely tell the Landscape Vibrant preset added a lot of life to what was otherwise a drab photo.
3. Atomic Colors (Designed for L3)
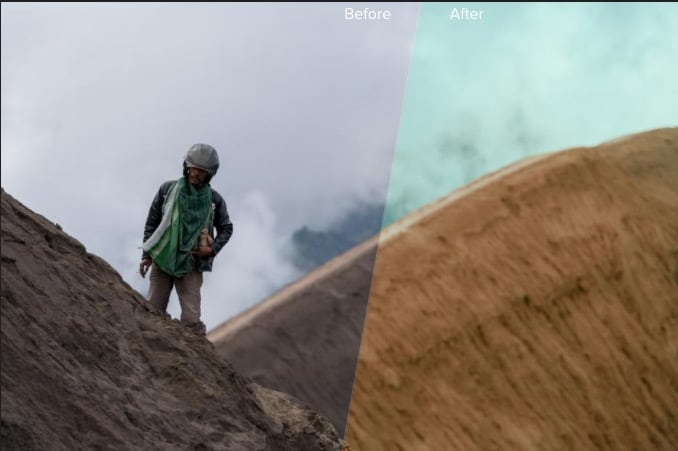
Created by Wim Arys, Atomic Colors is an extensive collection of toned presets made for Luminar 3. In fact, this preset pack comes with over 100 presets, all carefully crafted to work as film emulations.
Each preset is named after an atomic element and each offers its own blend of atmospheric change.
Honestly, it’s amazing that this preset pack is free.
At 100% these film emulations will look a bit surreal, so be sure to tone them down, either by reducing the intensity or the layer opacity.
4. Stunning Portraits (Designed for L3)

The Stunning Portraits preset collection you’re new to Luminar portrait editing or don’t want to bother with all the individual adjustments Luminar 4 has in their Portrait editing suite.
With this set of 18 presets, you can change the color intensity, add a variety of fashion “punches,” make subtle contrast changes, or just add a bit “special sauce” to what might otherwise be an ordinary shot.
Definitely one of the better free Luminar preset collections.
5. Winter Looks Collection (Designed for L3)
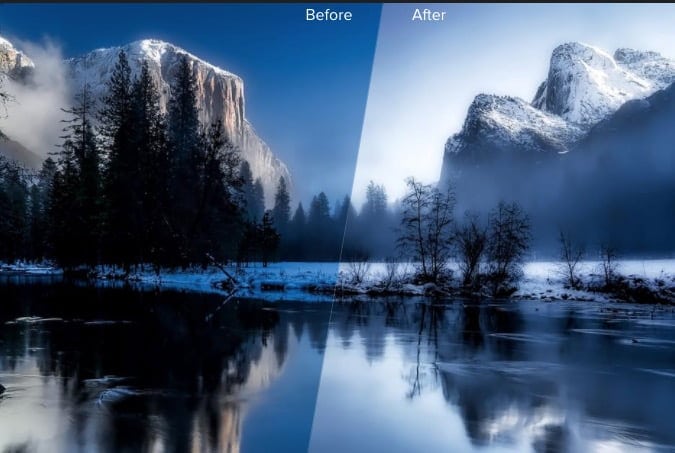
If you’ve taken a lot of photos with snow or ice, you know how hard it can be to get them looking just right in post-processing.
That’s where Luminar’s Winter collection of presets comes in.
This set of 25 Luminar presets includes everything from film emulation to HDR presets to image corrections like “Highlight Repair” and “Shadow Repair.”
There’s even a preset for urban winter scenes and landscape pictures in the winter. See more about HDR photography here.
Best Premium Luminar Presets
While the above free Luminar presets do a fine job at editing your RAW files with just one click, there’s a lot of be said about paying for your photo editing.
Here’s a list of the best paid options out there, which all work well with the latest version of Luminar, as well as older versions.
6. Moody Days ($20)

Moving on to Luminar’s premium presets, Moody Days is a set of 10 presets designed to add feeling and mystique to your photos. They work especially well on landscape photos taken on gray days, but I found that they can also add a special element to shots taken in full sun.
As a preset pack, there’s something for both beginners and advanced Luminar users.
A great collection for effortlessly adding mood and atmosphere to your shots.
Also designed as a set of Lightroom presets, a single purchase lets you use them in either application, though if you’re using Luminar 4 as your primary editing app there’s not really a lot of reason to use them in Lightroom instead. (It’s also easier to adjust each individual filter in Luminar.)
7. B/W Classic Filters ($9.99)
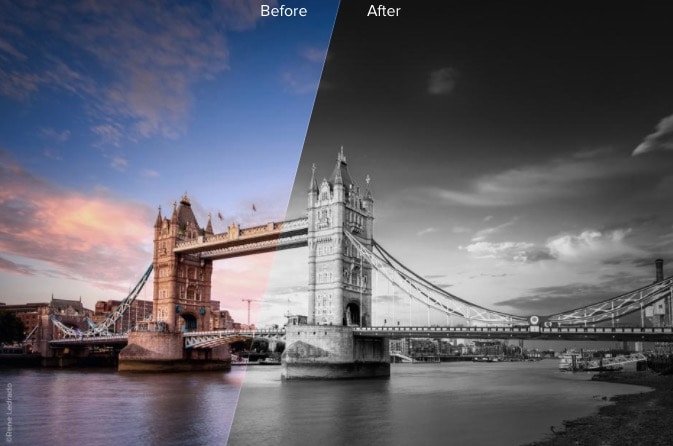
Love B&W photography but having trouble figuring out how to bring out the best in your B/W photos? Or maybe you just don’t like the time it takes to play around with each filter and slider? This set of 16 Luminar presets will make finding the perfect B&W look much easier.
This collection includes all the different color filters as well as natural, infrared, and artistic options.
Once you find ones you like, these can definitely save you time in your workflow.
Like the Moody Days Luminar preset pack, B/W Classic filters work both as Luminar Looks and Lightroom presets.
8. Anchor Collection ($9.99)
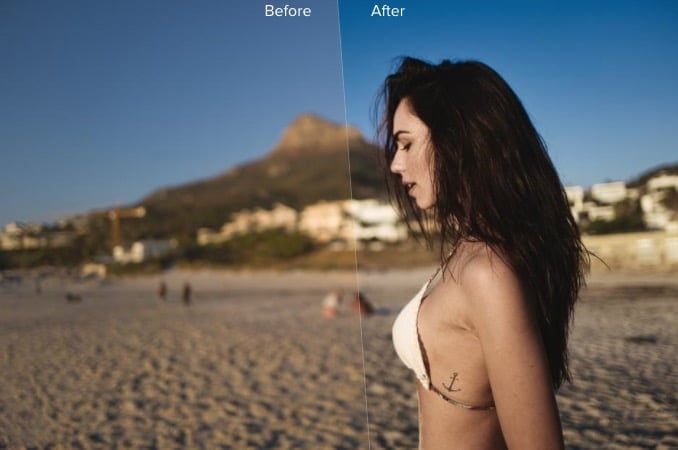
If you like adding individual flare to your photos, then you’ll probably love Luminar’s Anchor Collection. Designed by German photographer Patrick Ludolph, each look is one he actually uses in his professional work.
What’s awesome about this preset pack is that each Look – El Toro, Seafarer, Brooklyn, Cadillac, Capetown, Fishmarket, etc. – can be used on a variety of different types of photos. For example, the Seafarer preset works equally well for portraits as it does street photography.
Personally, these are some of my favorite Luminar Looks out there for creating artistic-style photos.
9. Americana BW ($9.99)
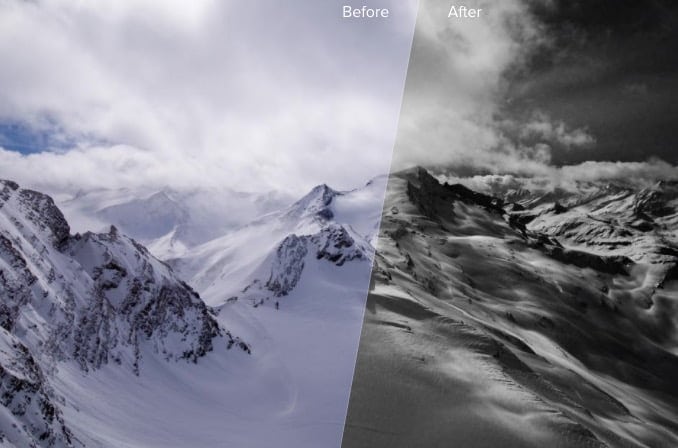
Another amazing B&W Luminar Looks collection, this set brings back the styles of the photographers of the mid-1900s. (Think Ansel Adams, Edward Weston, and Eliot Porter.)
If you’re not familiar with the style, it’s more than worth taking a look at (and emulating!).
These photographers made some of the most iconic US landscape photos of the twentieth century and influenced photographers for generations.
While there are all kinds of Luminar presets for B&W photography (usually mixed in other preset packs), this set of 10 is particularly focused on the vintage Americana look, with high contrast, really cool film emulation, and those classic darkened skies.
Created by landscape photographer Win Arys, this preset collection is the perfect gift for the landscape photographer in your life who likes the film look (though I also like these Looks on cityscapes and travel shots).
10. Travel Photography ($9.99)

Created by commercial, editorial, and travel photographer Victor Gonzalo, this collection of Luminar presets will make editing your travel photos a breeze.
I particularly like the cityscape presets, but there are also some excellent ones for portraits and landscapes too.
How to Install Luminar Presets
All Luminar presets are easy to install, especially the Looks collection from Luminar’s marketplace.
To install a Looks Collection from the Luminar Marketplace
- Click the download button.
- Find the file with the .mplumpack extension. (If you’re using a Mac this will probably be in your Downloads folder.) You’ll probably have to unzip it first.
- Double-click the file. It should directly install.
- If for some reason it doesn’t, drag and drop the file onto the Luminar icon. You’ll find this either in your Applications folder or on your home screen.
This works for both premium and free Luminar presets in version 3 and 4.
Final Words
Whether you’re using free Luminar presets or paid ones, you’ll save a lot of editing time, especially once you get accustomed to the Looks you really like.
If you’re a beginner, a Luminar preset can help you see what’s possible. If you’re an advanced editor, try using them with the different blending modes for a whole other set of creative options.
If you’re interested in more free Luminar presets, there are plenty of third-party ones available. (I just covered those offered through Skylum’s marketplace here.)
Some are sold as single Luminar presets, others are sold as collections.
There are also a number of awesome premium collections created by other excellent photographers like Trey Radcliffe and Jim Nix (i.e. the Magic Hour).
(If you use Aurora HDR, Trey also has some amazing HDR presets available – some free Luminar presets as well.)
In the end, the best Luminar presets will be the ones that match your photography style. For me, these are often the ones that keep my images looking realistic while offering enhancements that really bring out the best in my photos.
Remember, each Luminar preset is really designed to just be a starting place. Most, if not all, are going to need some fine-tuning adjustments afterwards to get them looking just right.
Still, compared to the time it would take coming up with all these adjustments from scratch, you’re still saving a lot of time using presets.
Best of all, you can use these presets as a starting place to create your own – remember to add a watermark with Luminar 4 to your photos too.
What do you think? Have any favorite Luminar presets? Which would you recommend?


