How to Shoot Event Photography Like a Pro in 2023
In this guide to event photography, we'll cover the 15 best tips for nailing your shots and keeping clients happy. Read on!
By Greg Cromie
In this guide to event photography, we’re going to cover all there is to know about capturing essential occasions and providing professional services.
In my experience, photographing events is hard work. There’s a lot at stake, and you won’t get the chance to go back in time and fix your mistakes.
Importantly, you’re not taking shots for your enjoyment, but for the satisfaction of a client – that’s the stressful bit.
With a little help from our tips for great event photography, you can plan, prepare and reap the benefits of your success.
15 Tips for Great Photography of Events
With event photography, there’s a lot at stake, and you’re under a lot of pressure to meet the client’s expectations.
Thankfully, there are some practical and straightforward steps you can take to ensure you capture the moment and meet the needs of paying clients.
Let’s take a closer look at our best photography tips for mastering this genre.
1. Get the Necessary Gear
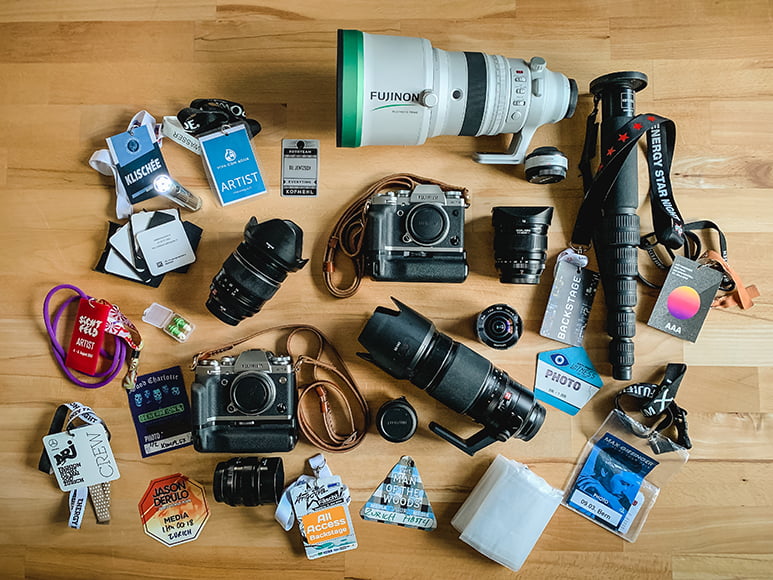
Assorted gear of event photographer Til Jentzsch on Shotkit
Having the correct gear is essential to both ensuring your success and gaining the kind of image quality that your client demands. Having the right camera, appropriate lens, flash kit, and other bits and pieces makes all the difference to your process.
I also cannot stress enough the need to know your gear inside and out. There’s nothing worse than being in a high-pressure situation, and you get bogged down trying to work out the settings on your camera.
- Camera
An essential piece of kit is your camera. Without the right camera body, you’ll struggle to keep up with the action in any event.
When selecting a camera for event photography, there are a few things to have high on your priority list.
Ensure that your camera can manage low-light situations better than most. A lot of events happen indoors and at night, so your camera needs to have excellent ISO management.
Your camera also needs an image sensor that captures a significant amount of detail – this is one of the essential camera parts you don’t want to skimp on – a full frame sensor will help you out in low light, and a higher mega-pixel account will allow you to crop more in post-production.
Finally, you want a camera that’s ergonomically comfortable enough to carry for an extended period. As an event photographer, you’ll find that you rarely lower your camera for a break.
- Lenses
Now that you have the right camera, your next step is to select suitable lenses.
Lens quality is an essential consideration as lenses form a critical part of the image quality equation. There’s no point having the best camera in the world if you have a terrible lens.
I prefer to shoot with a prime lens (single focal length) as they tend to have sharper image quality and wider aperture. Aperture is the width at which you can open the lens aperture diaphragm to allow light in.
The wider the aperture, the better, as it allows more light to hit the camera sensor. A lens with an aperture of f/1.4, f/1.8 or f/2.8 is perfect for event photography.
But what about the focal length?
If you’re shooting with a prime, then I recommend a wide lens so you can capture more of the event context. Wider lenses are also ideal for group shots and capturing the scale of the event.
You could start with a wider lens with a focal length of around 24mm or 35mm.
If you’re shooting tighter compositions such as couple portraits (often the case if you’re a wedding photographer), I’d also suggest a prime. A lens that’s between 50mm and 85mm is ideal for this kind of image.
If zooms are your thing, then you want a lens with a wide aperture and a focal range between 24mm – 70mm. See the prime vs zoom lens guide for a deeper dive. Longer lenses are obviously useful for shooting subjects that are further away, such as with fashion photography, where the stage may restrict you from approaching the models.
- Lighting
It’s essential to remember that in photography, light is your compadre!
But if you’re working in a dark event space or outside at night, there’s very little light. To deal with this, you’re going to want a quality on-camera flash.
A flash unit or Speedlight will pulse a burst of light when you take a photo. These add lighting to your composition so that the camera sensor can pick up on the detail.
But be warned, the worst event photos feature washed out guests and terrible shadows due to poor flash use.
Use a flash diffuser and where possible point the flash at the ceiling to bounce the light down.
- Accessories
You have the essential triad of camera gear ready for your event – but there are a few other bits you’re going to need.
It would help if you had a quality bag that suits the environment you’re working in. Showing up to a wedding with a giant hiking backpack is not ok. Go for a slimline sling bag that won’t get in the way or bang into guests.
Working without a bag is even better. There’s a great range of camera straps to support your camera comfortably over your shoulder or neck.
Shooting over several hours is going to eat up your batteries. Carrying as many spares as you have, a battery bank or even fitting a battery grip to your camera will save the day.
The same goes for memory cards – make sure you have plenty.
2. Master Your Camera Settings
The next bit is significant to understand but not nearly as important as taking that knowledge and practising it over and over. No point showing up to an event if you don’t know your camera settings.
It’s also essential to understand that one camera setting does not do it all. It’s a concerted effort from all of your settings to work in unison.
- Shutter Speed
Your shutter speed dictates how long the camera shutter is open to allow light to hit the sensor.
If the shutter is too fast, not enough light gets in, but you’ll get sharp images. If the shutter is too slow, you’ll get better light, but you’ll capture motion blur. Remember though, that slow shutter speed photography can be used as a creative effect.
For event photography, you want to capture groups, individuals and activities as they unfold. But you have to be quick as often guests will be in the middle of something when you stop by to take a shot.
I recommend starting at 1/125 and going up to 1/250 – that way you’ll be allowing light in but also freezing the movement.
- Aperture
Aperture adjusts the opening of the lens diaphragm.
A wide aperture, such as f/1.4 or f/2, allows more light in but results in a shallow depth of field, or a ‘bokeh background‘. A narrow aperture such as f/8 or f/11 restricts the amount of light but results in more in-focus content.
If you’ll be shooting events in darker settings, you’ll want to use a wide aperture – as wide as your lens allows. Just watch out for lenses that deliver a super thin depth of field.
A wide aperture is excellent for couples shots, groups of people, or for standing back to capture a broader scene.
When you need a more significant amount of in-focus content, set your aperture to f/4 or f/5.6.
- ISO
ISO is the camera function that manages the sensitivity of light hitting the camera sensor. It can be a great aid in allowing more light into your camera and compensating for having to use a narrower aperture or faster shutter speed.
Be warned that too high an ISO can result in ‘noise’ appearing in your images. Too much noise can ruin a perfectly good photo.
I suggest starting at 1600 ISO and then dialling up or down from there. If you get caught out, refer to our guide to noise reduction software to fix things in post.
- Continuous Shooting
A handy function for event photographers is continuous shooting (also known as burst mode).
In this mode, your camera will fire off several images with a single press of the shutter button. You’ll capture multiple shots as the action unfolds and later will select the best of them.
You do have to be careful as continuous modes fill up memory cards fast and deplete batteries even faster.
- RAW
For professional work like events photography, you should always shoot in RAW mode over JPEG. RAW image files retain almost every bit of detail that the camera sensor captures. JPEGs store far less information.
The best thing about RAW files is that you have far more scope to pull details out of dark areas and soften highlights in editing software. This is certainly handy for event photographers when their pictures turn out underexposed but need to be salvaged for clients.
3. Work on Client Communication
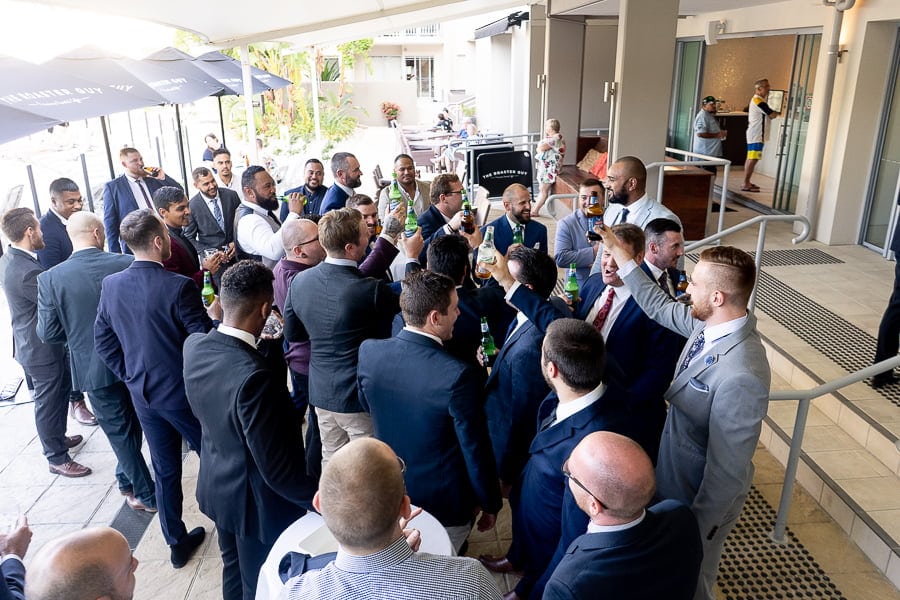
Regardless of whether you’re photographing an birthday party for a friend or a corporate event for a client, communication is critical.
Well before the event, you must establish rapport with the client and ensure you have a complete understanding of their needs. Show them examples of your past work and get a feel for what they do and don’t like.
To make this process easier, here’s a checklist of questions to ask:
- What is the purpose of the event and what is the mood likely to be?
- What is the goal of the photos?
- Where and when will the event take place, and how do I gain early access to scout the location?
- What and when are the crucial moments (e.g. speeches, meals, cake, dances)?
- What style of photographs are you after (candid, portraits, groups)?
- Who are the key people you want me to capture?
- Who or what should I not photograph?
- What sort of compositions do you like and not like?
At the event, make yourself available to any client requests that may pop up from time to time. Maintaining a strong line of communication ensures success and client satisfaction.
4. Make a Hit List
Once you have communicated with the client and covered the questions on your checklist, it’s time to plan.
Creating a running sheet that you keep either on your mobile or printed out will be a handy tool. You can keep track of the flow and key moments of the event and be ready in the right place at the right time.
Include images the client has marked as essential and those that they have advised avoiding.
Share the document with the client before the event to ensure there’s an understanding of what to expect.
It also acts as a bit of an insurance policy should the client later complain that you missed crucial moments.
5. Include Candids
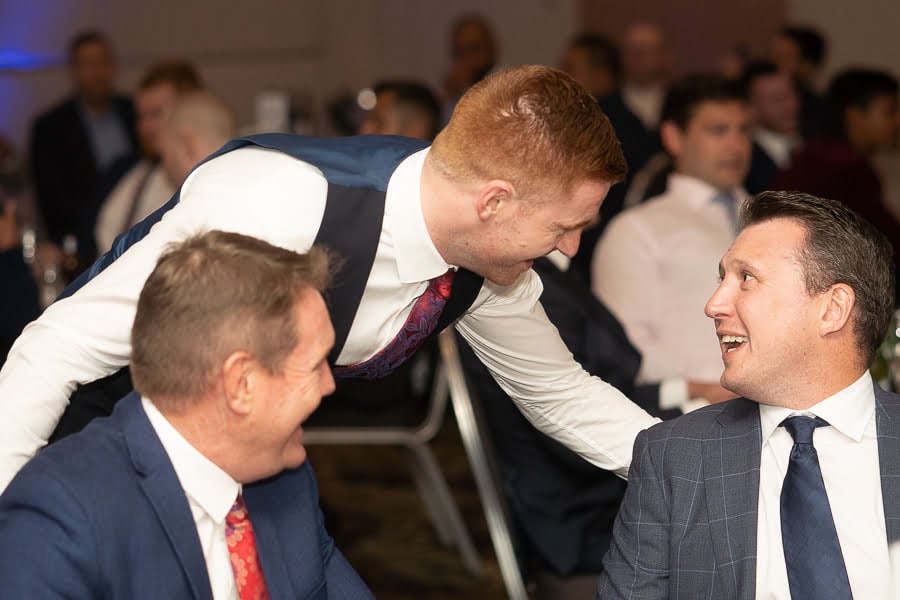
While you work from your ‘Hit List’ to meet the client’s expectations, also be on the lookout for candid shots.
A candid shot captures a moment where the guests were not expecting the photograph. Unlike staged and posed photos, candid images have a natural innocence about them.
More often than not, you’ll get great images of partygoers being themselves and not putting on their photo smile.
Experiment with this and take shots while people are enjoying a drink or a meal together. These shots go a long way to complementing the formal images.
6. Shoot a B-Roll
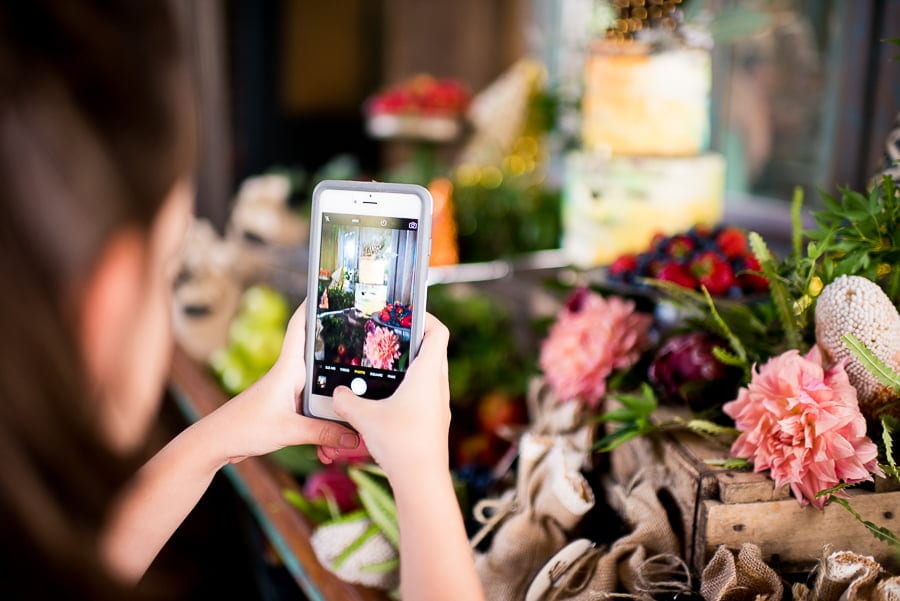
Aside from the formal and candid shots, it would help if you took the time to capture some b-roll images.
A b-roll is used by the client to help tell the story of the event.
I recommend getting to the location well before the party kicks-off. That way, you can scout the venue and understand where key moments take place.
Also, get a feel for the lighting and dial in your camera settings to match this.
You can go beyond photographing the empty venue to capturing candid images of the staff setting up, food placed on tables, decorations and decor.
7. Don’t Neglect the Legalities
If you’re doing any form of paid work or setting off as a professional event photographer, invest some time into understanding the legalities.
This is especially important when dealing with high-stakes events such as weddings, business functions and parties. The last thing you want is a client taking you to court because you lost all of their images (it has happened).
The best defence against this occurring is to have a strategy in place. Begin by hiring a lawyer who specialises in contracts – they’ll support you to create a standard contract for use with any event jobs.
Another essential consideration is liability insurance. A comprehensive policy provides cover for legal liability for property damage and/or bodily injury to a third party.
8. Mind Your Manners
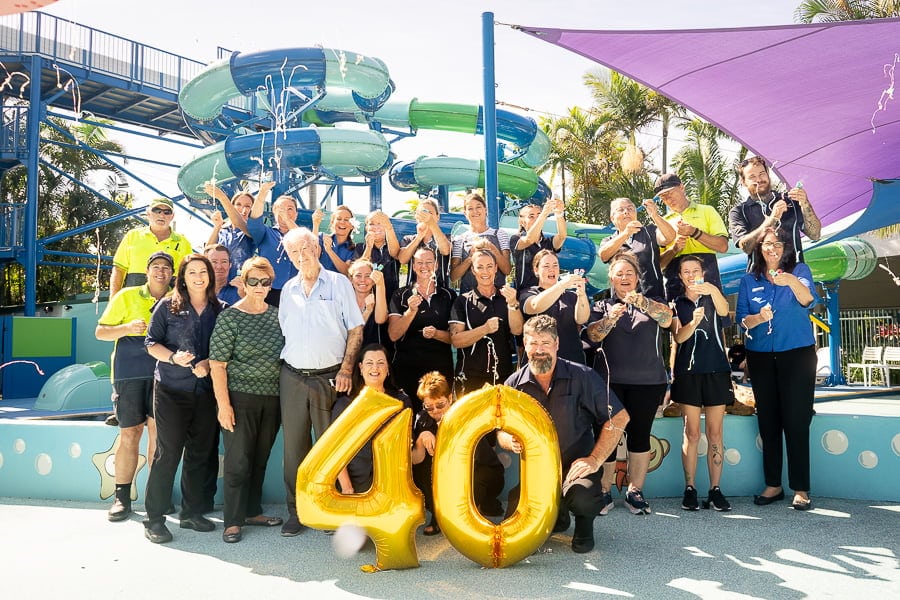
This one is thanks to my mum – she raised us to have impeccable manners, and I implore you to adopt professional courtesies too.
Always make sure you’re on time for the main event but also for client meetings before and after.
If you’re at an event and you have a meal break, don’t eat with the guests. Get friendly with the kitchen staff and find a quiet corner to grab a snack.
Politely decline any offer of alcohol and maintain your professional standards.
Use your best ‘Mrs Cromie manners’ when dealing with clients and any of the guests at the event.
Your professionalism goes a long way to ensuring future business from an existing client.
9. Keep Up Appearances
It’s always best to find out what the dress code for the event will be and tailor your outfit to suit the occasion.
If you’re photographing a wedding or engagement, step up your wardrobe selection to include nicer clothes.
For award ceremonies or black tie events, you might need to get quite formal with your attire. For casual events, wearing your polo shirt with your company logo may be acceptable.
If in doubt, a quick phone call to the event organizer can clarify the situation.
Above all else, dress for comfort as you’ll be at an event for several hours.
10. Don’t Be A Bother
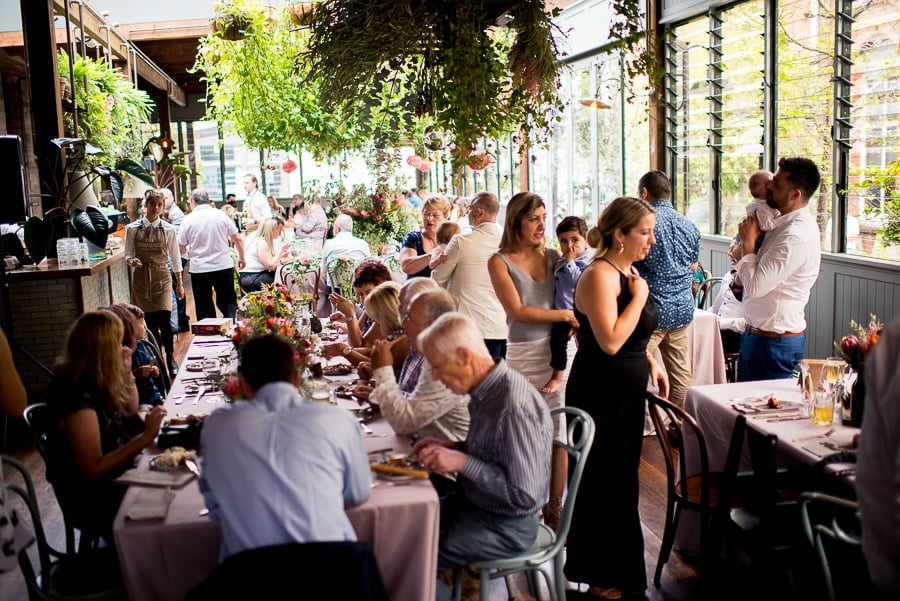
We’ve all been to events where everyone raises their mobile to photograph or video something important. And, we’ve all felt the same level of frustration at not being able to see the action.
As the photographer, it’s also critical to not get in the way of the guests.
If you’re at a wedding and the room is tight with little room for you to work, consider setting up a camera on a tripod with a remote shutter release. You’ll still get the front row view without blocking anyone else.
Be considerate of the mood of the event and remember Mrs Cromie’s manners! Don’t interrupt guests that are in the middle of a moment – if anything, take a candid shot.
If a guest is against having their photo taken, thank them for their time and wander off to the next shot.
Plus, if you’re intending on using a flash then do so as little as possible. There’s nothing worse than being at an event, and the constant flash is distracting guests from enjoying themselves.
11. Play The Waiting Game
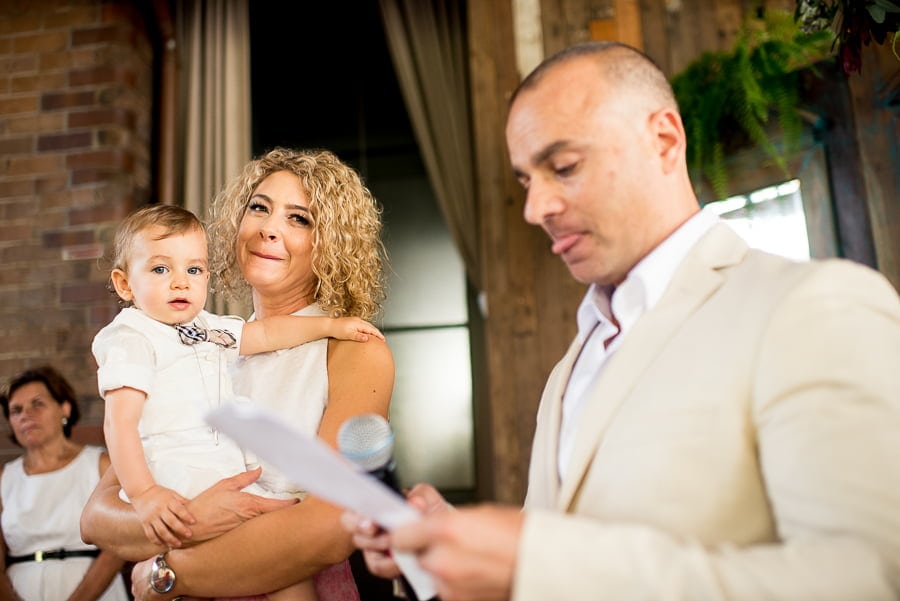
If you do your homework well enough, you’ll know when the key moments are going to take place.
Use this planning to position yourself in a great location, ready to capture a shot. You know when the speeches start, you have a golden opportunity to capture the mood or emotion of those involved.
When a keynote speaker finishes their inspiring talk, that’s another opportunity to capture their final moments on stage.
At other times, you’ll be watching a scene unfold between two guests and decide to raise your camera and wait for the ideal moment to capture their exchange.
Event photography is hard work as you’re always on the lookout for the next great shot. It would be best if you didn’t stop in a location for too long. ‘Work the room’ and ensure you capture an even spread of photos from your checklist.
12. Get In Close
There’s a lot of value to be gained in capturing more intimate images of participants as they experience critical moments.
Just be conscious of how intimidating you’ll be with a big camera and lens when approaching people.
Much like composing portrait headshots, images of a guest’s expression go a long way to telling the story. To elevate the quality of your work, capture close-ups to show emotions such as surprise, joy and sadness.
13. Direct People for Perfect Poses
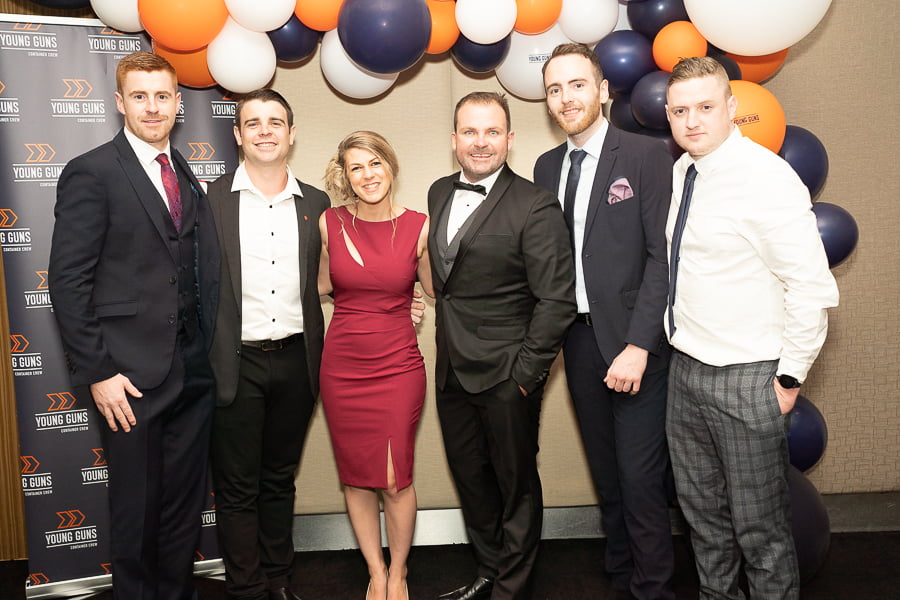
An essential skill for event photography is the art of posing others. People don’t know how to best post themselves for a photo.
Whether you’re posing couples or larger groups, your job is to guide your subjects in an encouraging and supportive way.
Before I prepare anyone for a pose, I ask them to take a deep breath and exhale with a smile – I do the same along with them.
Then I take a shot with them all doing a roaring tiger pose with their hands outstretched into claws. It breaks the ice and gets the giggles out. Plus, I’ll use this as a test shot to check that I have the right settings and lighting.
You’ll notice people feel awkward about where to place their hands. Ask them to hold their hands together with fingers laced. Alternatively, if with multiple people, get them to embrace with arms behind one another’s backs.
I’ll instruct them to move one foot back slightly, so they twist their body. A front-on image is less appealing than those where the subject has turned somewhat.
Finally, I ask everyone to imagine that there’s an invisible thread pulling them up straight towards the ceiling – this makes them stand up straight and extend their necks.
Not everyone is comfortable with having their photo taken. Make an effort to be gracious and encouraging – ask for and use everyone’s name, and smile and talk with a positive yet soothing tone.
14. Show Me The Money
It’s vital to ensure that final images are ready for your client as soon as possible. Preferably before the due or agreed date.
This is both as a professional courtesy and to capitalise on the memory of the event. The client and the guests are still abuzz with energy and gossip about the event and all those cherished moments.
Striking while the iron is hot will elevate your sales of additional prints beyond what you originally agreed to with the client.
15. Streamline Your Editing Workflow
For the last of our photography tips, we’re obliged to acknowledge that much of the photographer’s work happens after the event has ended.
Your editing workflow is going to take a little bit of time for a couple of critical reasons.
Chances are, you took hundreds of photos at the event. Your first job is to sort them into categories based on the moments of the event and the image quality.
Editing software like Adobe Lightroom allow you to label photos (or groups of photos) with a particular colour. Then, you can use the star ranking to assign a quality rank.
That way, you’ll quickly eliminate the unwanted images from your collection well before you touch an editing tool.
With a reduced collection of the best images, you can start the editing workflow. A good idea is to play around with the colour and exposure and then apply this to the whole collection.
Event Photography FAQ
What is event photography?
Event photography is a specialist genre that involves capturing images at an event. The event photographer could specialise in a single style such as weddings or a range including weddings, parties and corporate functions.
What is the best lens for event photography?
The best lens for event photography depends on your shooting style. Zooms offer greater flexibility but slower apertures. Primes are limiting in terms of focal length but generally offer a much faster aperture and better image quality.
What should a photographer wear for an event?
What you wear will depend on the formality of the event, but you should aim for smart casual at a minimum. Ask the event organizer what the dress code will be and decide based on that. Do wear comfortable shoes.
Event Photography Tips | Final Words
Event photography is one of those genres that you’ll easily base a professional career on. For example, shooting wedding photography could see your weekends booked out in no time.
If you land a job doing photography for events in the corporate sector, try to build a good relationship with the event planner – it may land you more gigs in the future.
Just make sure that before you step foot in a function centre you do your homework and build your skillset to ensure you master the craft and exceed your client’s expectations.


Check out these 8 essential tools to help you succeed as a professional photographer.
Includes limited-time discounts.


