


Wondershare Filmora Video Editor Review: Better Than Adobe?
Is Wondershare Filmora the right video editing software for you? Is it able to keep up with Premiere Pro or Final Cut Pro? Find out in our honest review.
Finding the right video editor for your needs can seem a bit like Goldilocks and the three bears – it can be hard to find something that’s “just right.”
Adobe Premiere is the industry standard, but it’s wildly complicated and pricy to boot – that’s why it’s fortunate there are a few great Premiere Pro alternatives, including this one.

Affordable and easy to use video editor that's perfect for beginners. Also supports plugins to extend features for power-users.
The free video editors that come with your operating system (e.g. iMovie or ClipChamp) are fairly simple to learn but lack the more advanced video editing features.
Wondershare Filmora is designed to split the difference, offering advanced video editing features, competent audio tools, and a robust stock library, all in an easy-to-learn package.
In Goldilocks language, it’s not too hot (complicated), not too cold (free but not enough umph), but aiming to be “just right.”
Does that mean Filmora is the best video editing software app for you?
Let’s take a look at my Filmora review.
Filmora Video Editing Software Review
- Exceptionally easy to use
- Pleasing interface
- Drag-and-drop functionality
- Plenty of tutorial videos
- Advanced video effects
- Motion tracking
- Boris FX and NewBlue FX Plug-ins
- Screen and webcam recording
- Integrated free stock sites
- Reasonably priced
- Not touch-friendly
- Laggy when editing multiple video tracks
- Only one timeline can be open at a time
- No adjustment layers
- Written documentation sometimes unclear
Wondershare Filmora is a video editor aimed at beginners and enthusiasts who want plenty of advanced features and a simple and fast workflow.
Its simple user interface belies the extensive suite of video editing tools it packs under the hood. Filmora is remarkably accessible, both in terms of usability and in terms of cost. It’s easy to learn and use, yet powerful enough to turn out some professional-looking work.
Beginners will definitely need to watch a Filmora tutorial or two to get started, but it doesn’t take much to get well on your way to creating excellent videos.
There’s plenty of written documentation online about how to use Filmora too.
Filmora Key Features
-
Exceptionally Easy to Use

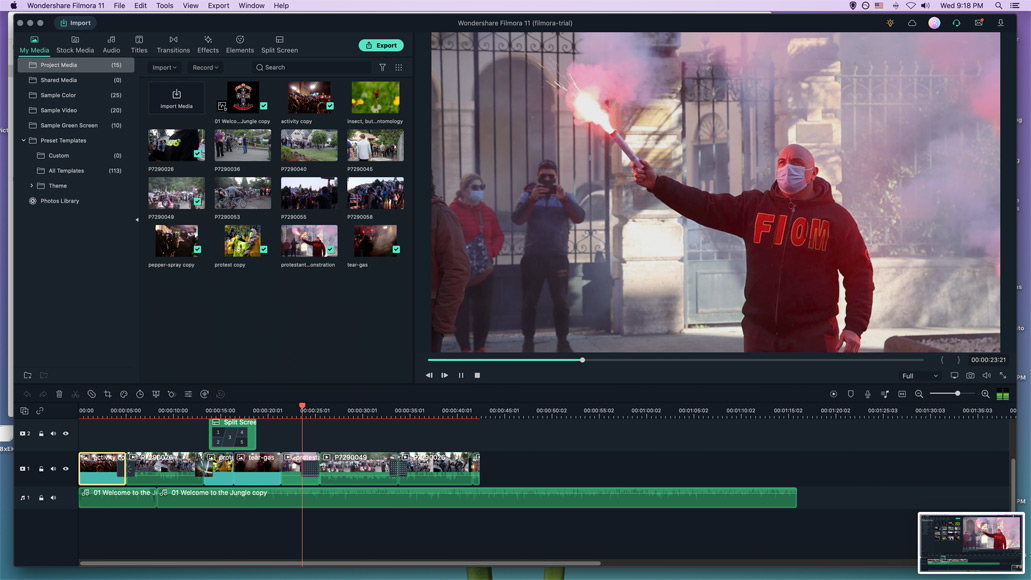
Filmora’s interface is designed for ease of use.
One of the first things to jump out at you is Filmora’s modern and clutter-free interface. It’s intuitive (at least for those who’ve already learned a few basics) and quite well-designed.
There are just three panels: the video timeline, the preview window/box, and the elements panel. Once you know what you’re looking for, everything is clear and straightforward.
You can adjust the size of the panels, and if you want to see what your video looks like on its own, go into full-screen mode with the video preview.
It’s been mentioned in other Filmora reviews that its interface isn’t optimized for touchscreens. I only edit from a desktop or laptop, so I didn’t get a chance to try this out.
I suspect, however, that if you’re wanting to edit on a mobile device, you’ll be better served by Filmora’s mobile version of the app, FilmoraGo.
-
Motion Tracking
The motion tracking in Filmora 11 is pretty basic, but gets the job done.
In this latest release Filmora has added in motion tracking,
By following your chosen subject, motion tracking allows you to keep the focus of the video on what’s most important in the scene. It’s especially useful in sports videos and video game play.
Filmora’s motion tracking options are pretty basic, but they get the job done.
It would be nice if there were a few more included options beyond mosaics (like text or graphics), but this is the first version with this feature, so maybe the updates will improve it.
-
Speed Ramping

Speed ramping (also known as time remapping) is a gradual increase or decrease in clip speed.
With it, you can dip smoothly in and out of slow-mo or high-speed playback, and/or anything in between.
When used well, it’s an amazing way to add impact to your videos.
Wondershare Filmora comes with six speed ramping templates, making speed changes relatively painless for beginners and enthusiasts alike.
You can also customize a speed ramping template for a more personalized approach.
-
Auto Synchronization
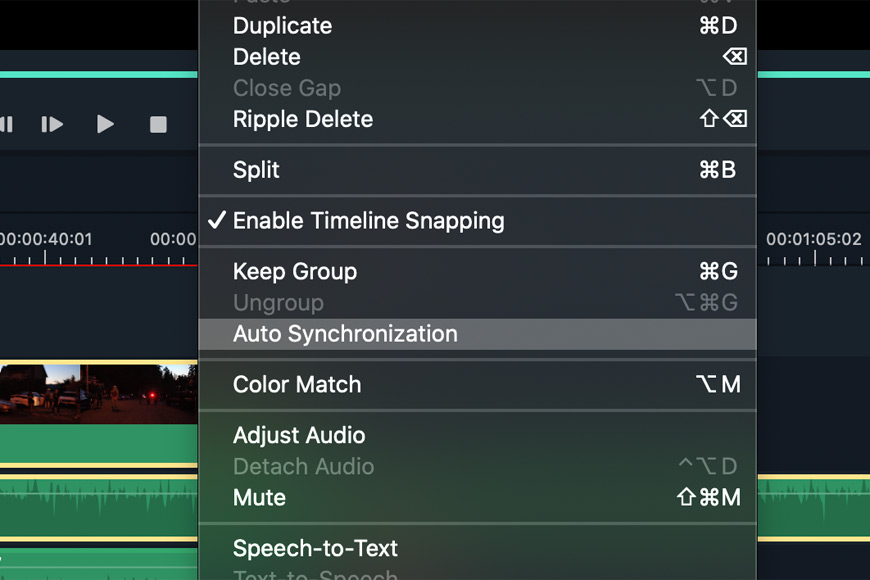
Auto sync is extremely useful when your audio source is different than your video source.
Of the many audio editing features included in Filmora 11, the new auto-synchronization tool is one of my favorites.
Ever struggle with getting your audio to sync up with your video footage? I sure have, especially when recording lectures where the audio was independent of the video.
If you’ve been in the same boat, you’ll find the auto sync on Filmora 11 a total blessing.
Simply upload the audio and video files in question, select both of them in the Filmora media window, right-click, and hit Auto-Synchronization.
That’s it. Your clips will now be synched.
-
Masking
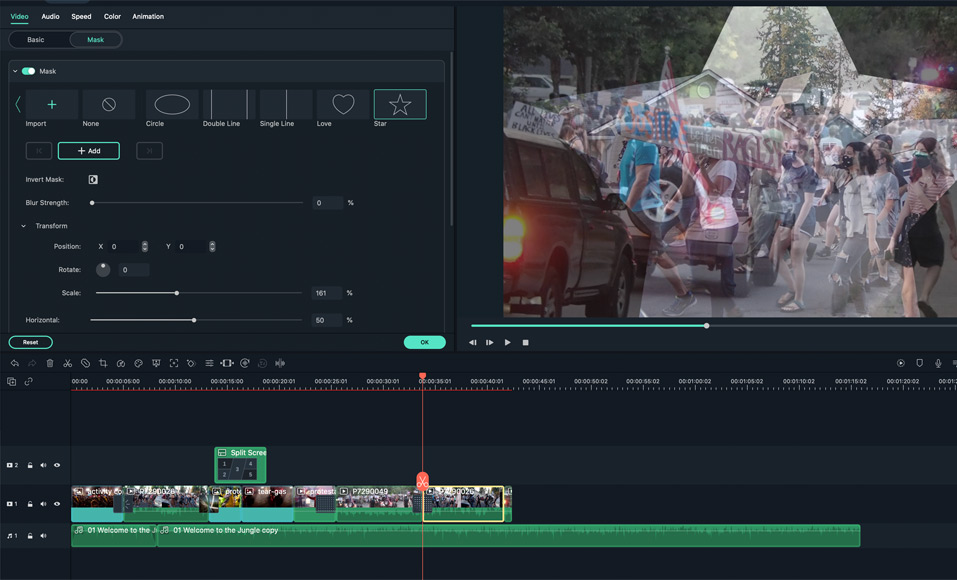
Filmora 11 now comes with a number of masking presets, making it incredibly easy to hide and reveal text, create optical illusions, create picture-in-picture effects, and add various blending effects to your video compositing.
Choosing a mask is incredibly simple, as is refining it. You can change the size and placement of your chosen shape, as well as add in some really cool transitions into and out of the mask.
There are also a number of tutorials on the Filmora website showing you how to create optical illusions through masking. It’s definitely a fun way to up your video skills if you haven’t tried it before.
-
Green Screen
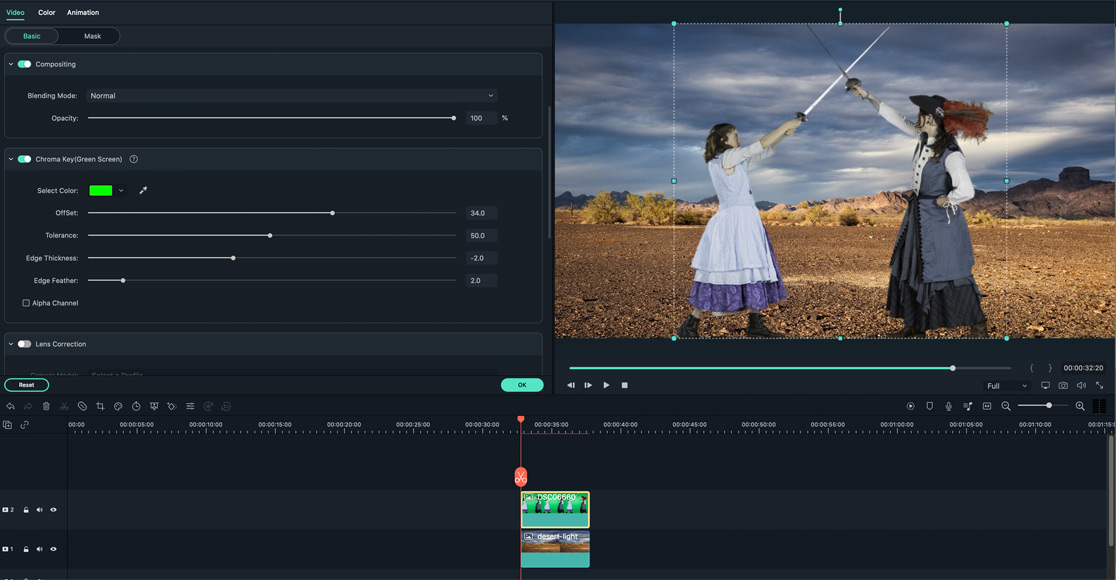
Just to try it out, I placed a less-than-optimal green screen image taken from a photoshoot and placed it over a landscape image of mine. It took some minor tweaking with Filmora’s controls, but I was surprised at how well the end result turned out. A little more time would probably have yielded much better results.
Those who work with green screens will be happy to know that Filmora’s green screen removal feature works fantastically.
Having done a few photoshoots with a green screen I decided to try it out with a less-than-stellar image – there was uneven lighting on the background.
A little tampering in Filmora yielded some more than passable work with a really tricky image. (The only real issues occur in the feathers of the hat.)
-
Instant Mode

Never tried video editing before and want to get started right away? Filmora 11’s new Instant Mode might be for you.
Simply choose Instant Mode from the opening Window, and Filmora will offer you a number of customizable templates from its library.
There are all different types of templates – from business applications to family slideshows. Once you find a template that suits your needs, change the text, and you’re good to go.
-
Auto Beat Synchronization
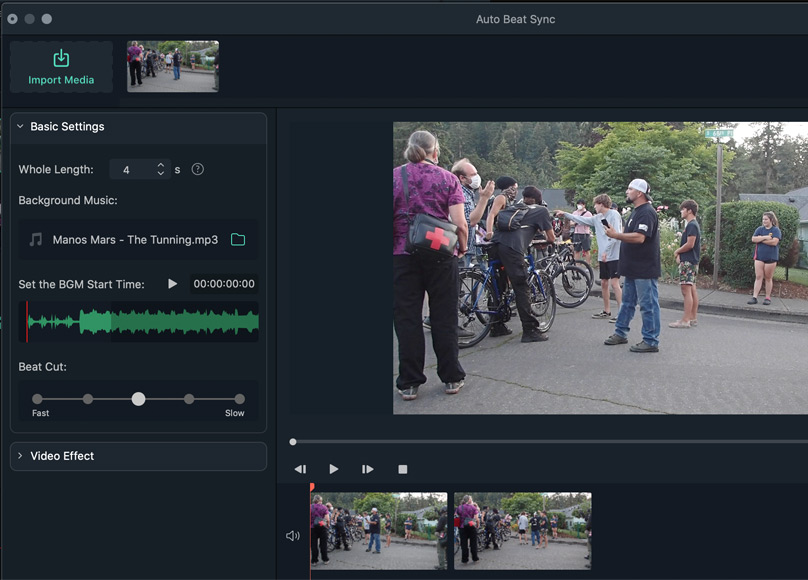
Auto Beat Synchronization is a feature new to Filmora 11 that allows you to combine video and audio in such a way that the motion in the video gets accented on the beats of whatever background music you choose.
I played with it a few times, but I can’t say that I got it working in a way that appealed to me. To be fair, this isn’t something I’ve worked a lot with, and aficionados of this type of effect might find they have a deft hand at it.
(Just make sure to remove any audio from the video clips before you get started with the beat sync.)
-
Visual Effects and Transitions
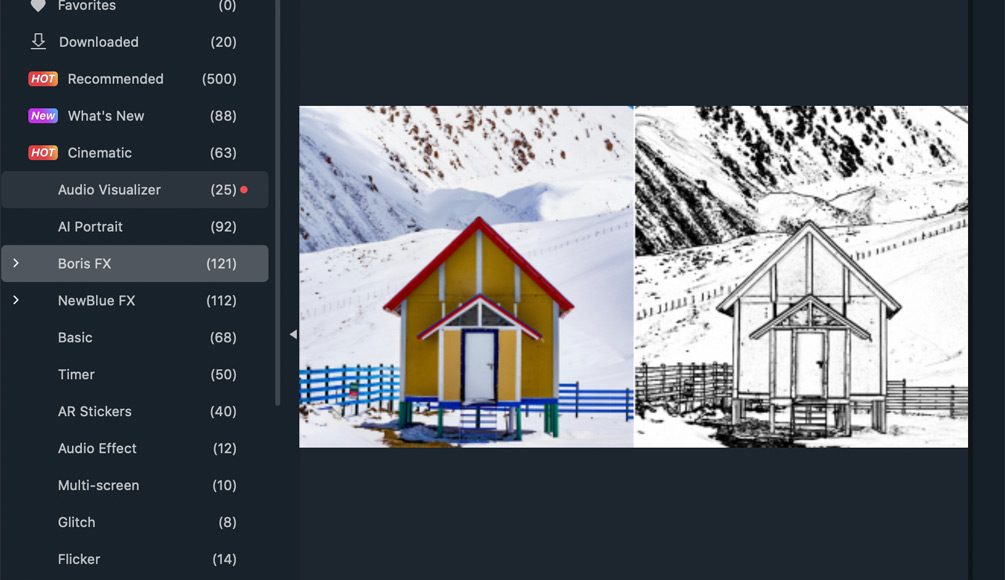
The addition of Boris FX and FX adds a ton of professional effects options in Filmora 11.
Once you’ve arranged your content, this is where a lot of the fun starts.
Filmora 11 comes with a whole range of free and commercial effects, from elements and icons that you can add on top of your videos to simple Shake and Distortion effects to Night Life and Instagram filter emulators. There are also plenty of LUTs included, many themed after popular movies.
Boris FX and NewBlue FX
Love the special effects you see in some of the top superhero movies? Many of those come from Boris FX and NewBlue FX and can now be accessed directly through Filmora 11. Of course, these all come at an added charge (sigh), so I didn’t try them out.
(I do have Optics from Boris FX and love, love, love the program – see the Boris FX Optics review to learn more about why it’s so great.)
Most of these effects have an amazing amount of customizability, coaxing you into a rabbit hole of infinite visual effect options, so beware.
Transitions
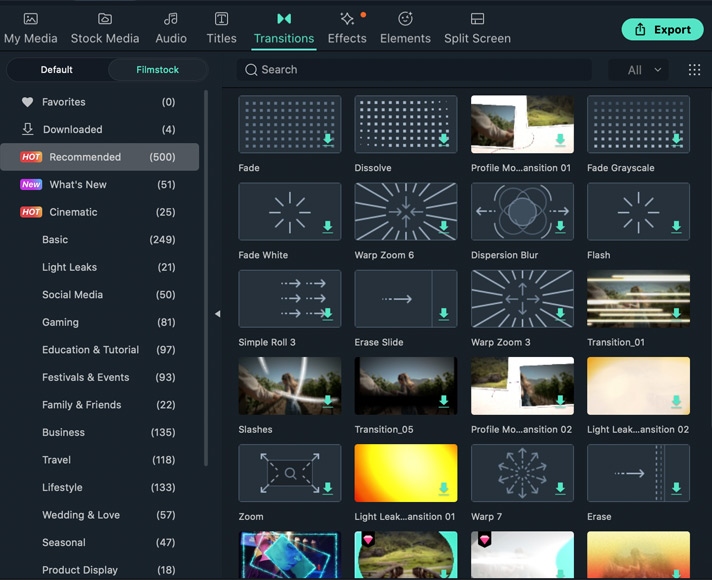
Wondershare Filmora comes with plenty of transition options, most of which are available for an additional fee.
More importantly for my workflow, Filmora provides over 860 transitions in 18 different categories (though again, that number goes way down when you select only free options in the tab).
All of the transitions are easily customizable in terms of adjusting the length, speed, or style (overlap, prefix or postfix). They can also include trimmed frames.
Text Templates
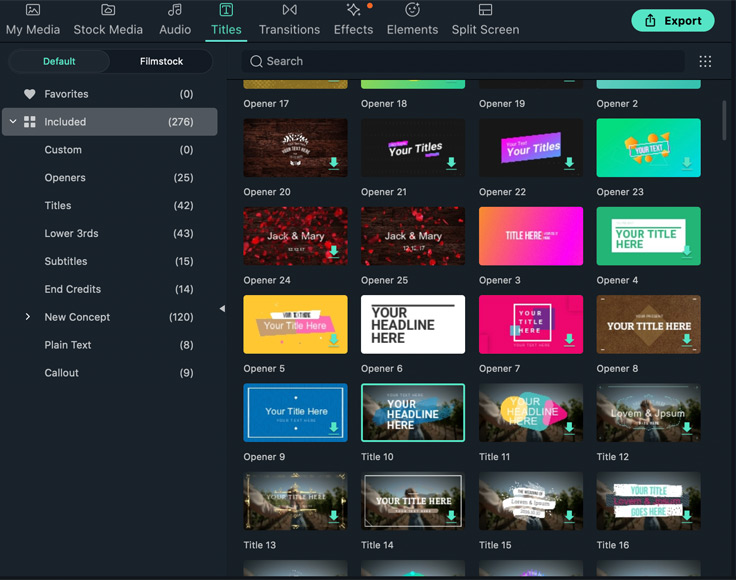
Filmora includes a fair amount of text templates, as well as a number of purchasable options – over 200 in all.
They vary from plain to quite intricate. Some are animated in a way that looks quite professional.
Like most of the elements in Filmora, using the text templates is super easy. Even the most complex of templates can be directly edited in the video preview window.
Changing the color, font, and animation is also a mostly one-click affair under the Advanced Text Edit option.
You can then save your alterations as a custom template.
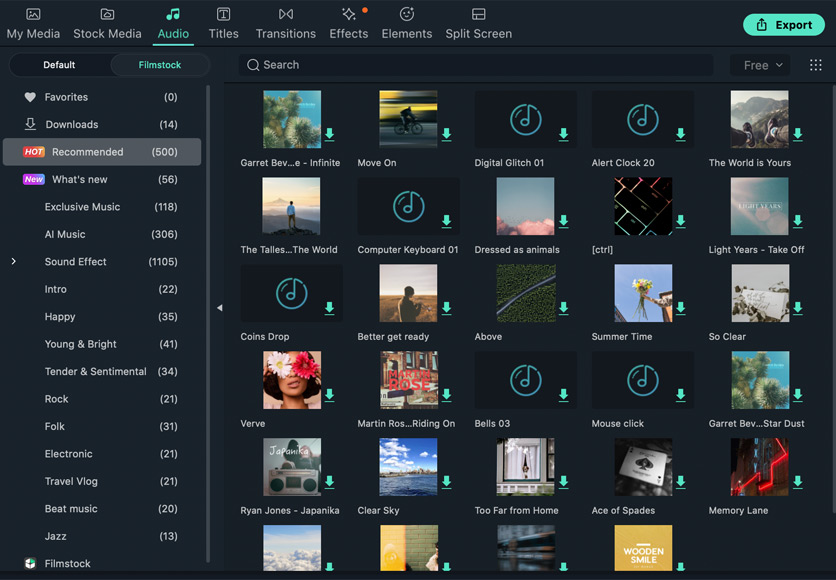
These are the free tracks under the “recommended” tab in Filmora 11.
If you need royalty-free music tracks, Filmora 11 has quite a few to choose from. (Exactly how many is a matter of confusion – the official site says both 76 and 25. Other review sites vary even more widely.)
If you like, you can also upload your own soundtrack. Just be careful and check for copyrights. You can also download audio files from the integrated stock sites.
Speaking of the stock media library…
-
Stock Media Library
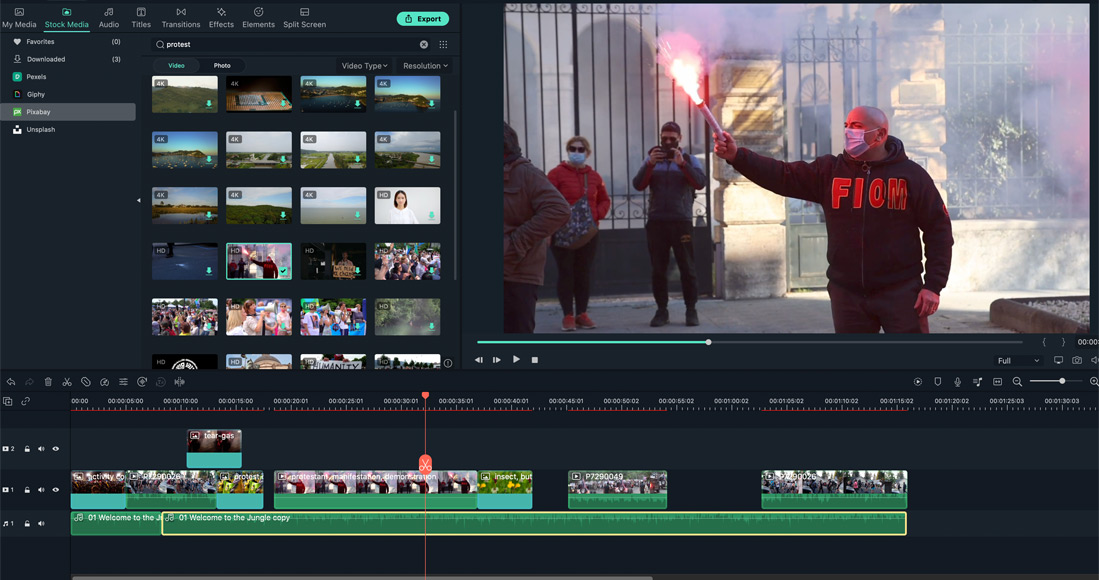
This video clip I downloaded from Pixabay worked great in the video I was making about protests.
One feature I find really helpful is that Filmora 11 comes pre-integrated with Pexels, Pixabay, GIPHY and Unsplash.
It makes it incredibly easy to search for and download royalty-free clips and still photos and put them directly into your media list.
I was even able to find a couple of free protest clips, which was unexpected.
There’s also a service called Wondershare Filmstock, which I guess is similar to Adobe Stock, though not quite as large.
You’re automatically signed up once you make an account with Wondershare.
There you’ll find thousands more elements, effects, videos, and audio tracks, all filtered by cost: free, standard library, and premium library.
-
Wondershare Drive

1 GB of cloud space is included when you buy Filmora 11
Another new feature on Filmora 11 is the ability to easily store your projects in the cloud on Wondershare Drive from within the Filmora video editor.
Click on the cloud icon, and your work will automatically be saved to your Wondershare Drive account, which in turn will not only save space on your hard drive but also allow you to privately share your creations with others and/or access your work from any of your other online devices.
When you buy the Filmora video editor, you’ll get 1GB of storage included – anything beyond that will need to be paid for (though there’s a discount for Filmora users).
Other Excellent Filmora Features
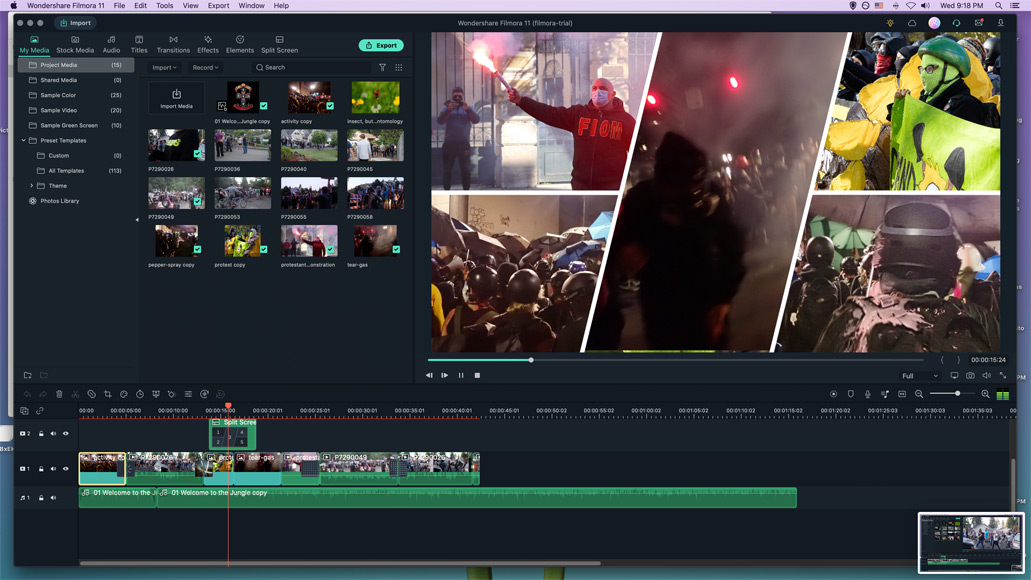
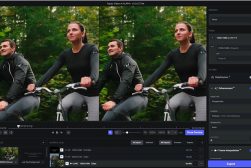
Filmora has a fantastic split-screen tool that makes it ridiculously easy to run multiple tracks at once in the same screen.
Filmora comes with a number of other tools and features, some of the more notable being
- Webcam and screen recording
- An excellent split-screen tool
- Custom animation tools
- Instagram presets
- Auto reframe
- Instant Cutting
- Audio ducking
- Voiceovers
- An AI stylizer
- Plenty of online resources
Check out all Fimora’s tools and features here >>
Overall Performance

Filmora’s masking features make creating a picture-in-picture video incredibly simple.
Wondershare Filmora 11 will run on any macOS running Monterey or later. Windows users need Windows 7 or later.
I tested Filmora out on a 2017 27″ iMac running Catalina. While the installation did crash my computer, I haven’t really had a lot of other issues with it. The rendering speed was usually great, and I didn’t have any laggy behavior.
To be fair, I haven’t tried it with videos longer than 10 minutes nor with more than 3-4 tracks happening at once. I’ve heard that it can be laggy once there’s a significant amount of resources being used.
Wondershare Filmora vs. Adobe Premiere
For those wondering whether to go with Filmora or with Adobe Premiere, it all depends on 1) what kind of projects you’re looking to do, 2) what level of learning curve you’re willing to endure, and 3) whether you want a perpetual license or not.
Filmora is a video editor designed for those who want a powerful video editor that is simple and easy to work with. It’s great for social media content creators, educators, and anyone who doesn’t need extensive creative control.
There are plenty of one-click editing options, presets that do a lot of the heavy lifting for you, and drag-and-drop functionality, all in a sleek, uncluttered interface.
Adobe Premiere Pro – like most Adobe Pro software – isn’t simple at all. It comes laden with far more controls, options, and panels, panels, panels. The overall UI is incredibly powerful – you can do just about anything with it – but you’ll have a steep learning curve to get there.
In some ways, Filmora is a bit like having the car drive for you – you just tell it where to go and make some adaptations to the route, speed, etc. You won’t really need to know too much about how the car works – just tell it what to do and customize things, and you’re good to go.
With Adobe Premiere, you’ll need to know how everything works before being able to travel from point A to B. The sheer volume of options makes it daunting for beginners and a bit of a slog to get your first videos out there. That being said, you’ll be able to do just about everything you could ever imagine and have plenty of third-party support along the way.
So which to choose?
Buy Filmora if you’re looking to create weekly tutorials, videos for your Youtube channel, product review videos, or any other type of social media video project.
Buy Adobe Premiere if you’re looking to become a filmmaker, you’re a content creator who enjoys having a fine level of control, or you’re planning to work on video editing larger projects or with teams.
- Adobe Premiere review
- Adobe Premiere Rush review
- Adobe Premiere Elements review
- Adobe Premiere vs. Final Cut Pro
How much does Filmora Cost?
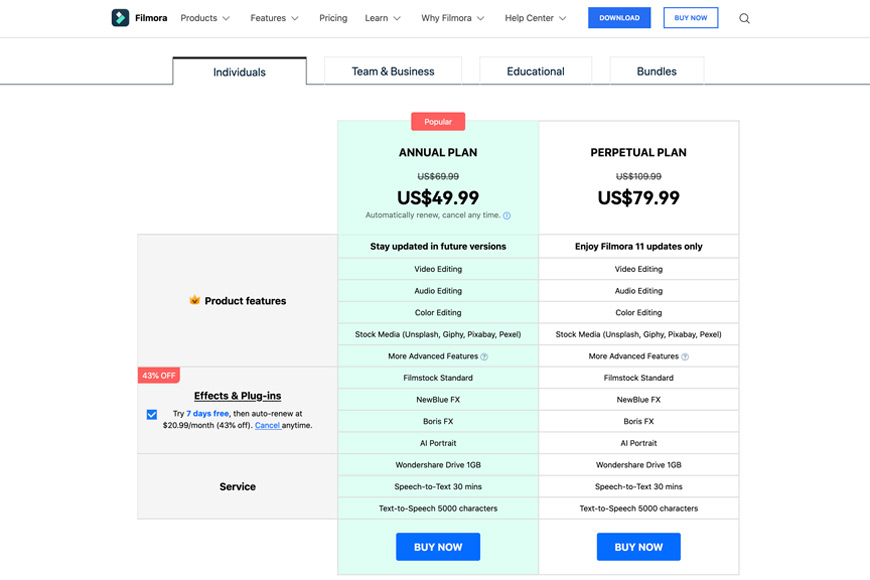
Currently, you can get Filmora 11 as a subscription for about $50/year or make a one-time payment for about $80.
There’s also a 7-day free trial available, though your final products will all have a watermark on them.
Considering all the features included and the price of other video editors like Apple Final Cut Pro and Adobe Premiere Pro, I think Filmora 11 is more than reasonably priced if you stick to what’s included and limit your in-app purchases.
Filmora Review | Conclusion
In the end, there’s more than enough power and control in Filmora for the average video creator. It’s simple and fun to use, and you only need a modicum of editing knowledge (you do need some!!).
I would have loved to have seen more effects and transitions simply included in the purchase/subscription, but in-app purchases are the way of things now, and Filmora is certainly no exception.
Still, there’s more than enough to get started with. One thing worth noting, however, is that you’ll get more “free” color filters, objects, and movie templates if you pay by subscription rather than getting a perpetual license.
One thing I didn’t like, however, is that you can’t edit multiple videos at once. That puts a bit of a damper on my workflow, especially if I’m using the same video effects in each project.
Otherwise, Wondershare Filmora 11 is great video editing software – especially for educational videos and social media content. Add in the fact that it’s quite affordable, and momma bear would be quite proud.
Affordable and easy to use video editor that's perfect for beginners. Also supports plugins to extend features for power-users.
You'll Also Like These:
 Final Cut Pro vs Adobe Premiere in 2023: Which Video Editor?
 Adobe Lightroom Review – Still the Best Image Editor in 2023?
 Wondershare Recoverit Review: Repair Corrupted Photos & Videos
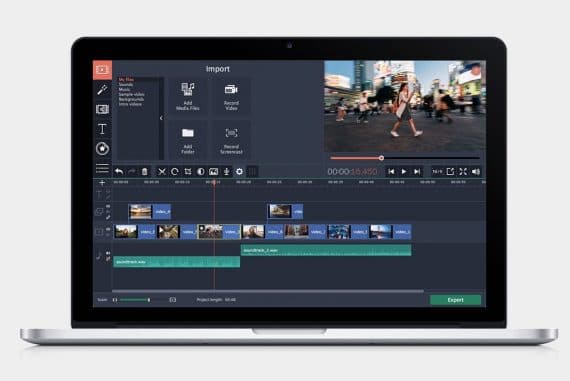 Movavi Video Editor & Wedding Set
 Topaz Video AI Review: Enhance & Upscale Your Video Resolution
 Lightroom vs Photoshop – Adobe Image Editor Comparison

Marc and Brenda Bergreen are professional wedding photographers and adventurous storytellers based in the Rocky Mountains.

WELCOME TO SHOTKIT
Enter your email to be sent
today's Welcome Gift:
19 Photography Tools
🔥 Popular NOW:


Shotkit may earn a commission on affiliate links. Learn more.